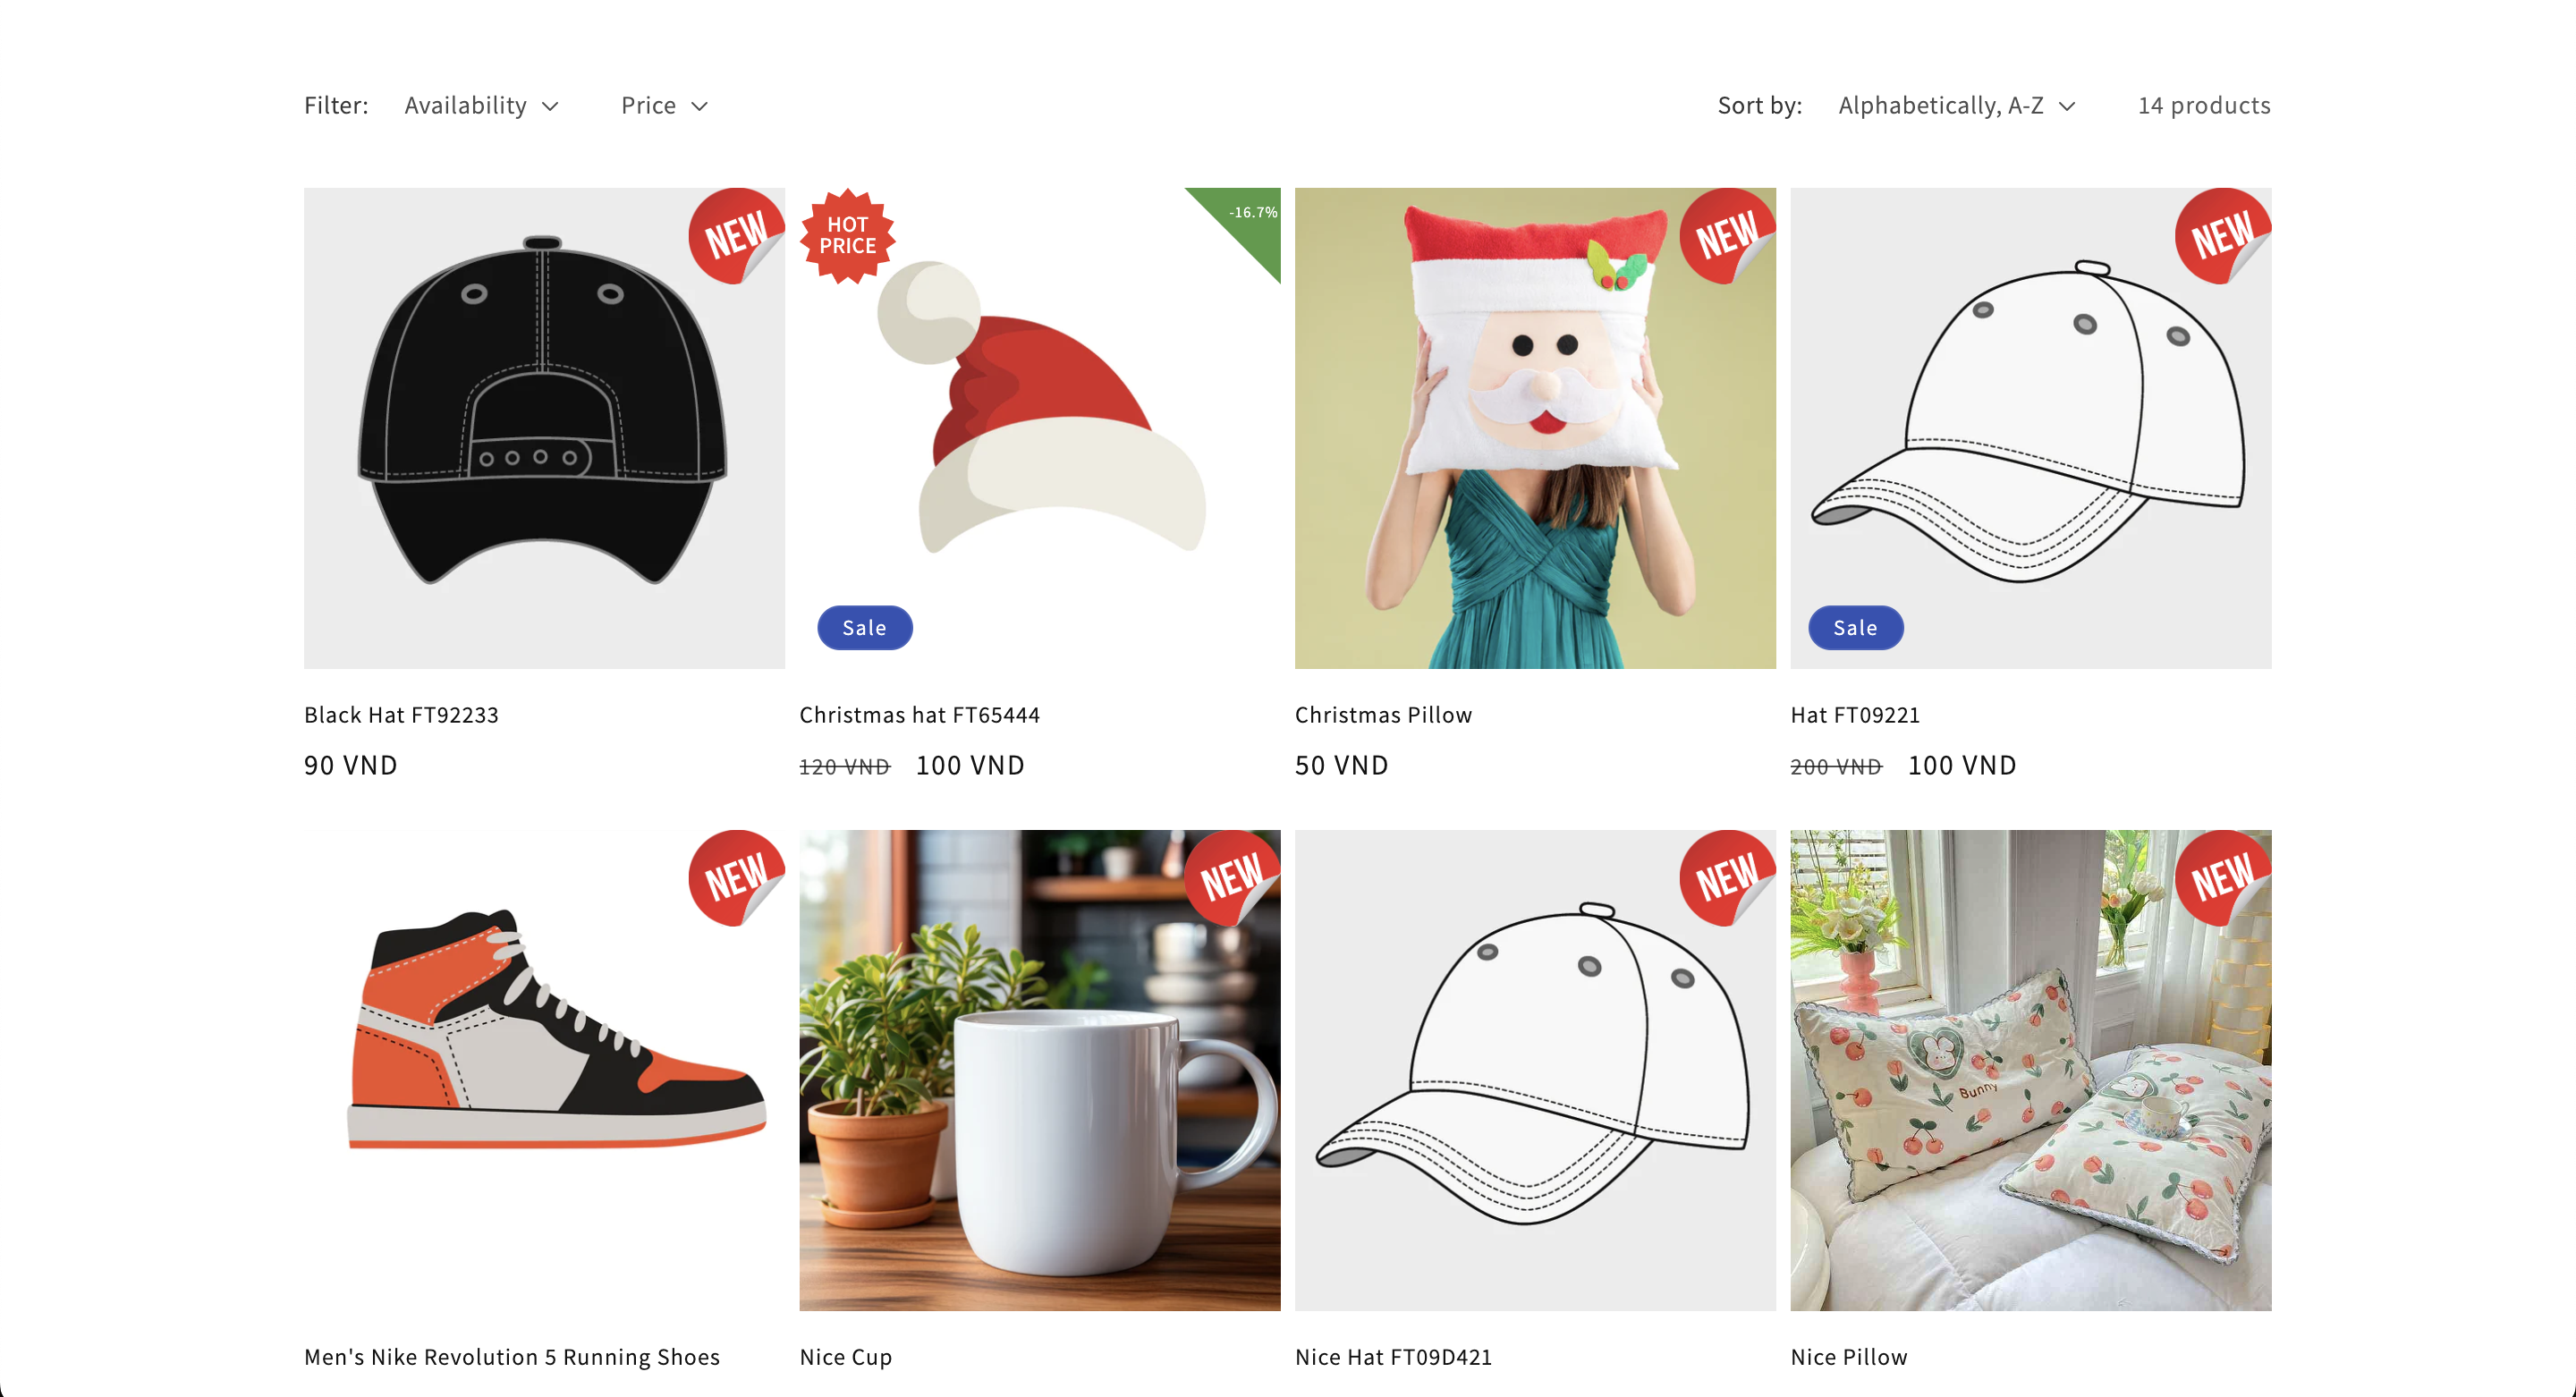
Product Labels app allow Merchants can setup labels for products in thier store, it helps Merchants can create and customize labels in thier store, They can create label for products like Hot, Sale, Descount, New...
Merchants can create and customzie lable for:
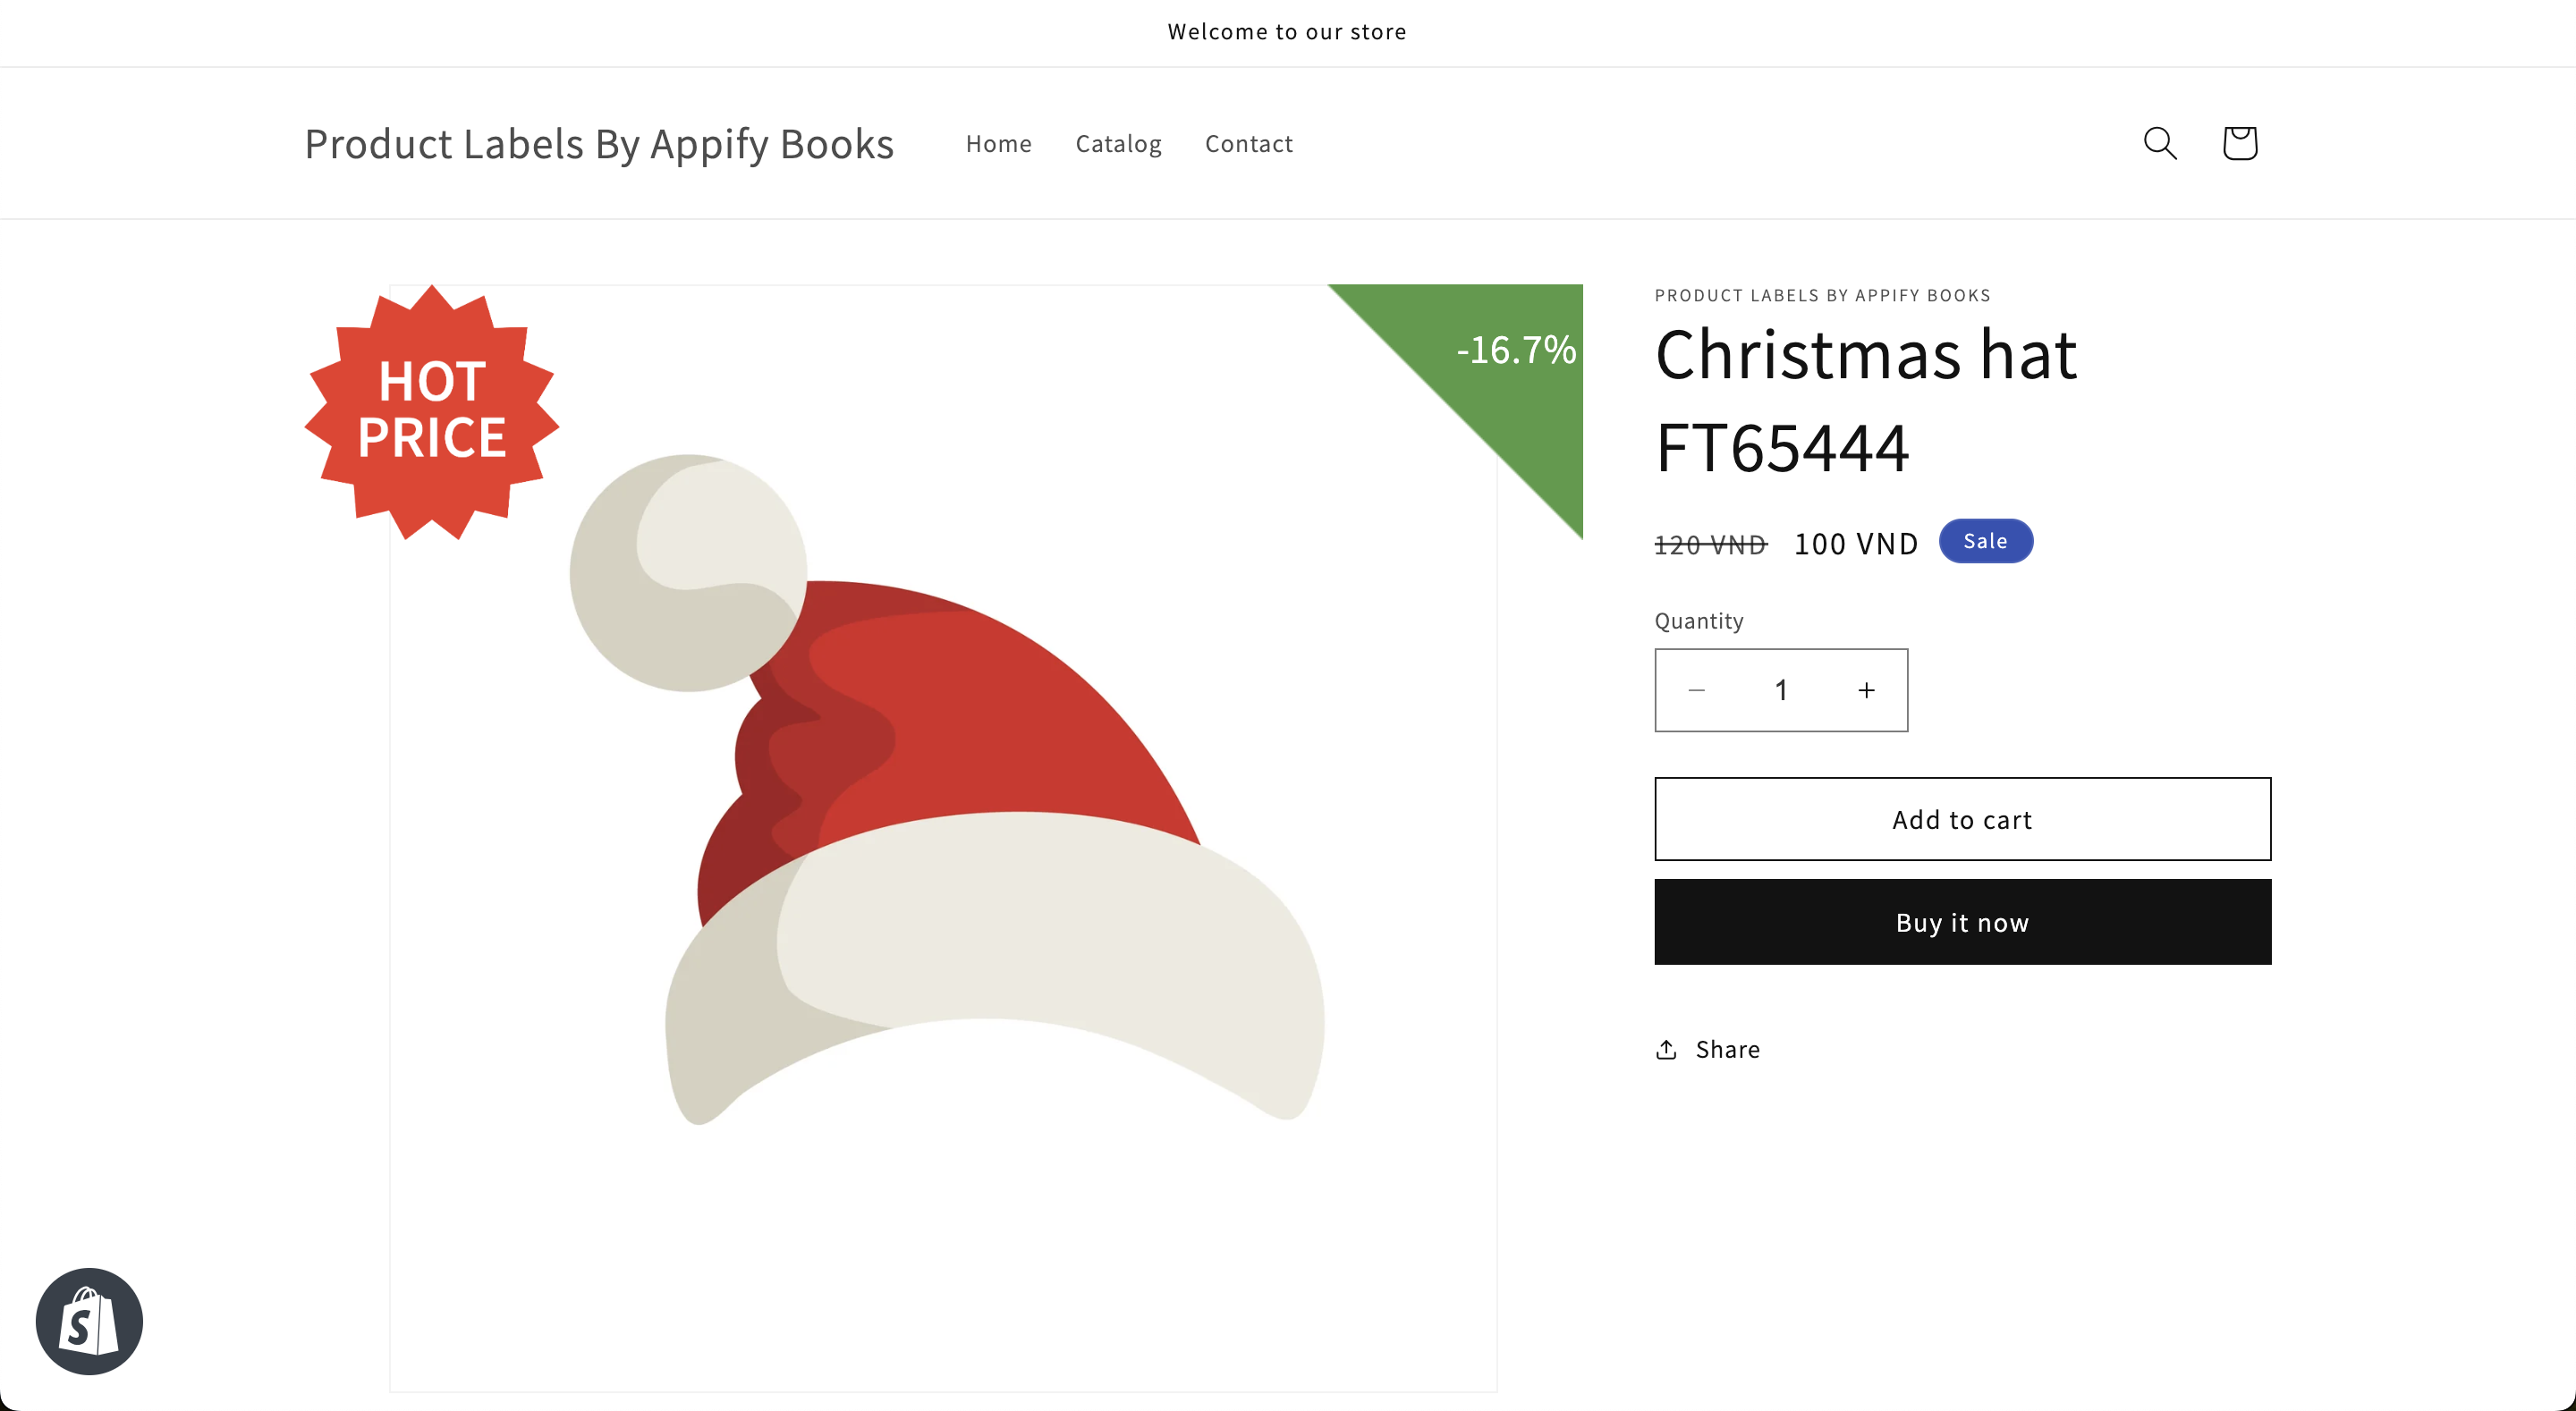
- Create Nornally Label like Hot, New, Sale, Discount...
- Create Label For Sale (the label only display in sale product in a same page)
- Create Label to Show Discount Number for proudct automatically. (For example: Product A: Discount 5%, Product: Discount 15%)
- Create Label to show Sold Out Product (Label will apply for sold out prouducts only)
You can upload Label from PC or Select Sample Media
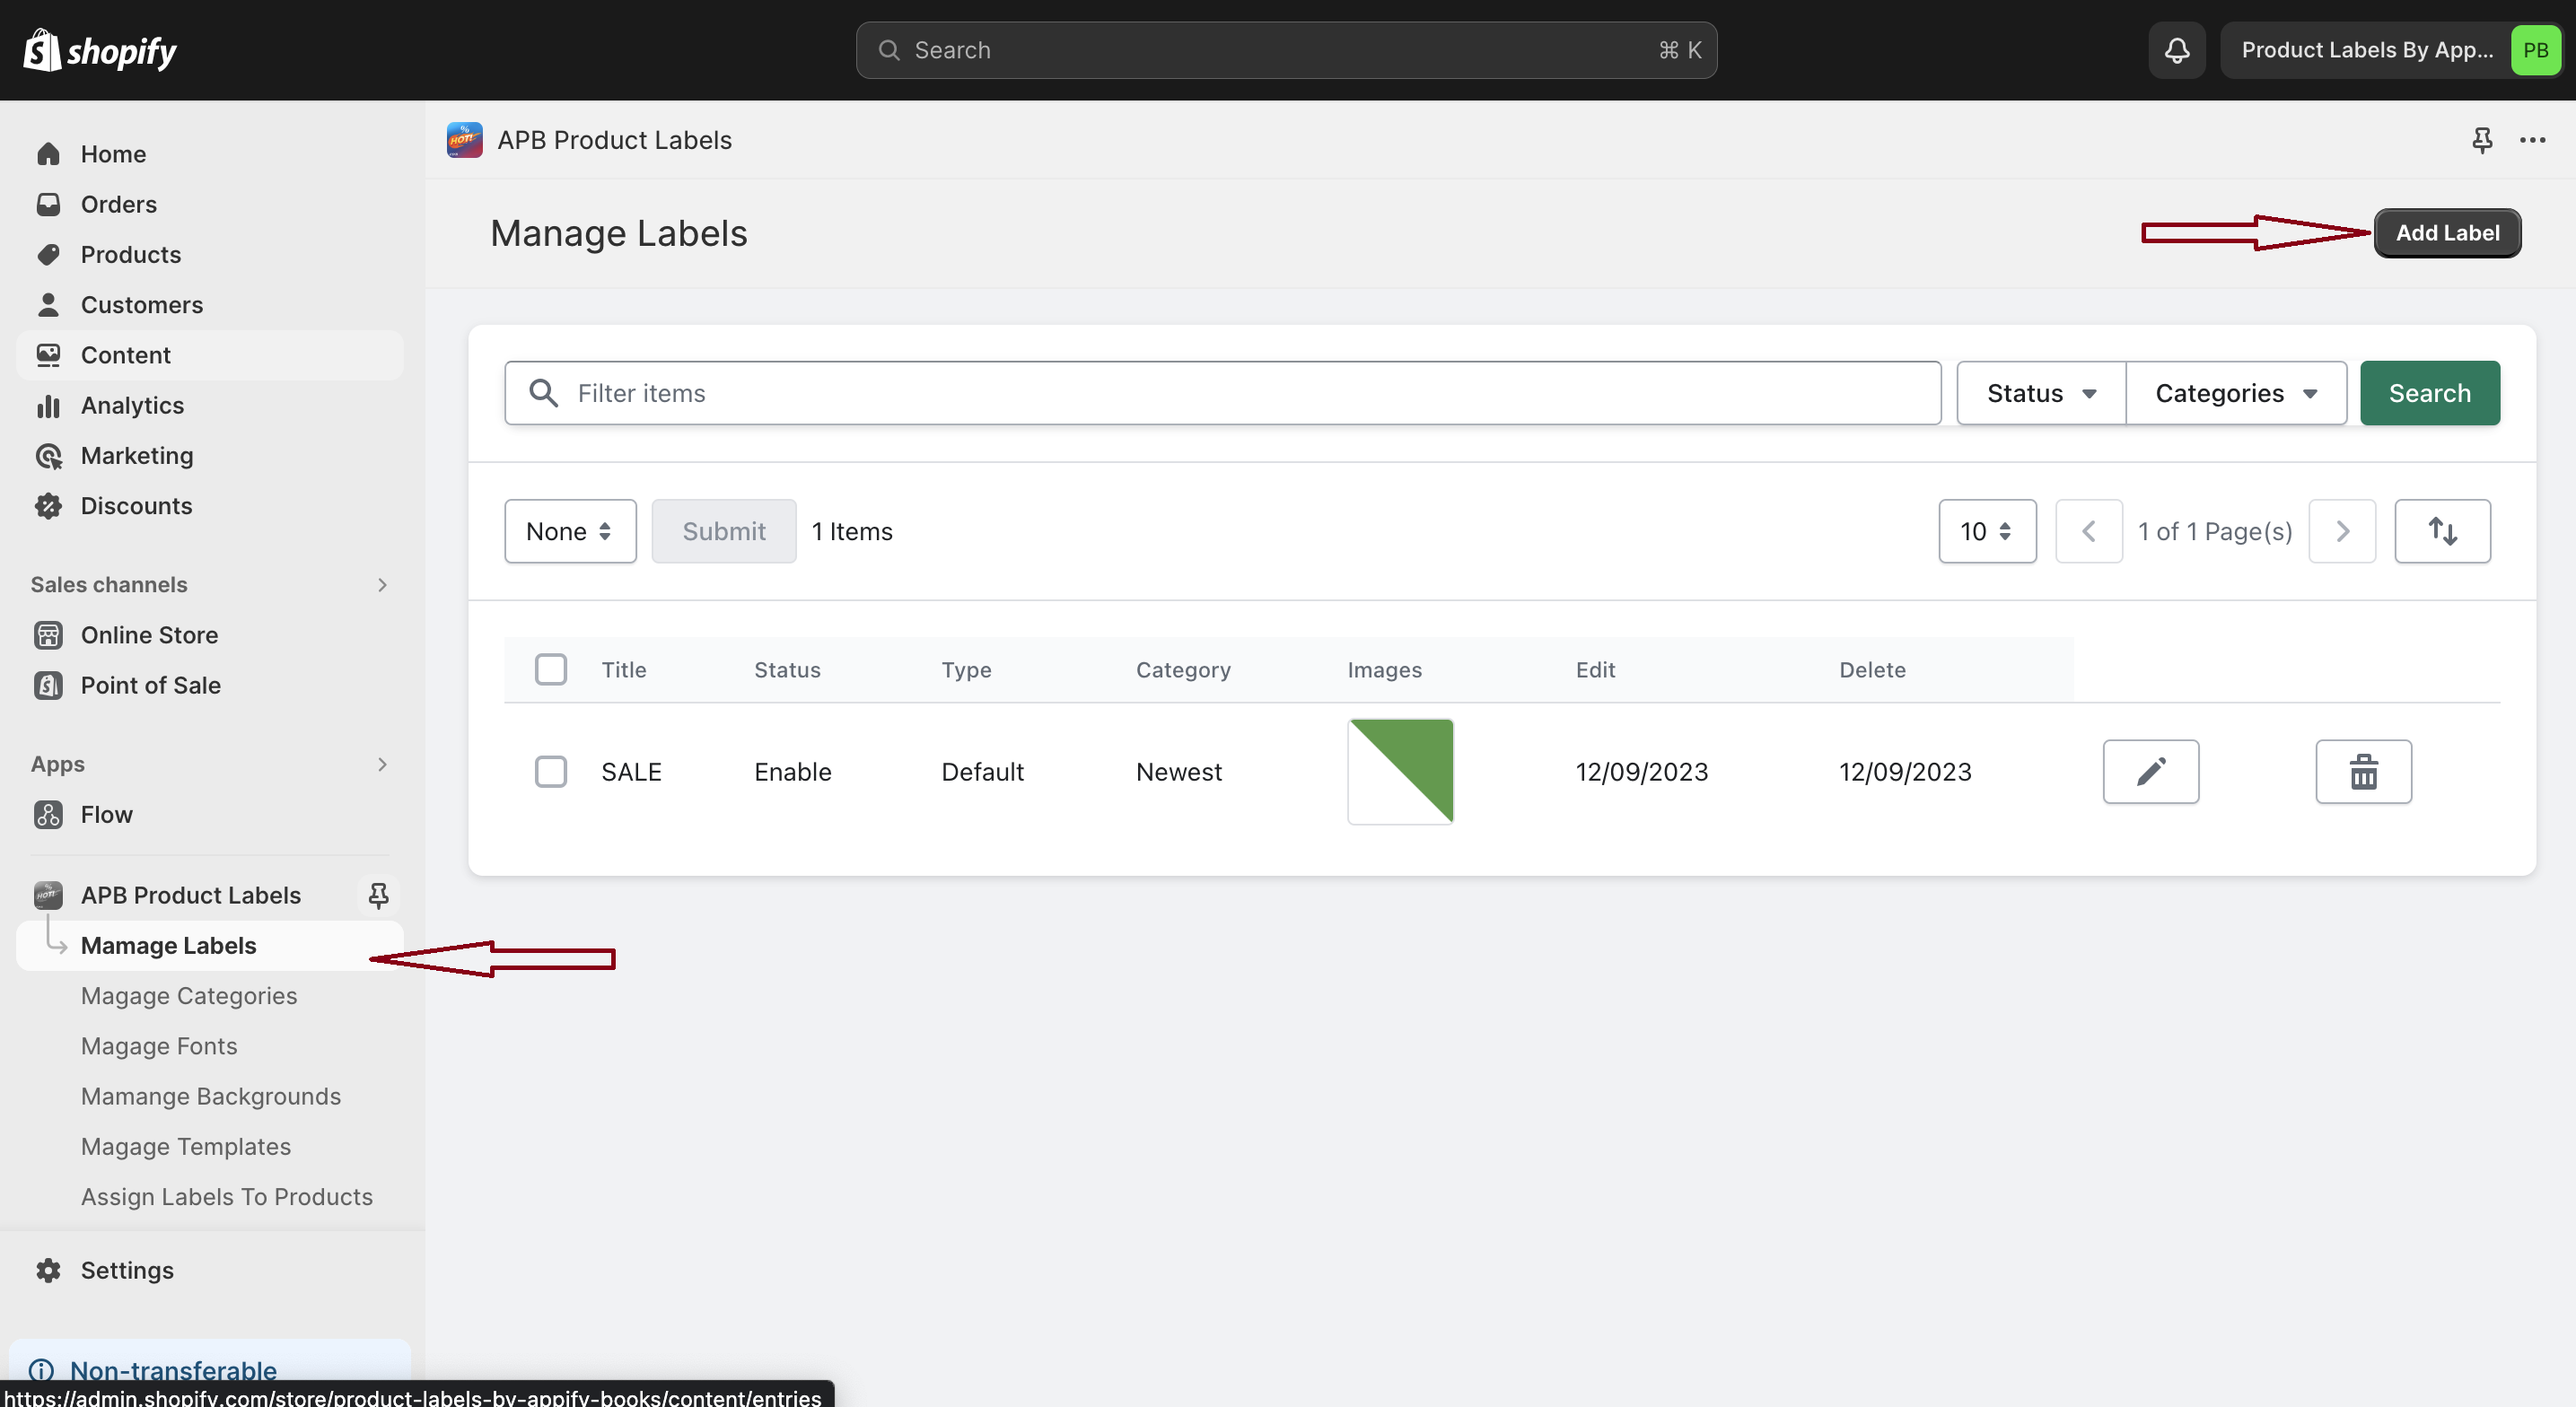
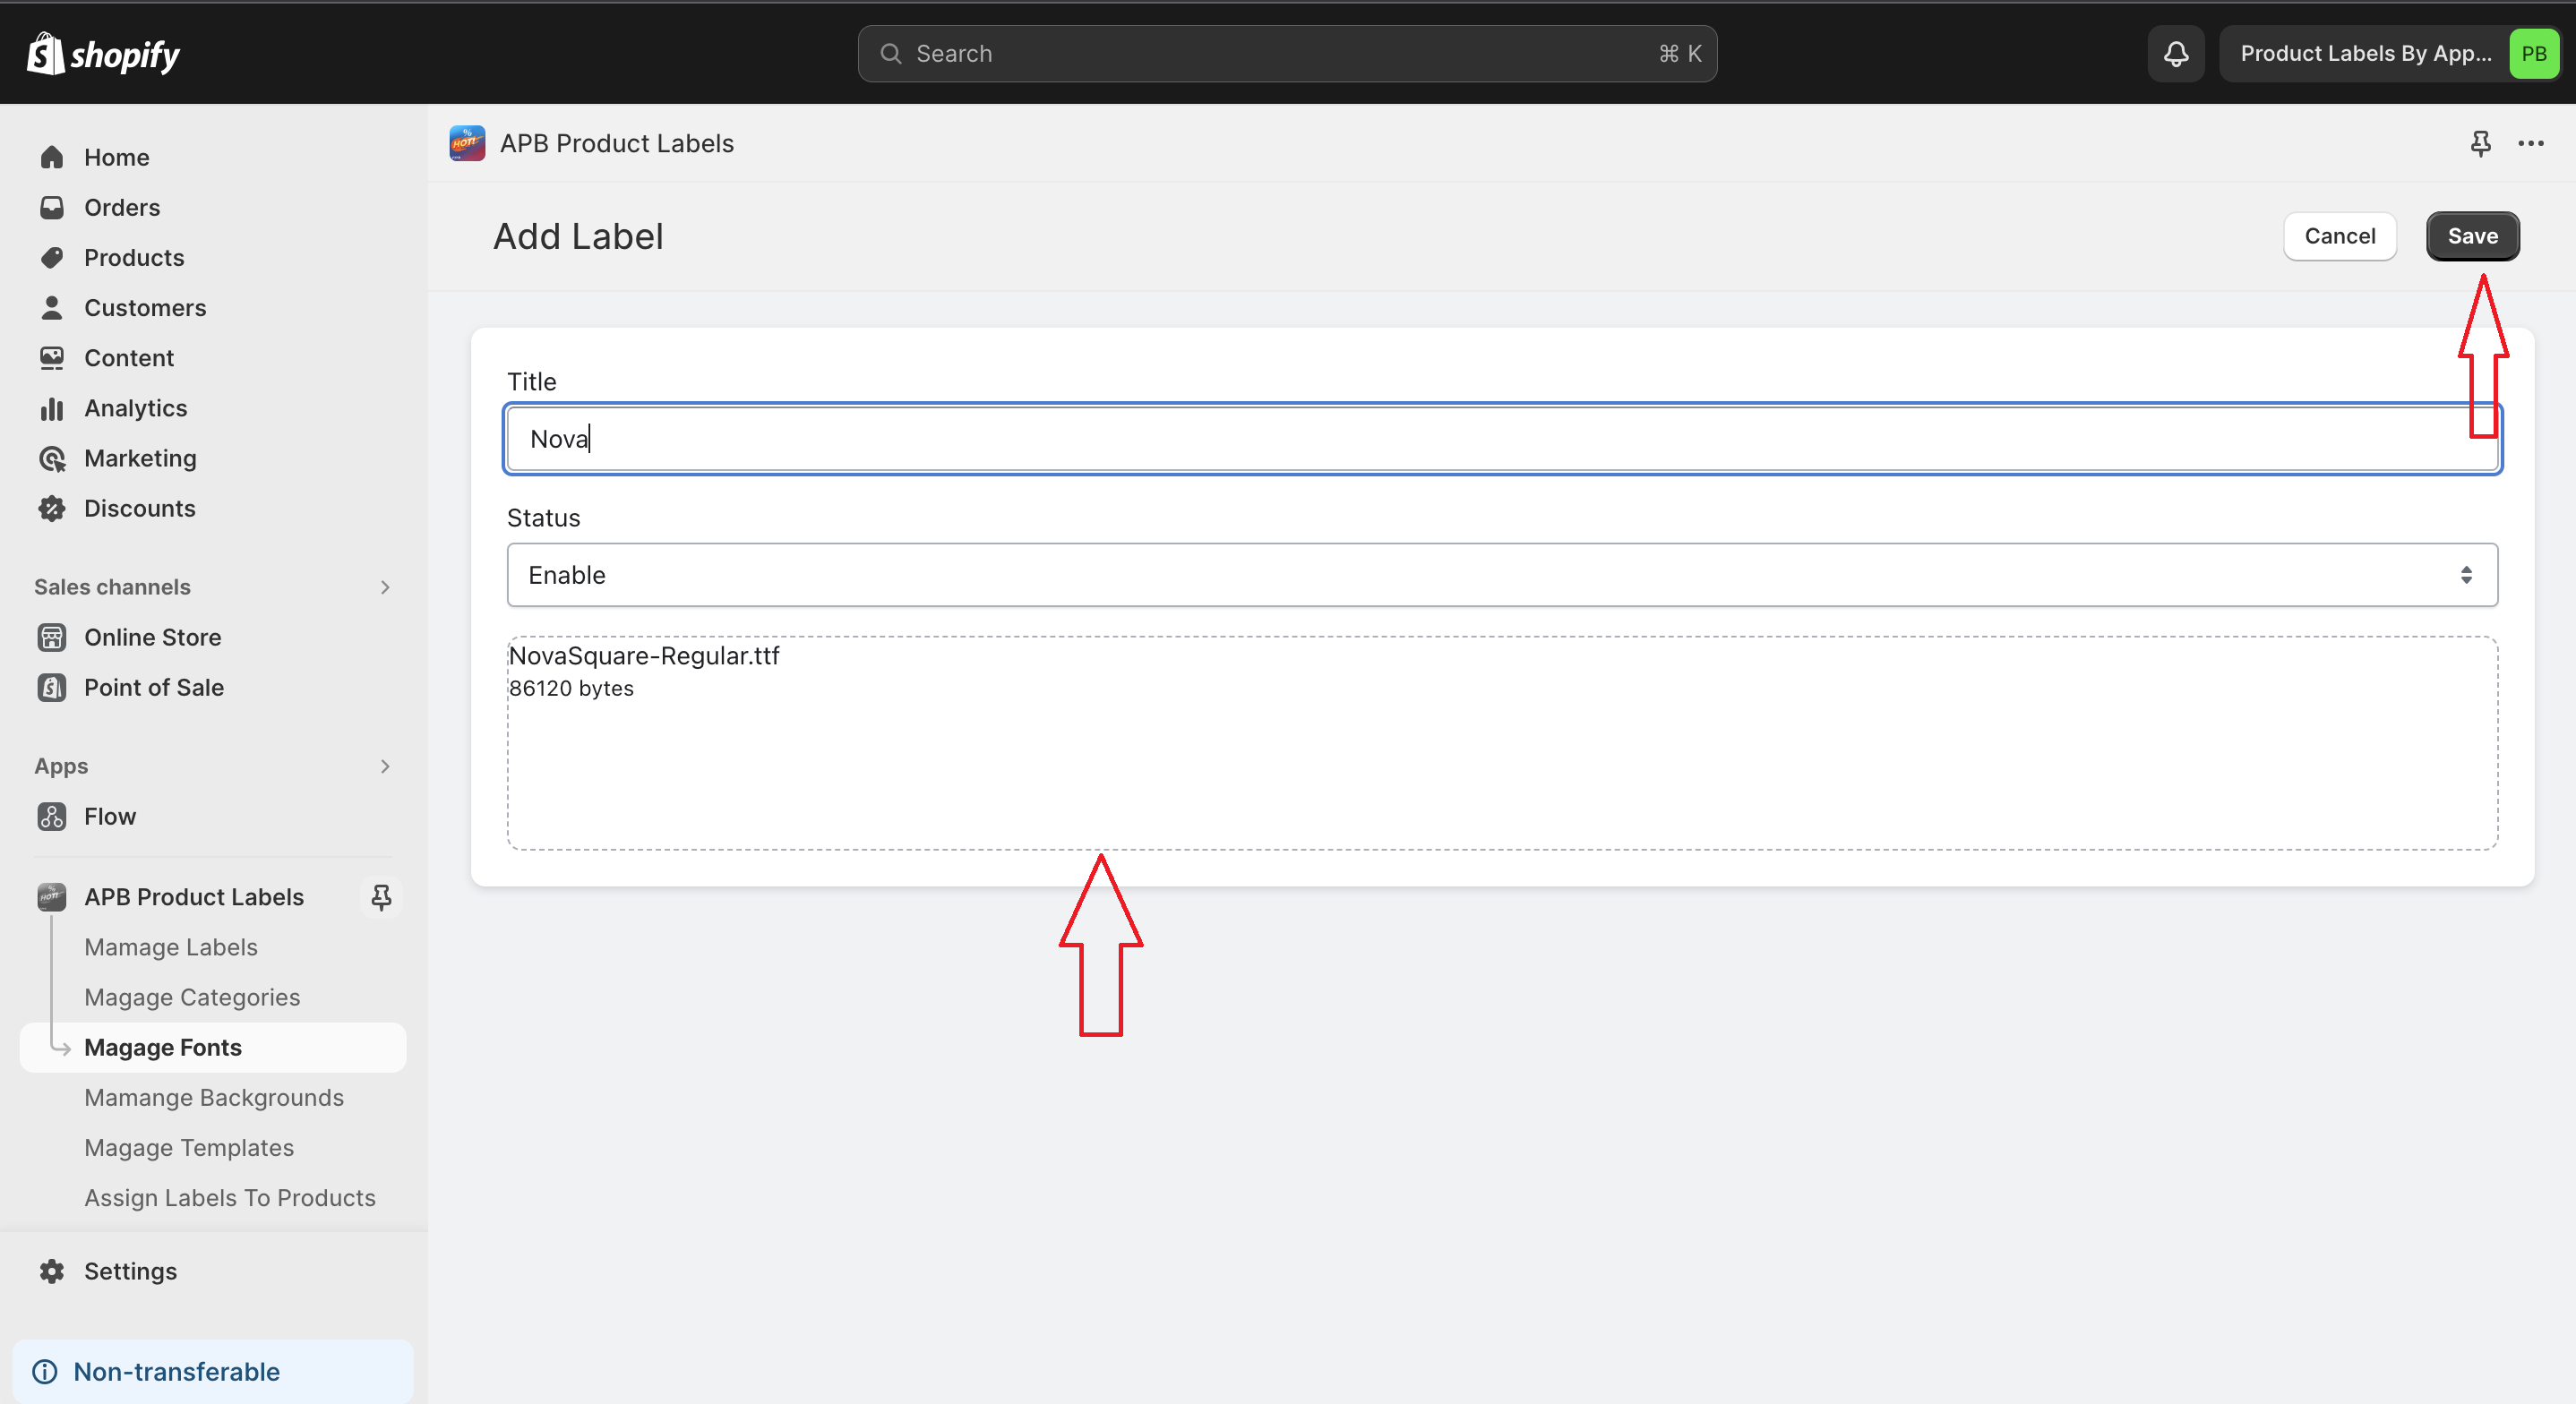
- In the App Left menu, Click to Manage Labels => Add Label
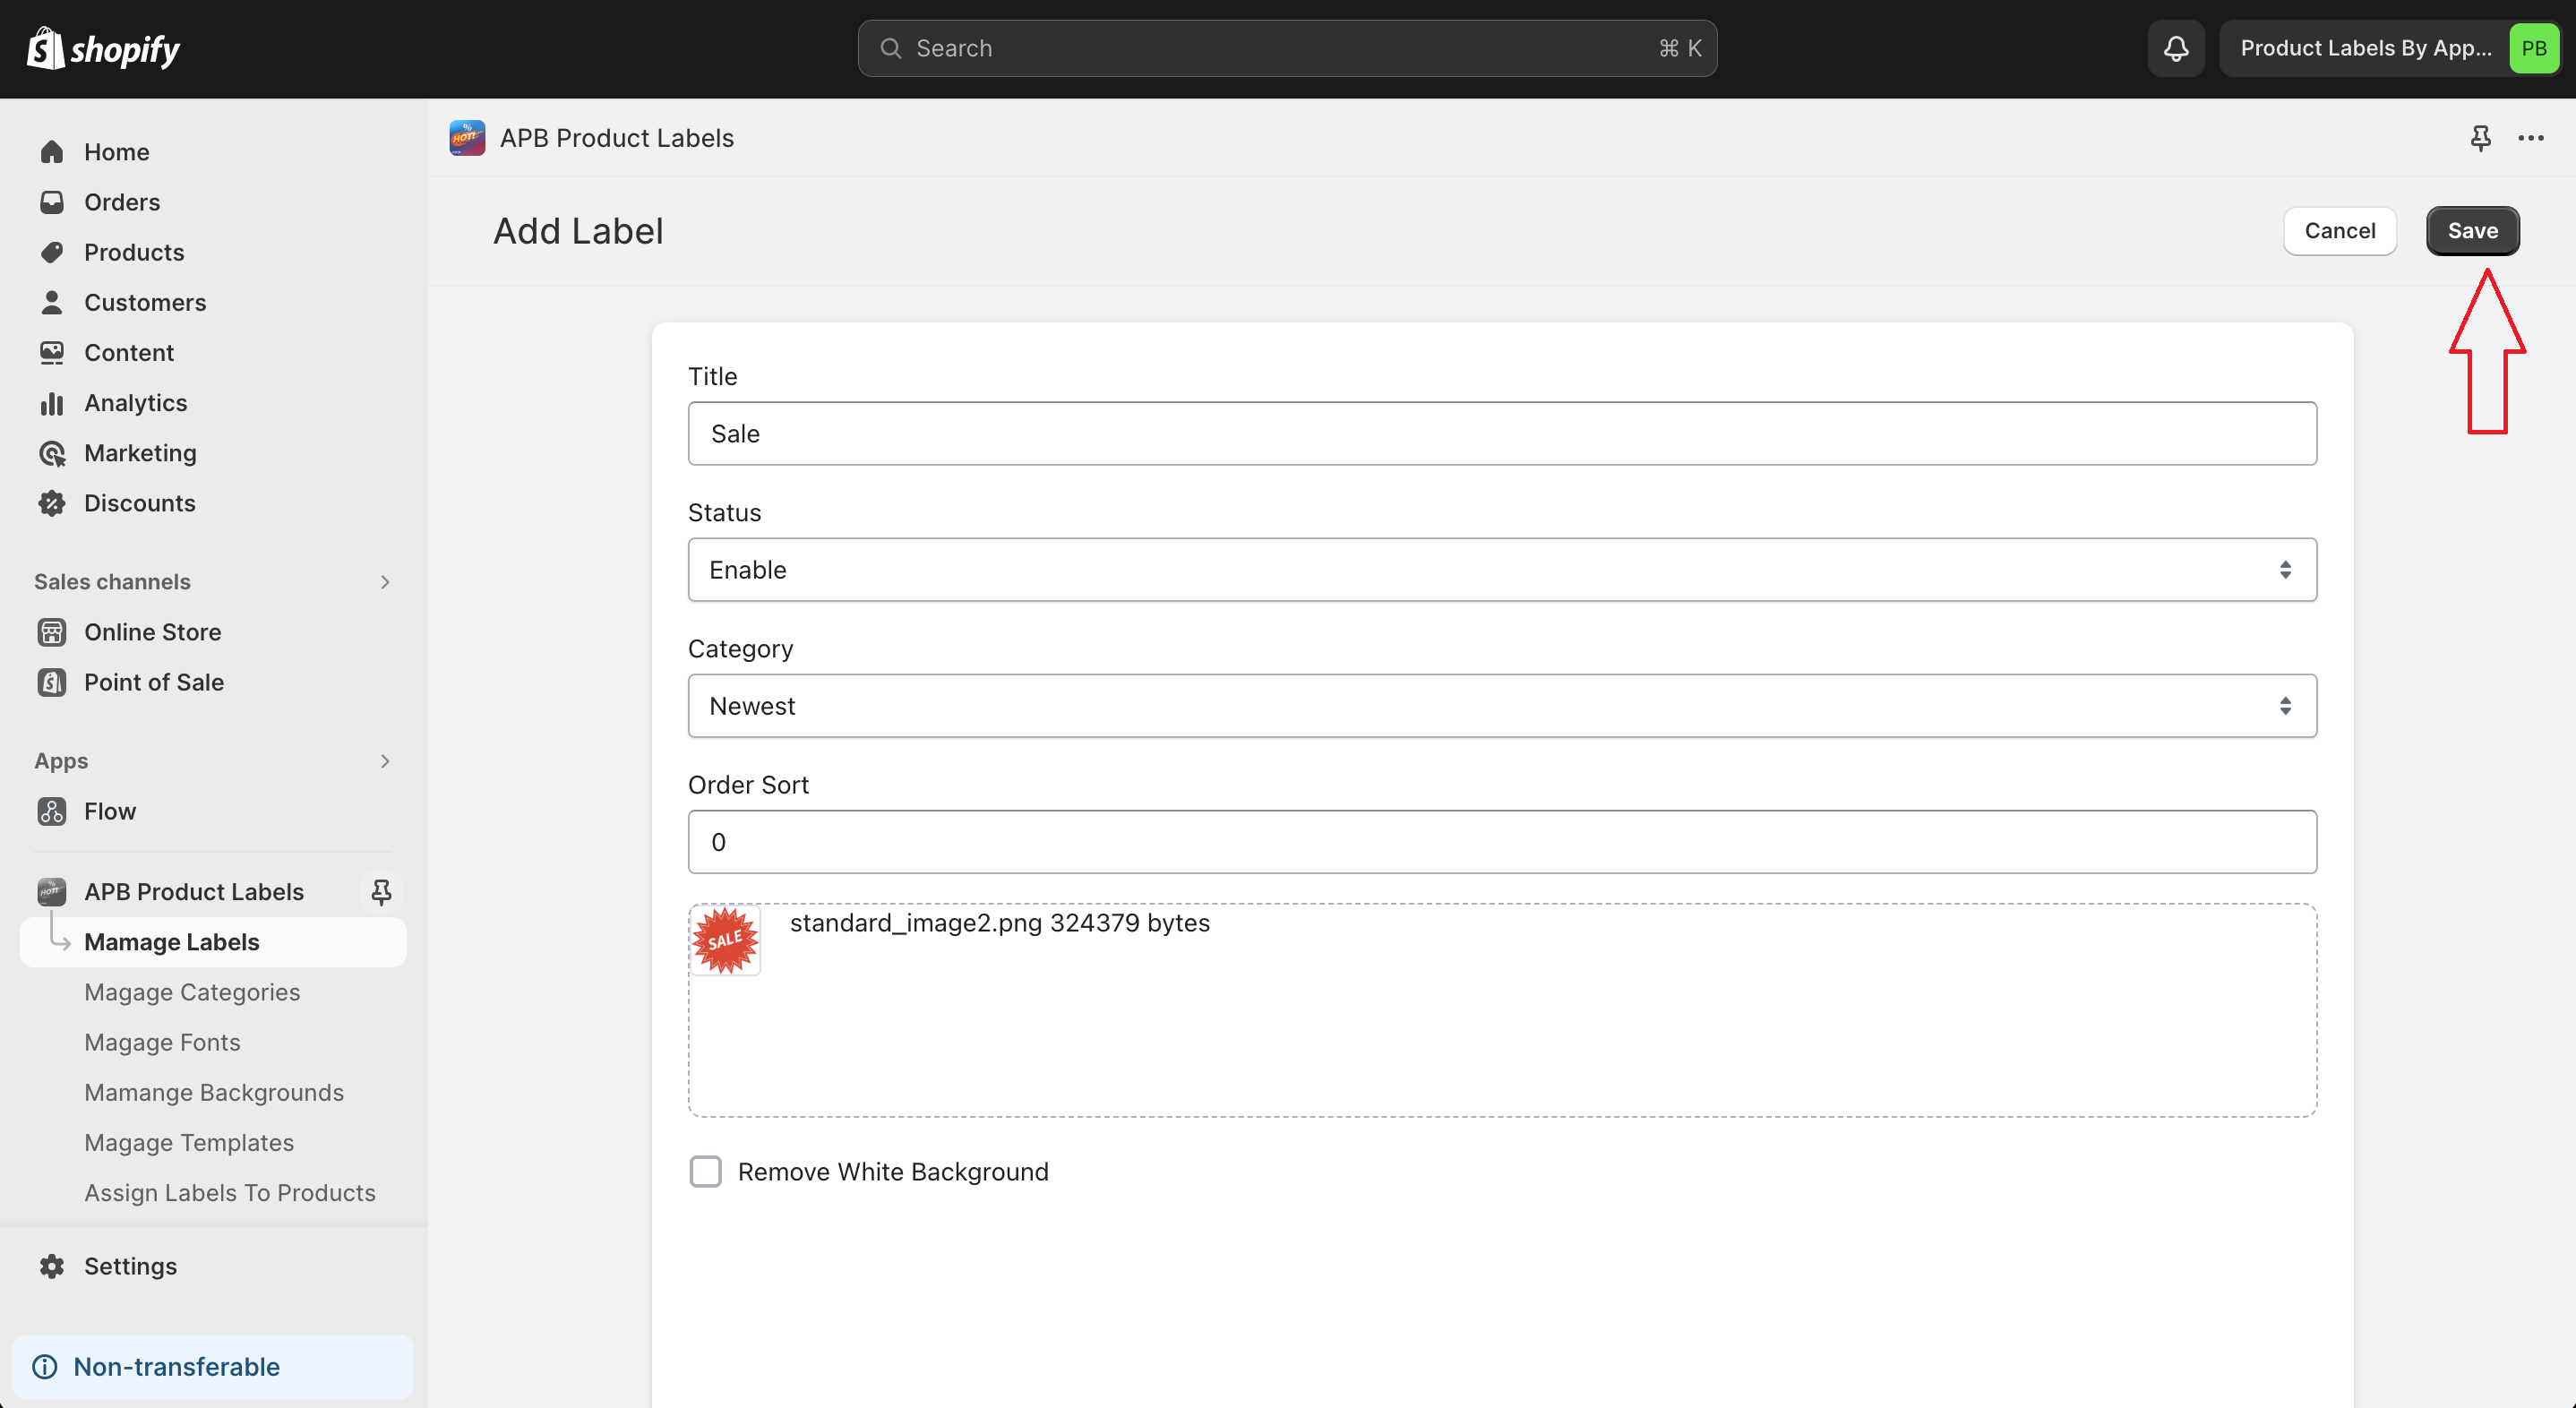
In the setting tab, Enter information and Upload Label
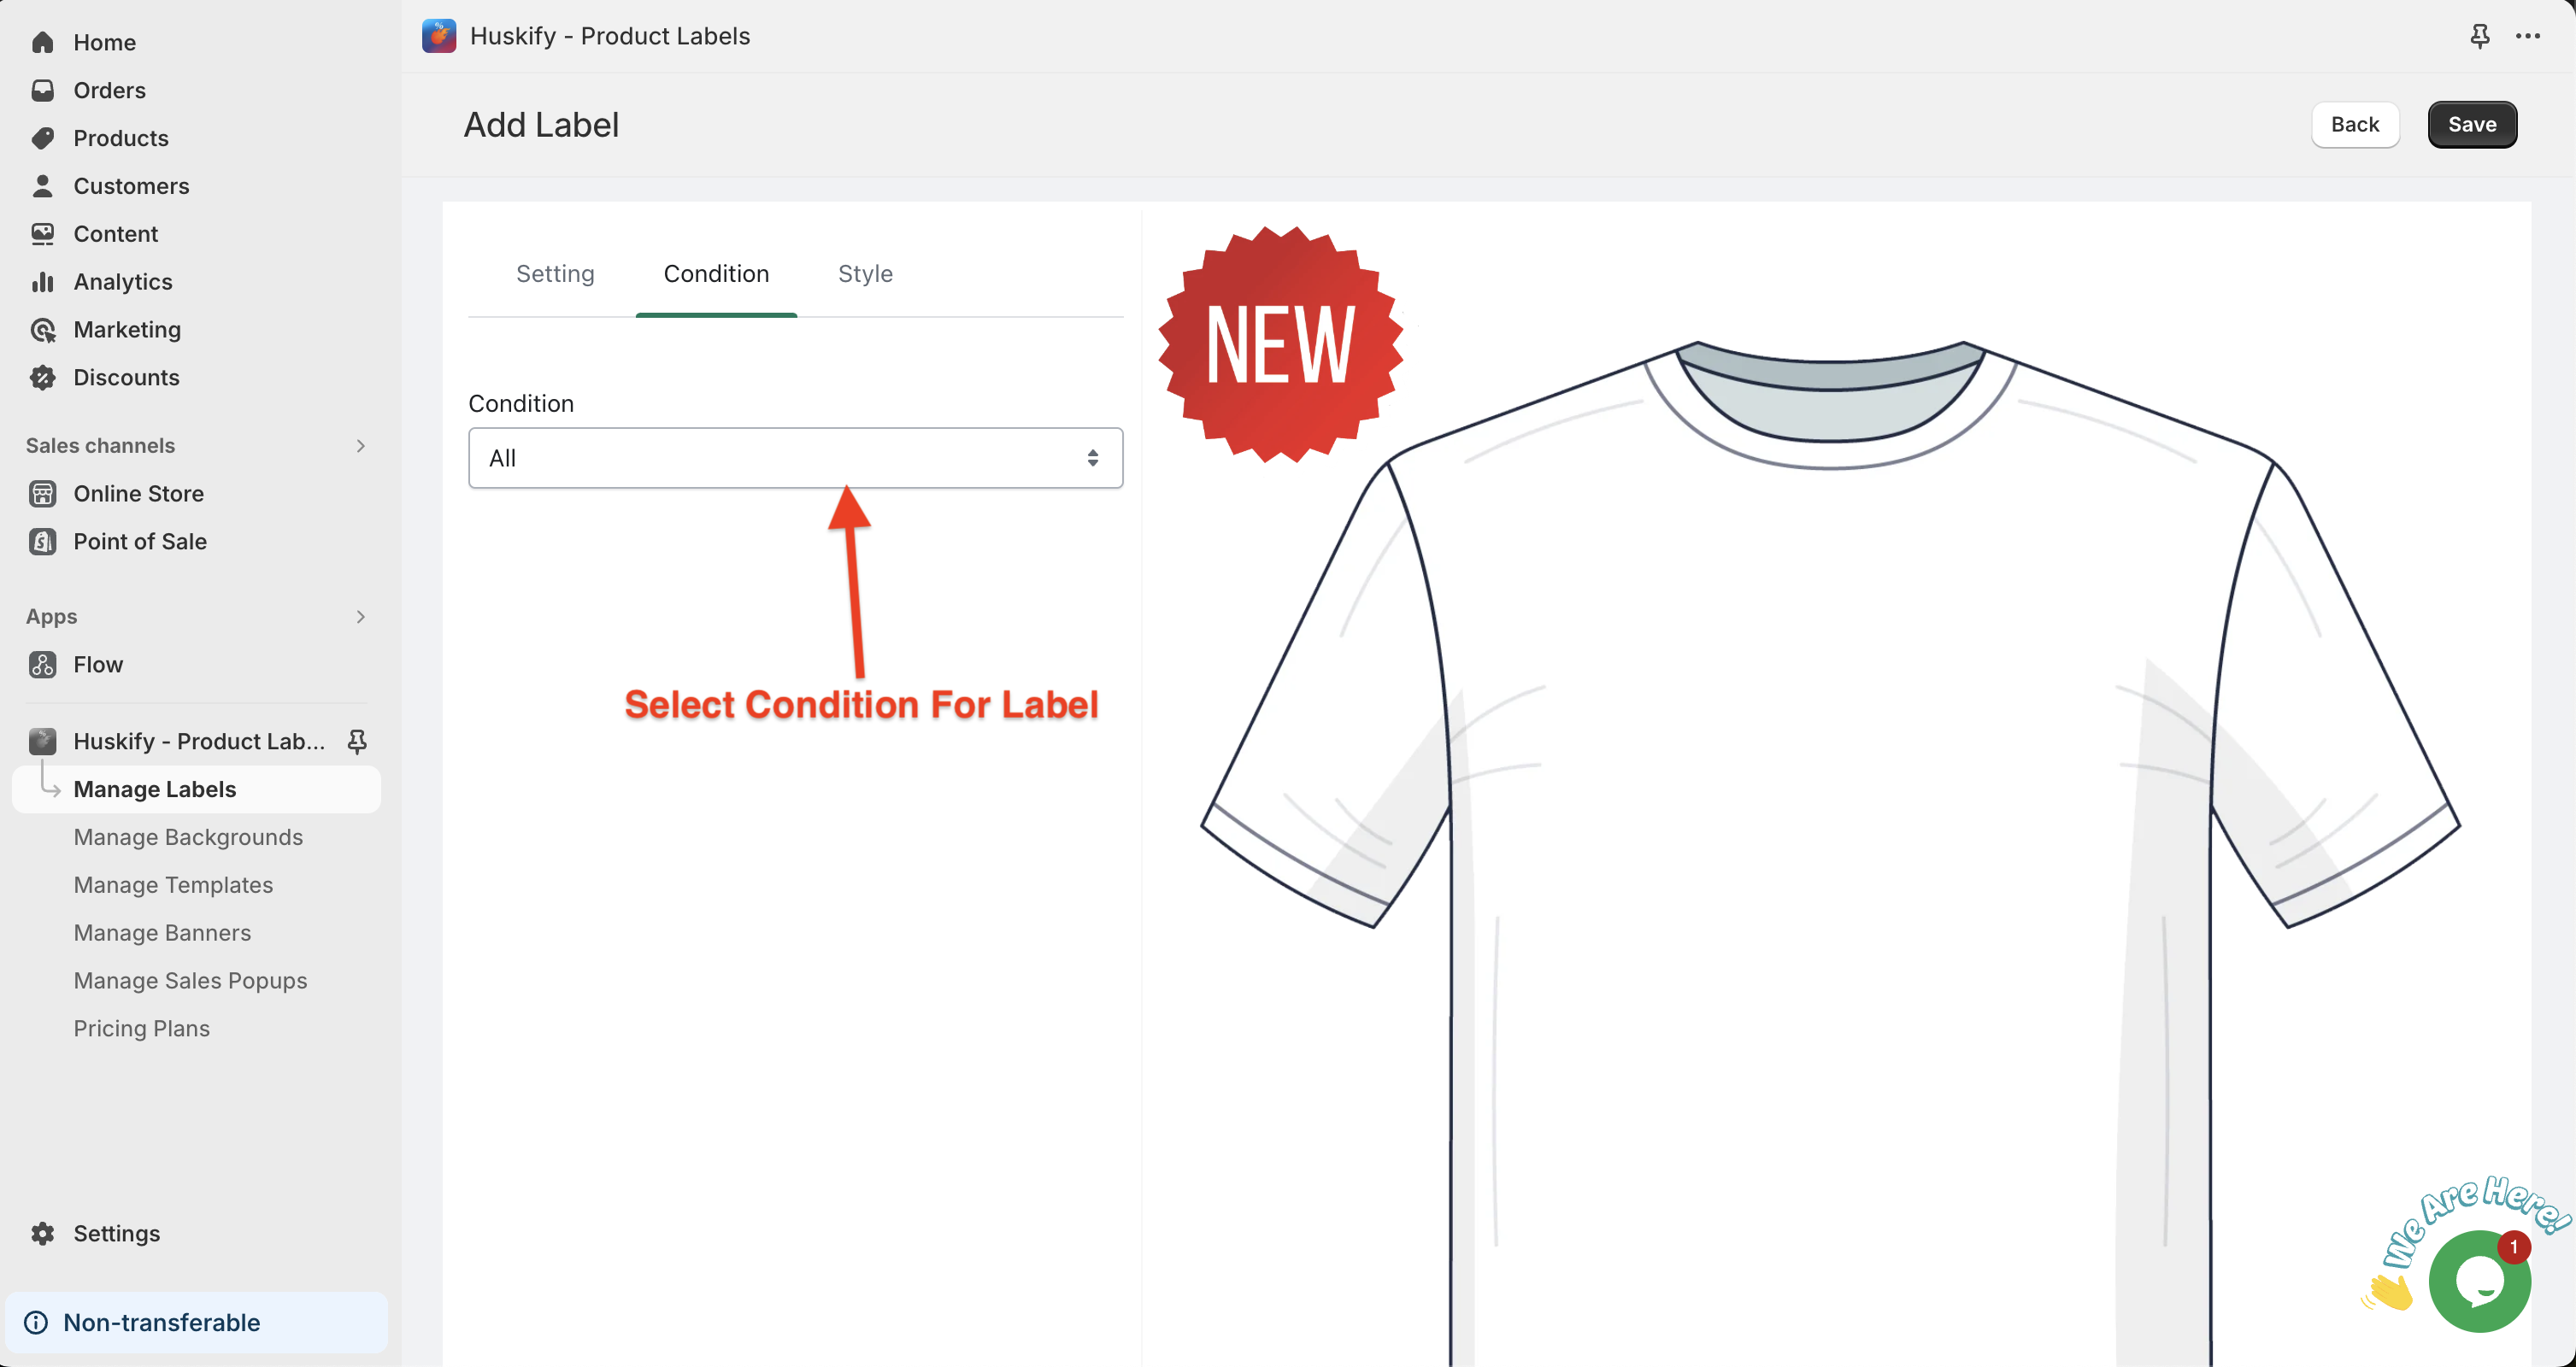
Select Condition For label in the Condition Tab
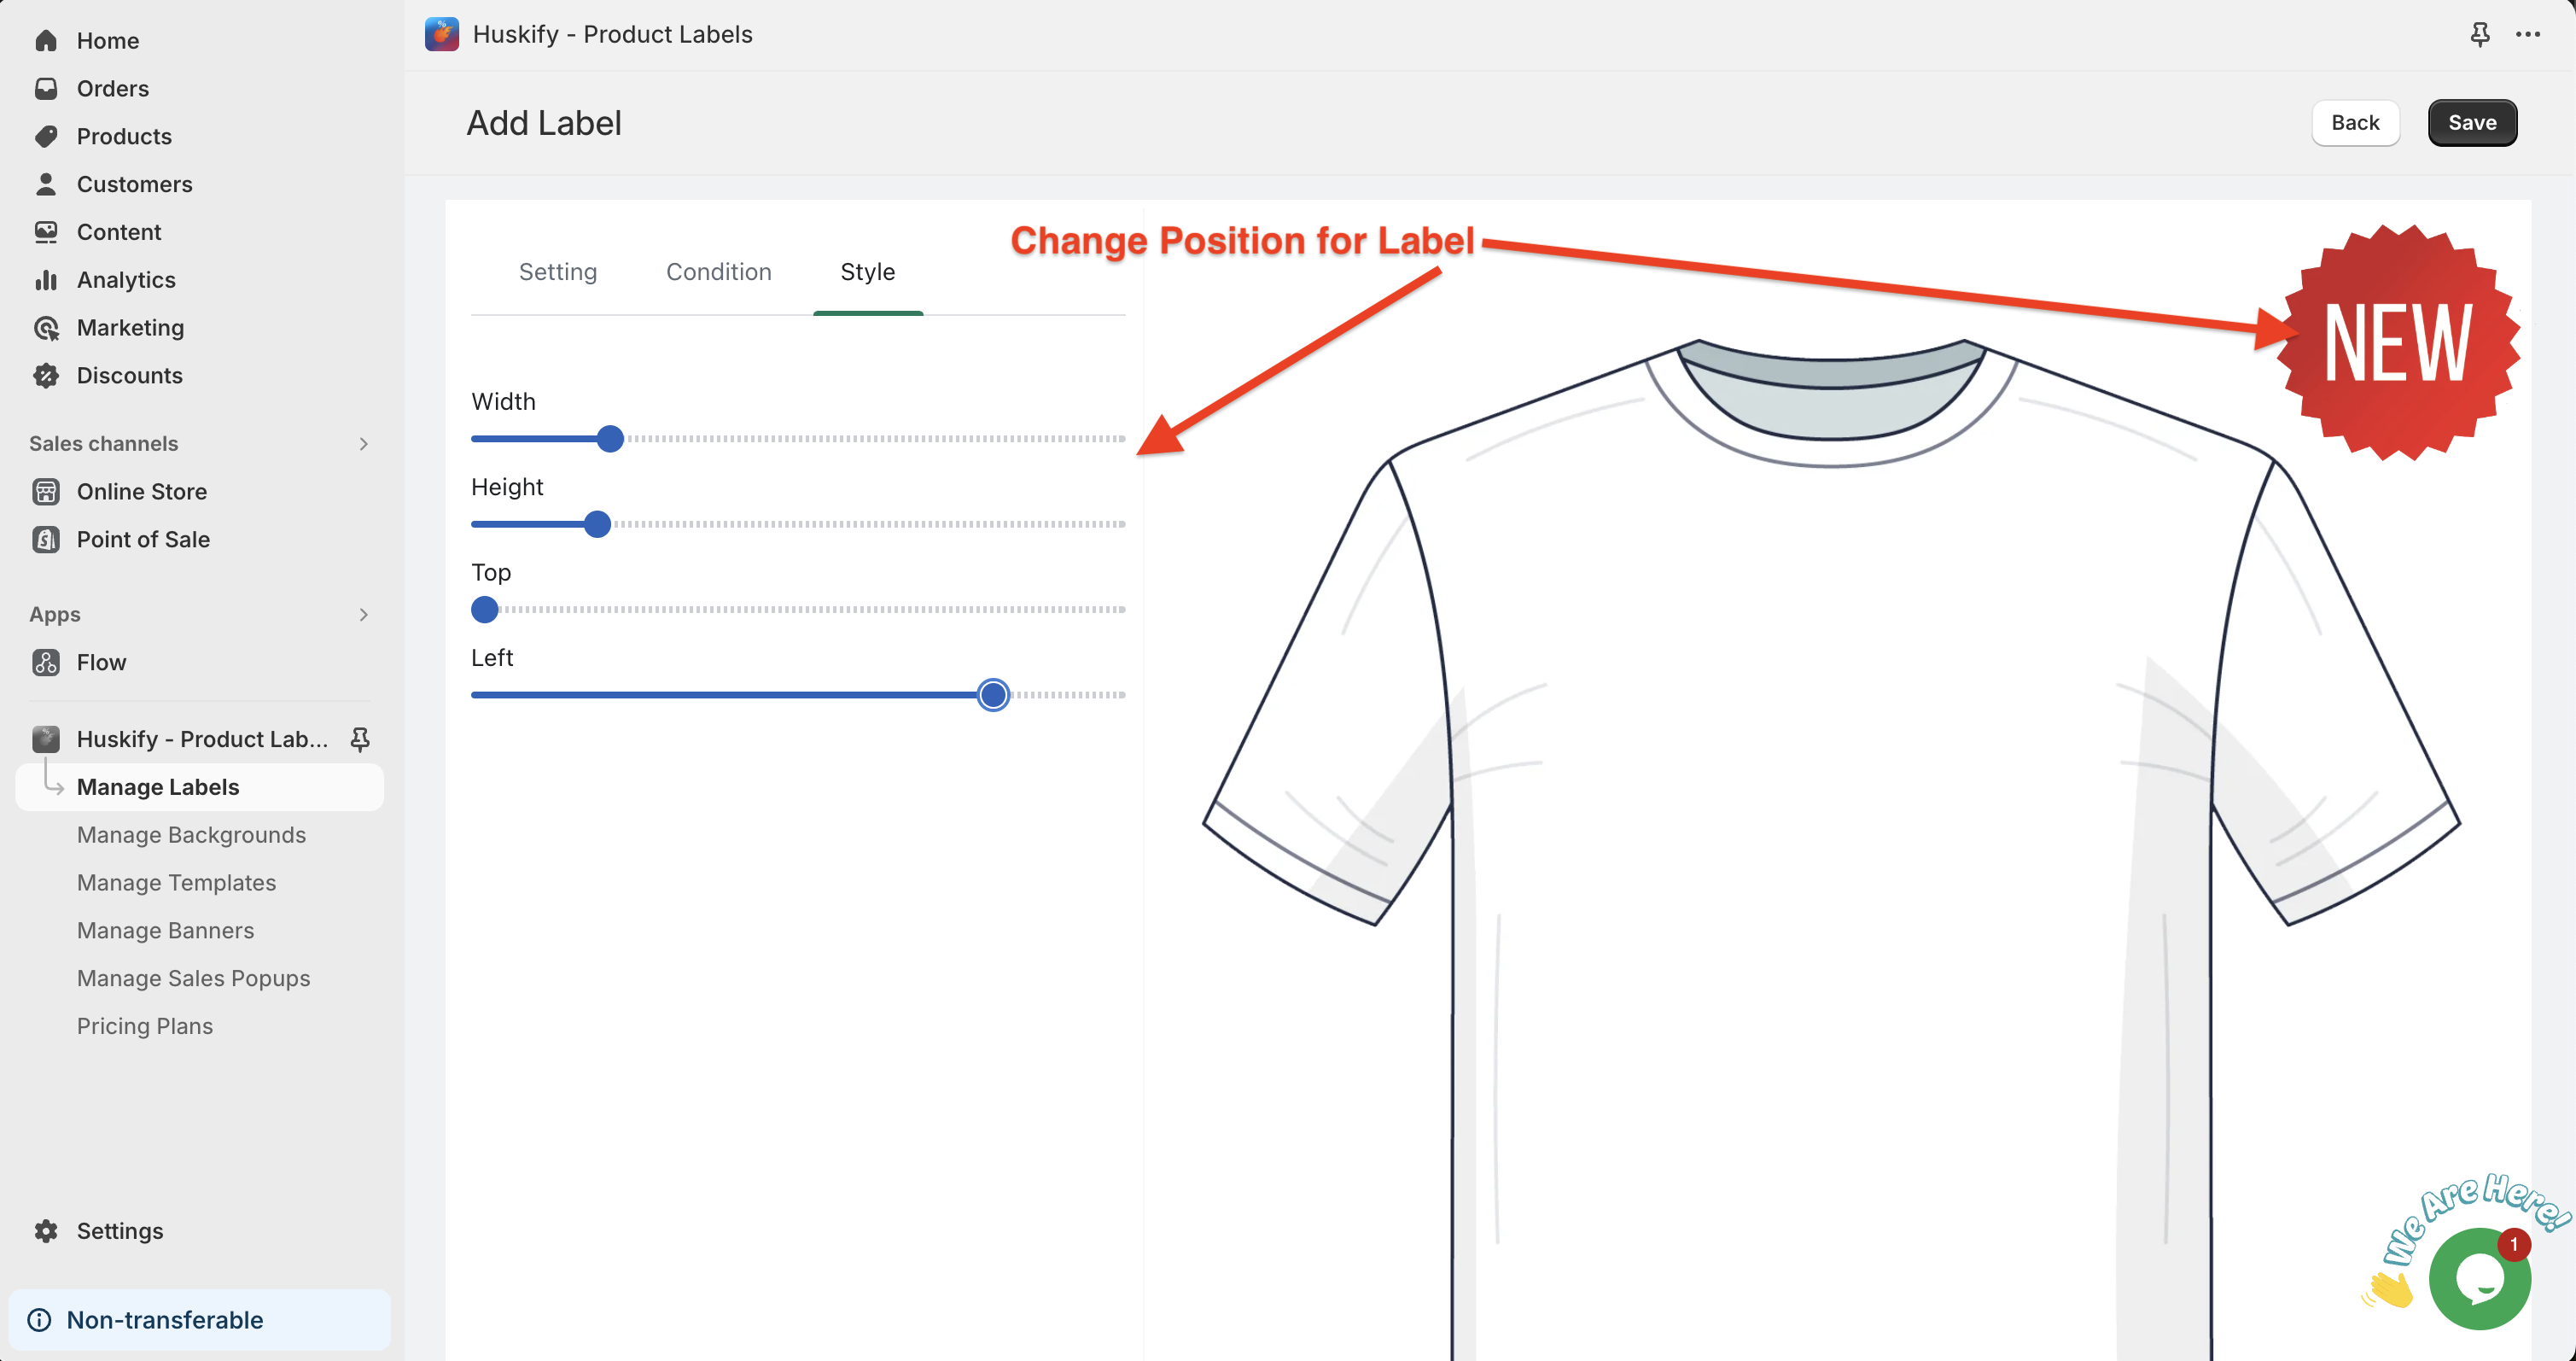
Change Position and Style in the Style Tab, After Configure Label, Click To Save
- Go to Manage Banners by click to Manage Banners on left Sidebar menu:
- Add Banner Button On top Right Corner
- Enter Banner information and upload banner to the form and Click Save
Go to Manage Sales Pop-ups by click to Manage Sales Pop-ups on Left Sidebar Memu
Click To Add Sales pop-up Button on Top Right Corner
Enter information, upload Icon for sale Pop-ups and click to Save button in the top right corner
Merchants can upload thier Background to use for Custom text in Custom Label
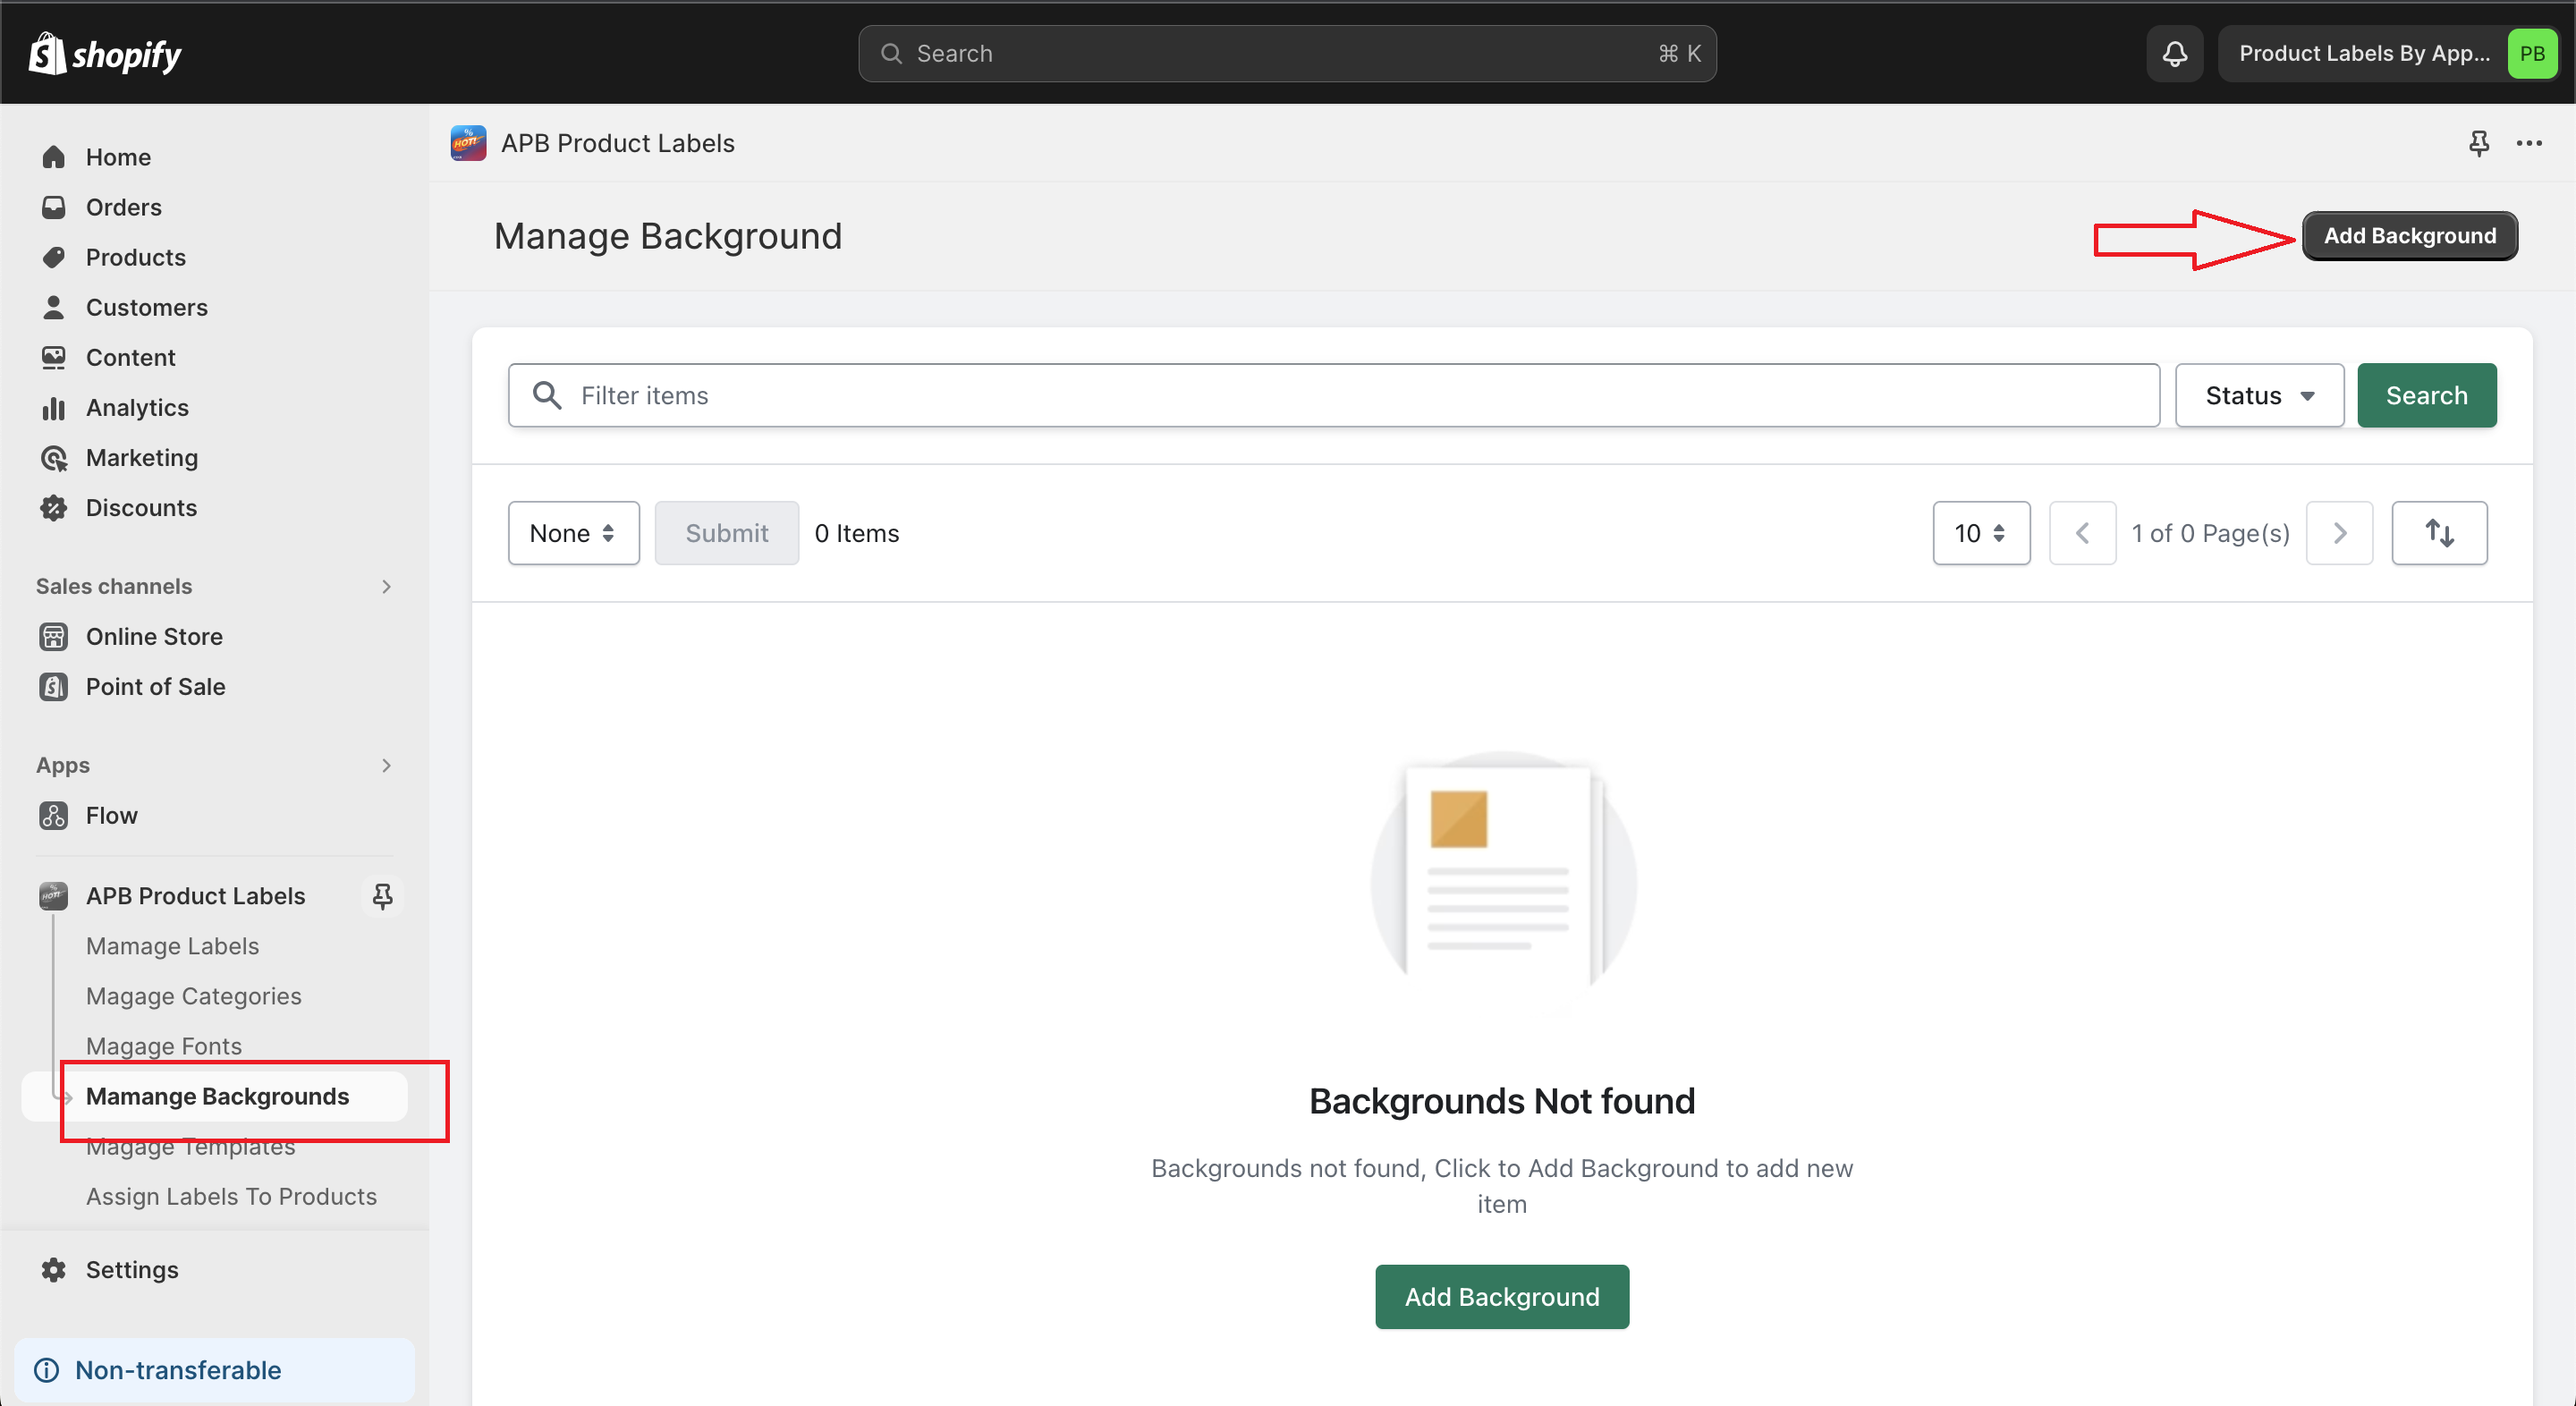
Go to Manage Backgrounds by click to Manage Backgrounds on Left Sidebar Memu
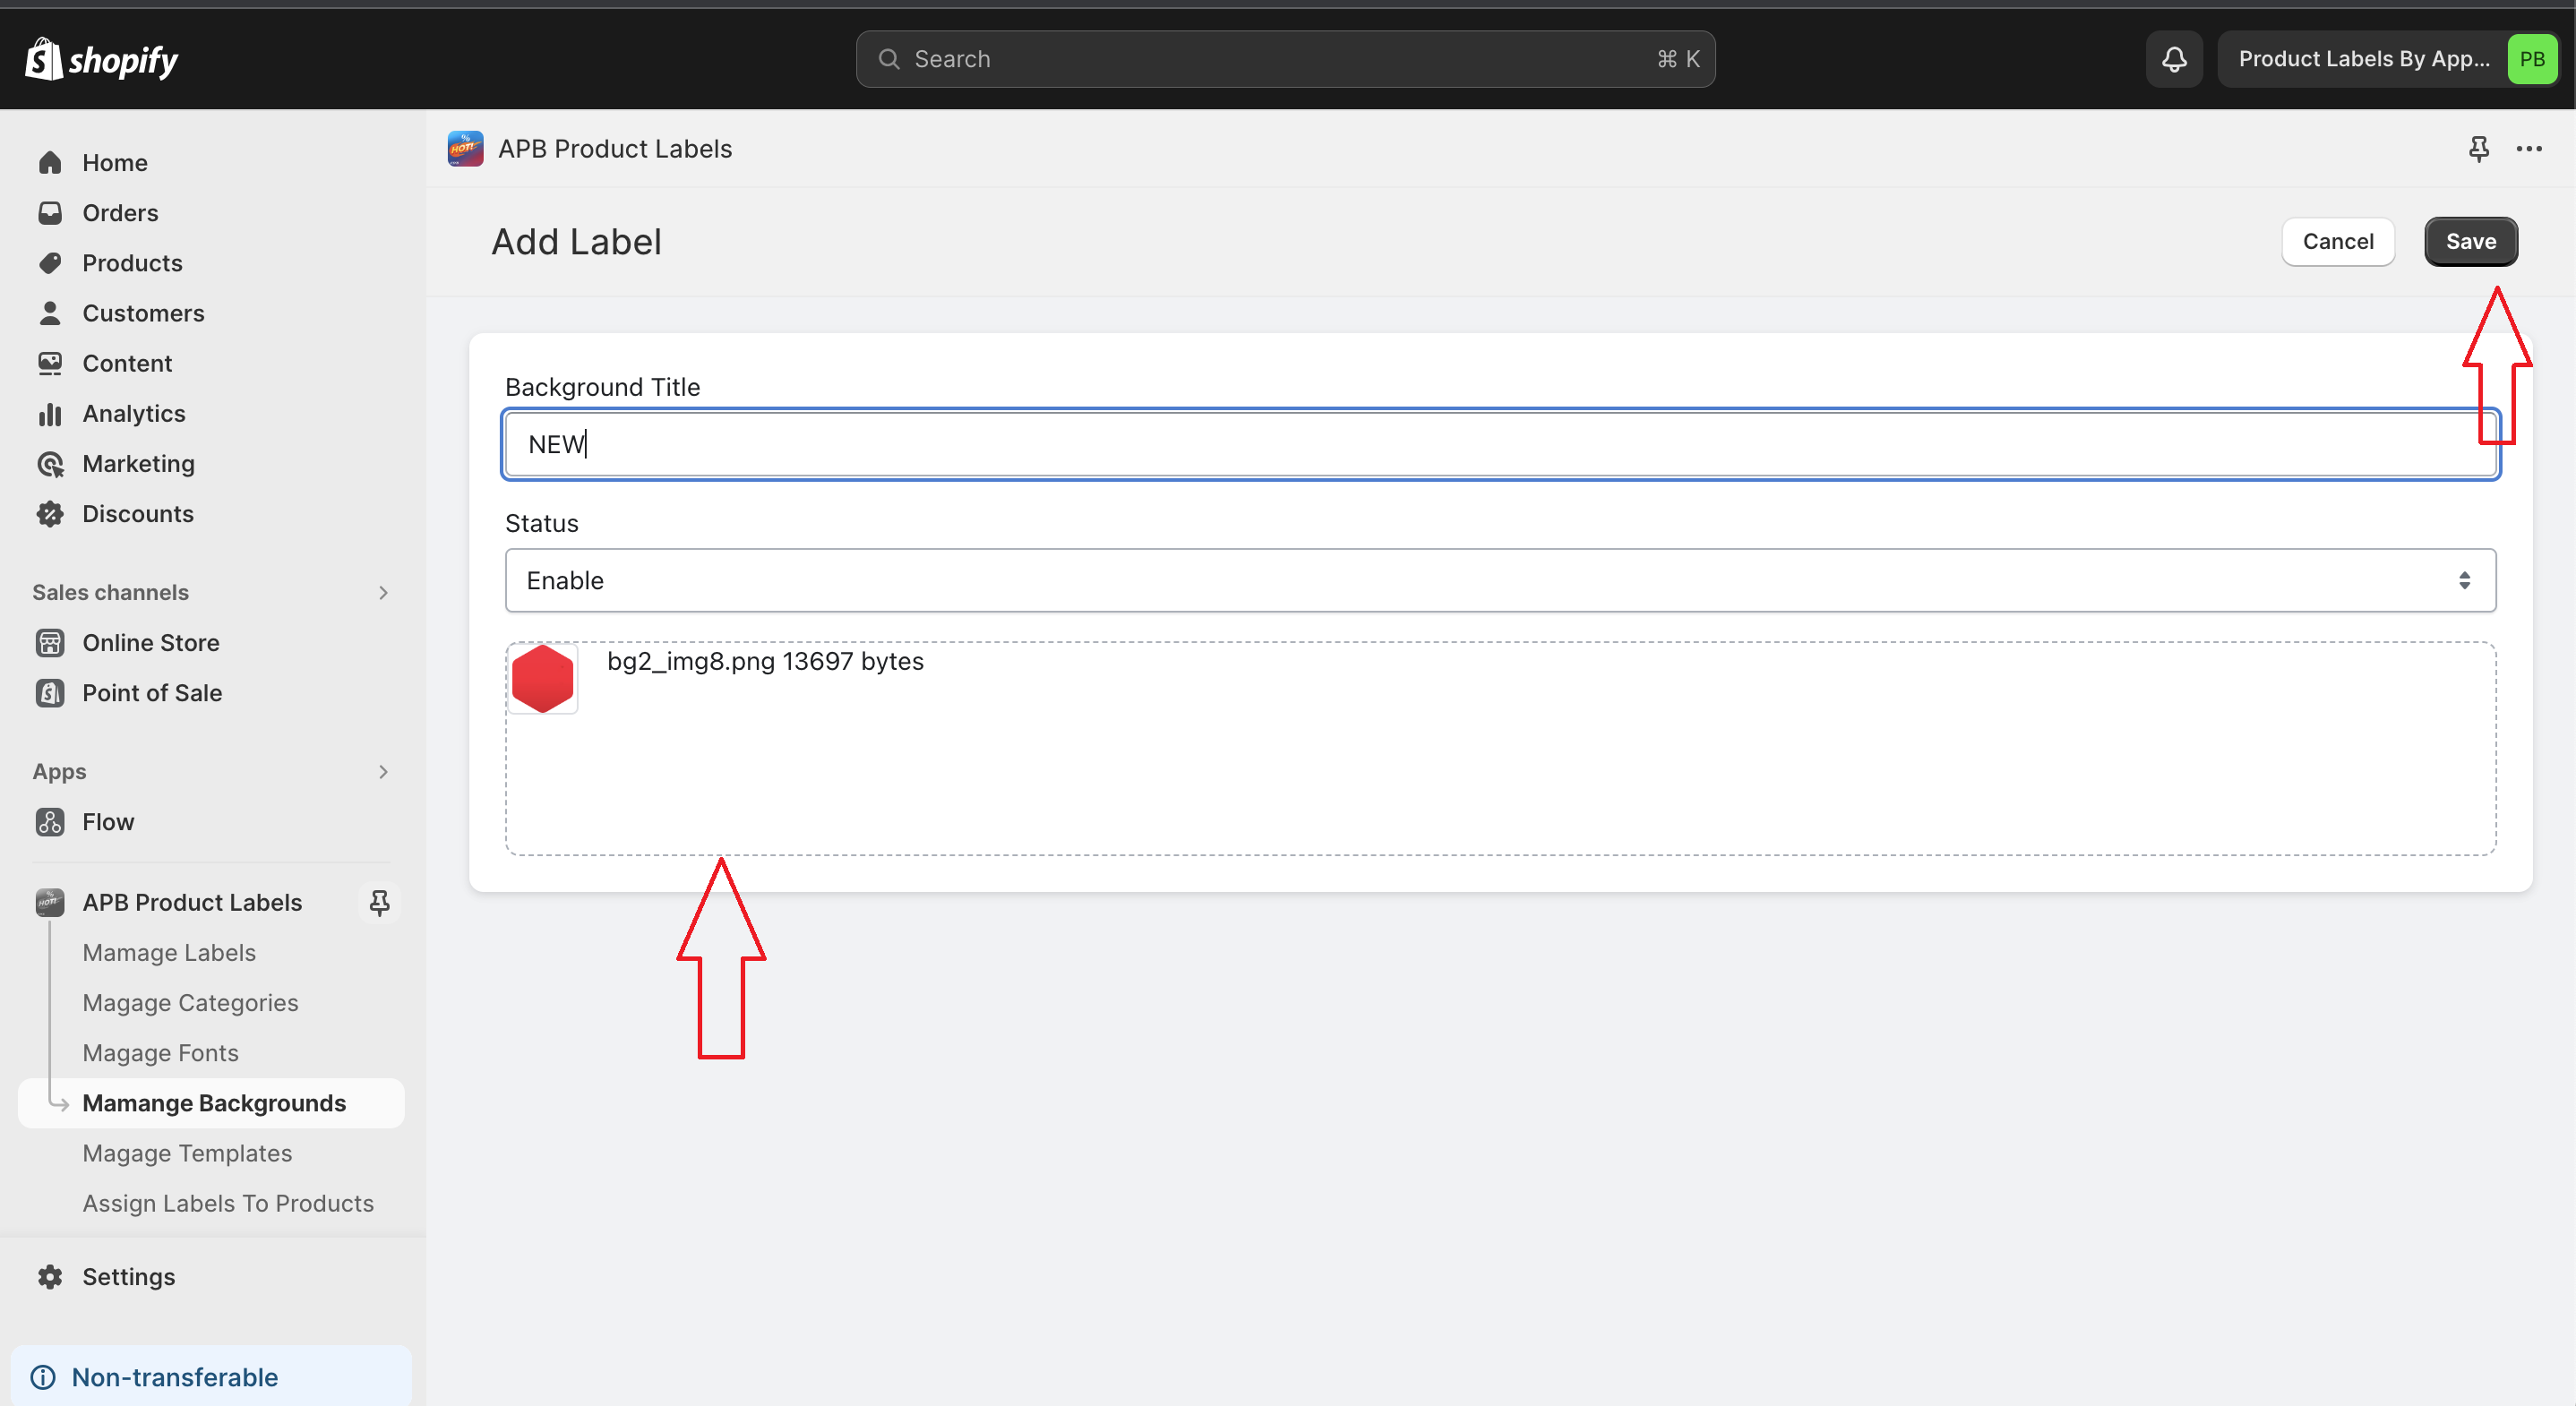
Click To Add Background Button on Top Right Corner
Enter information and upload image From your PC and click Save
Merchants can add template to use for Custom Label
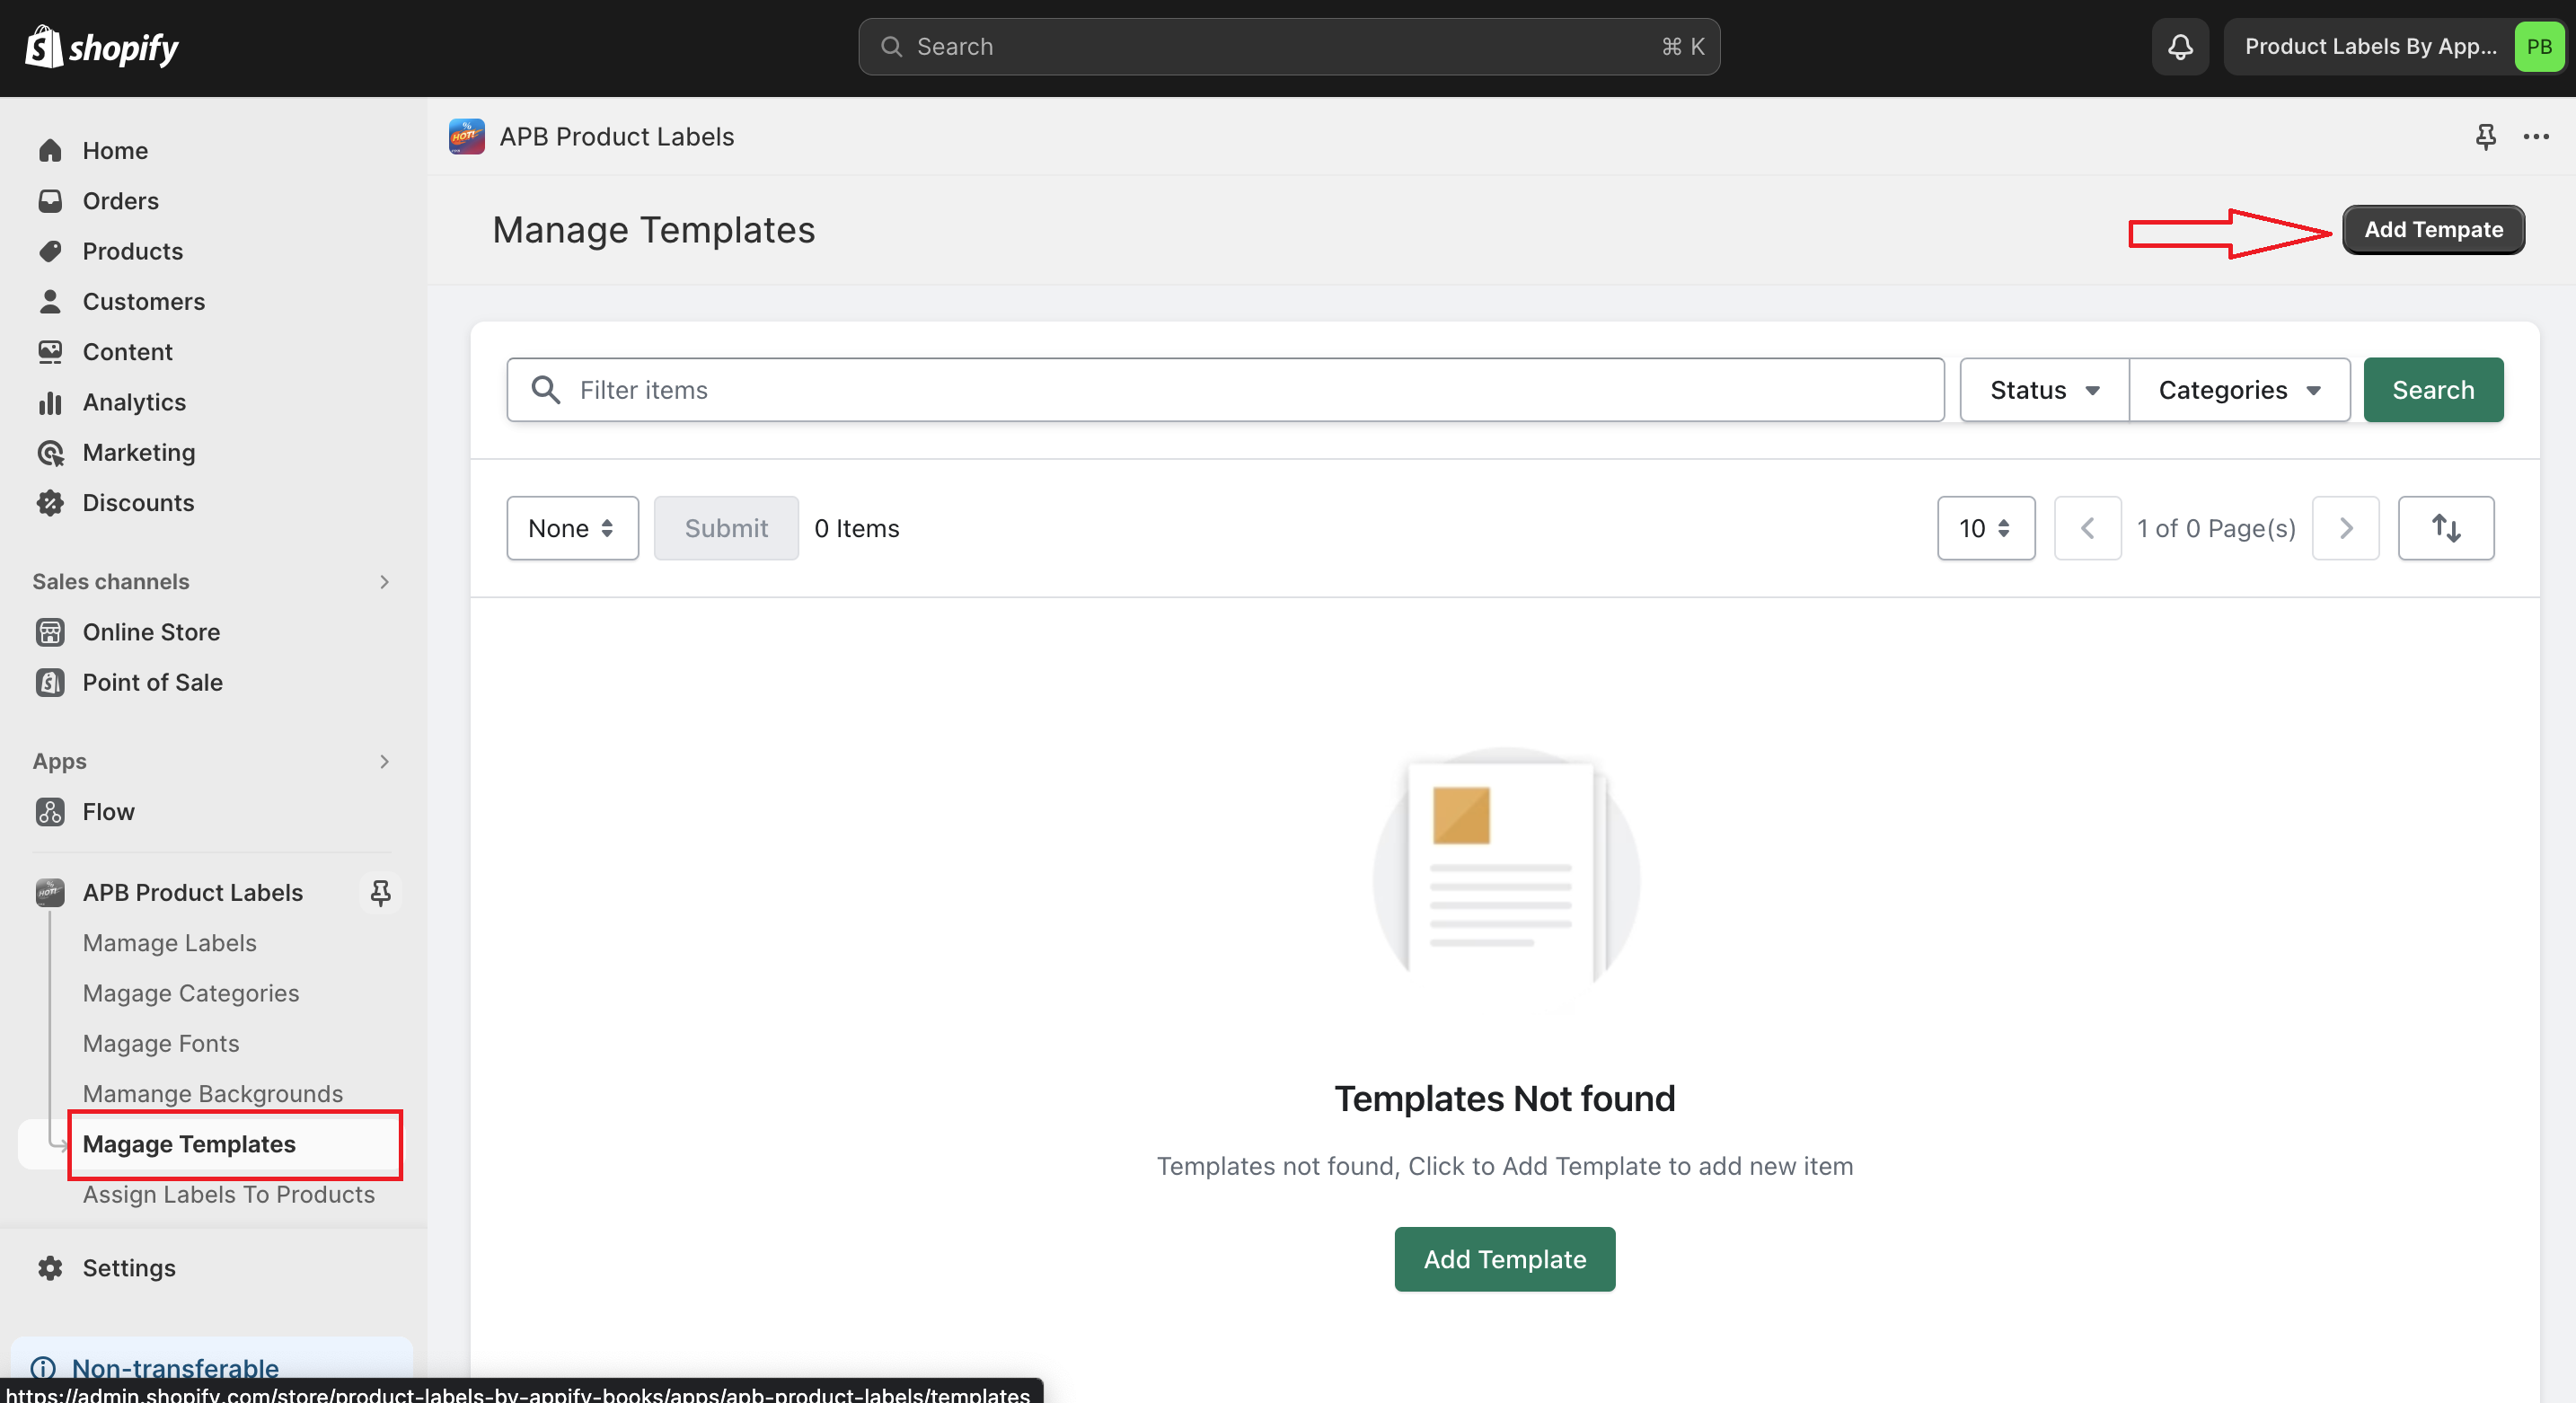
Go to Manage Templates by click to Manage Templates on Left Sidebar Memu
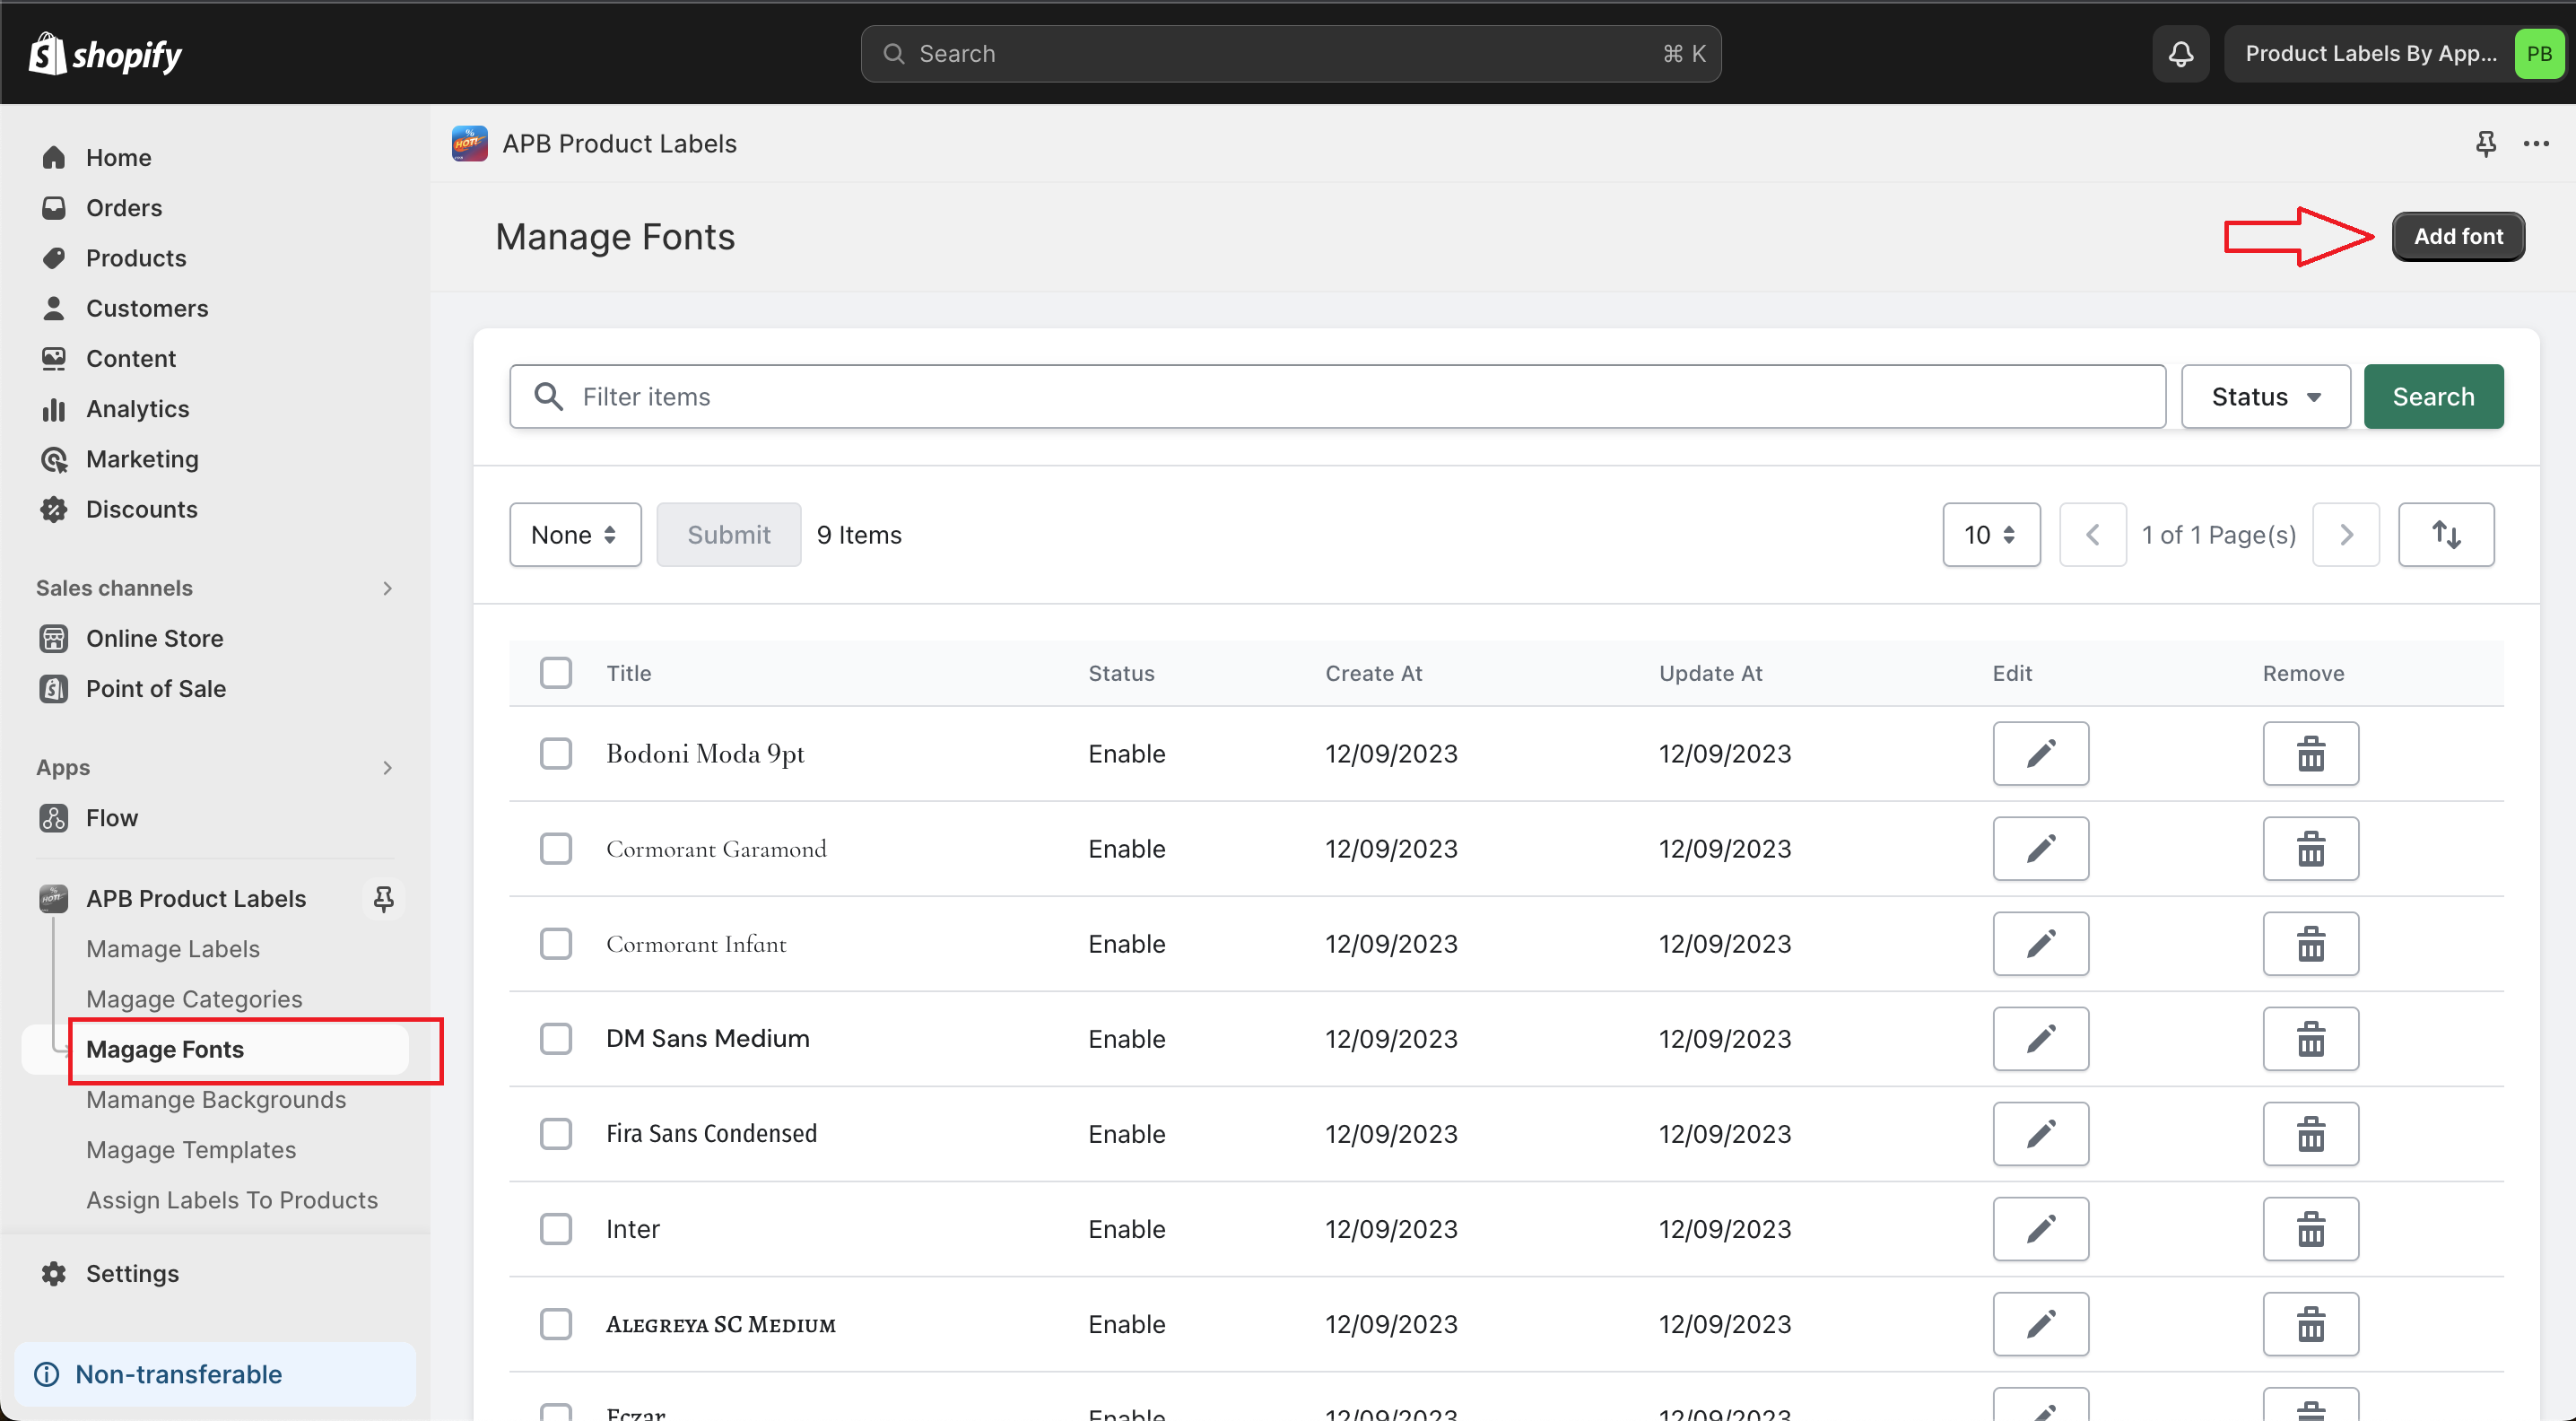
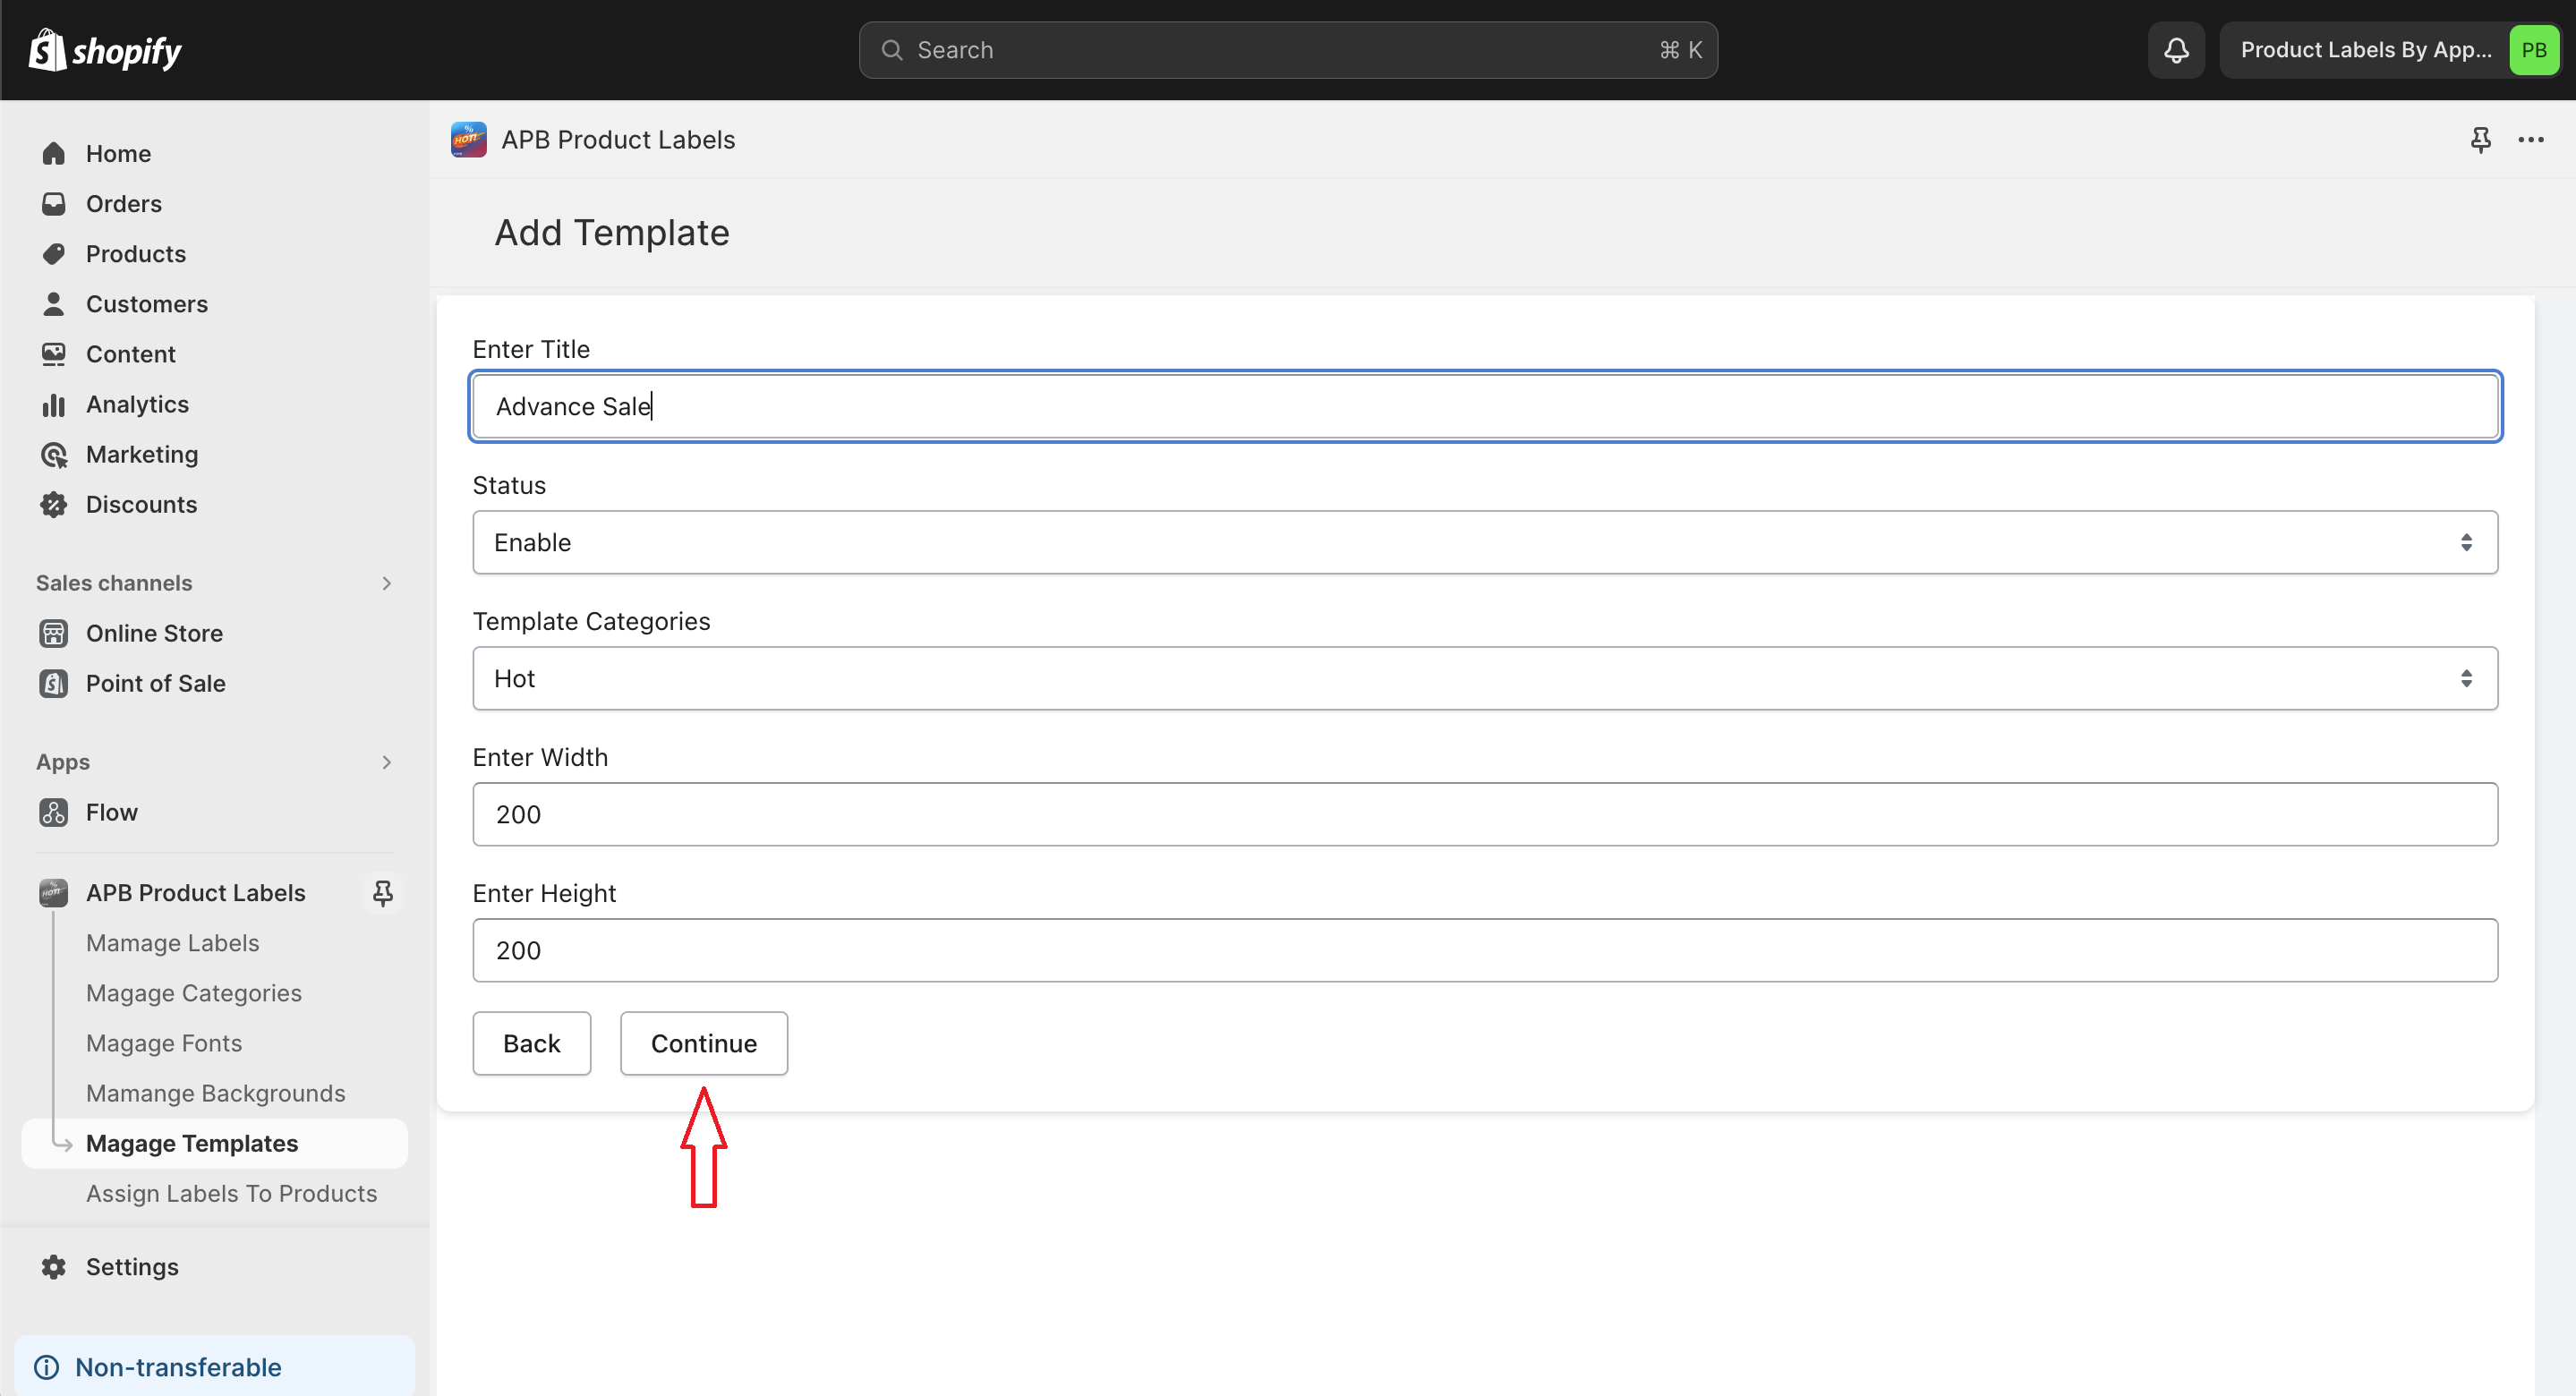
Click To Add Template Button on Top Right Corner
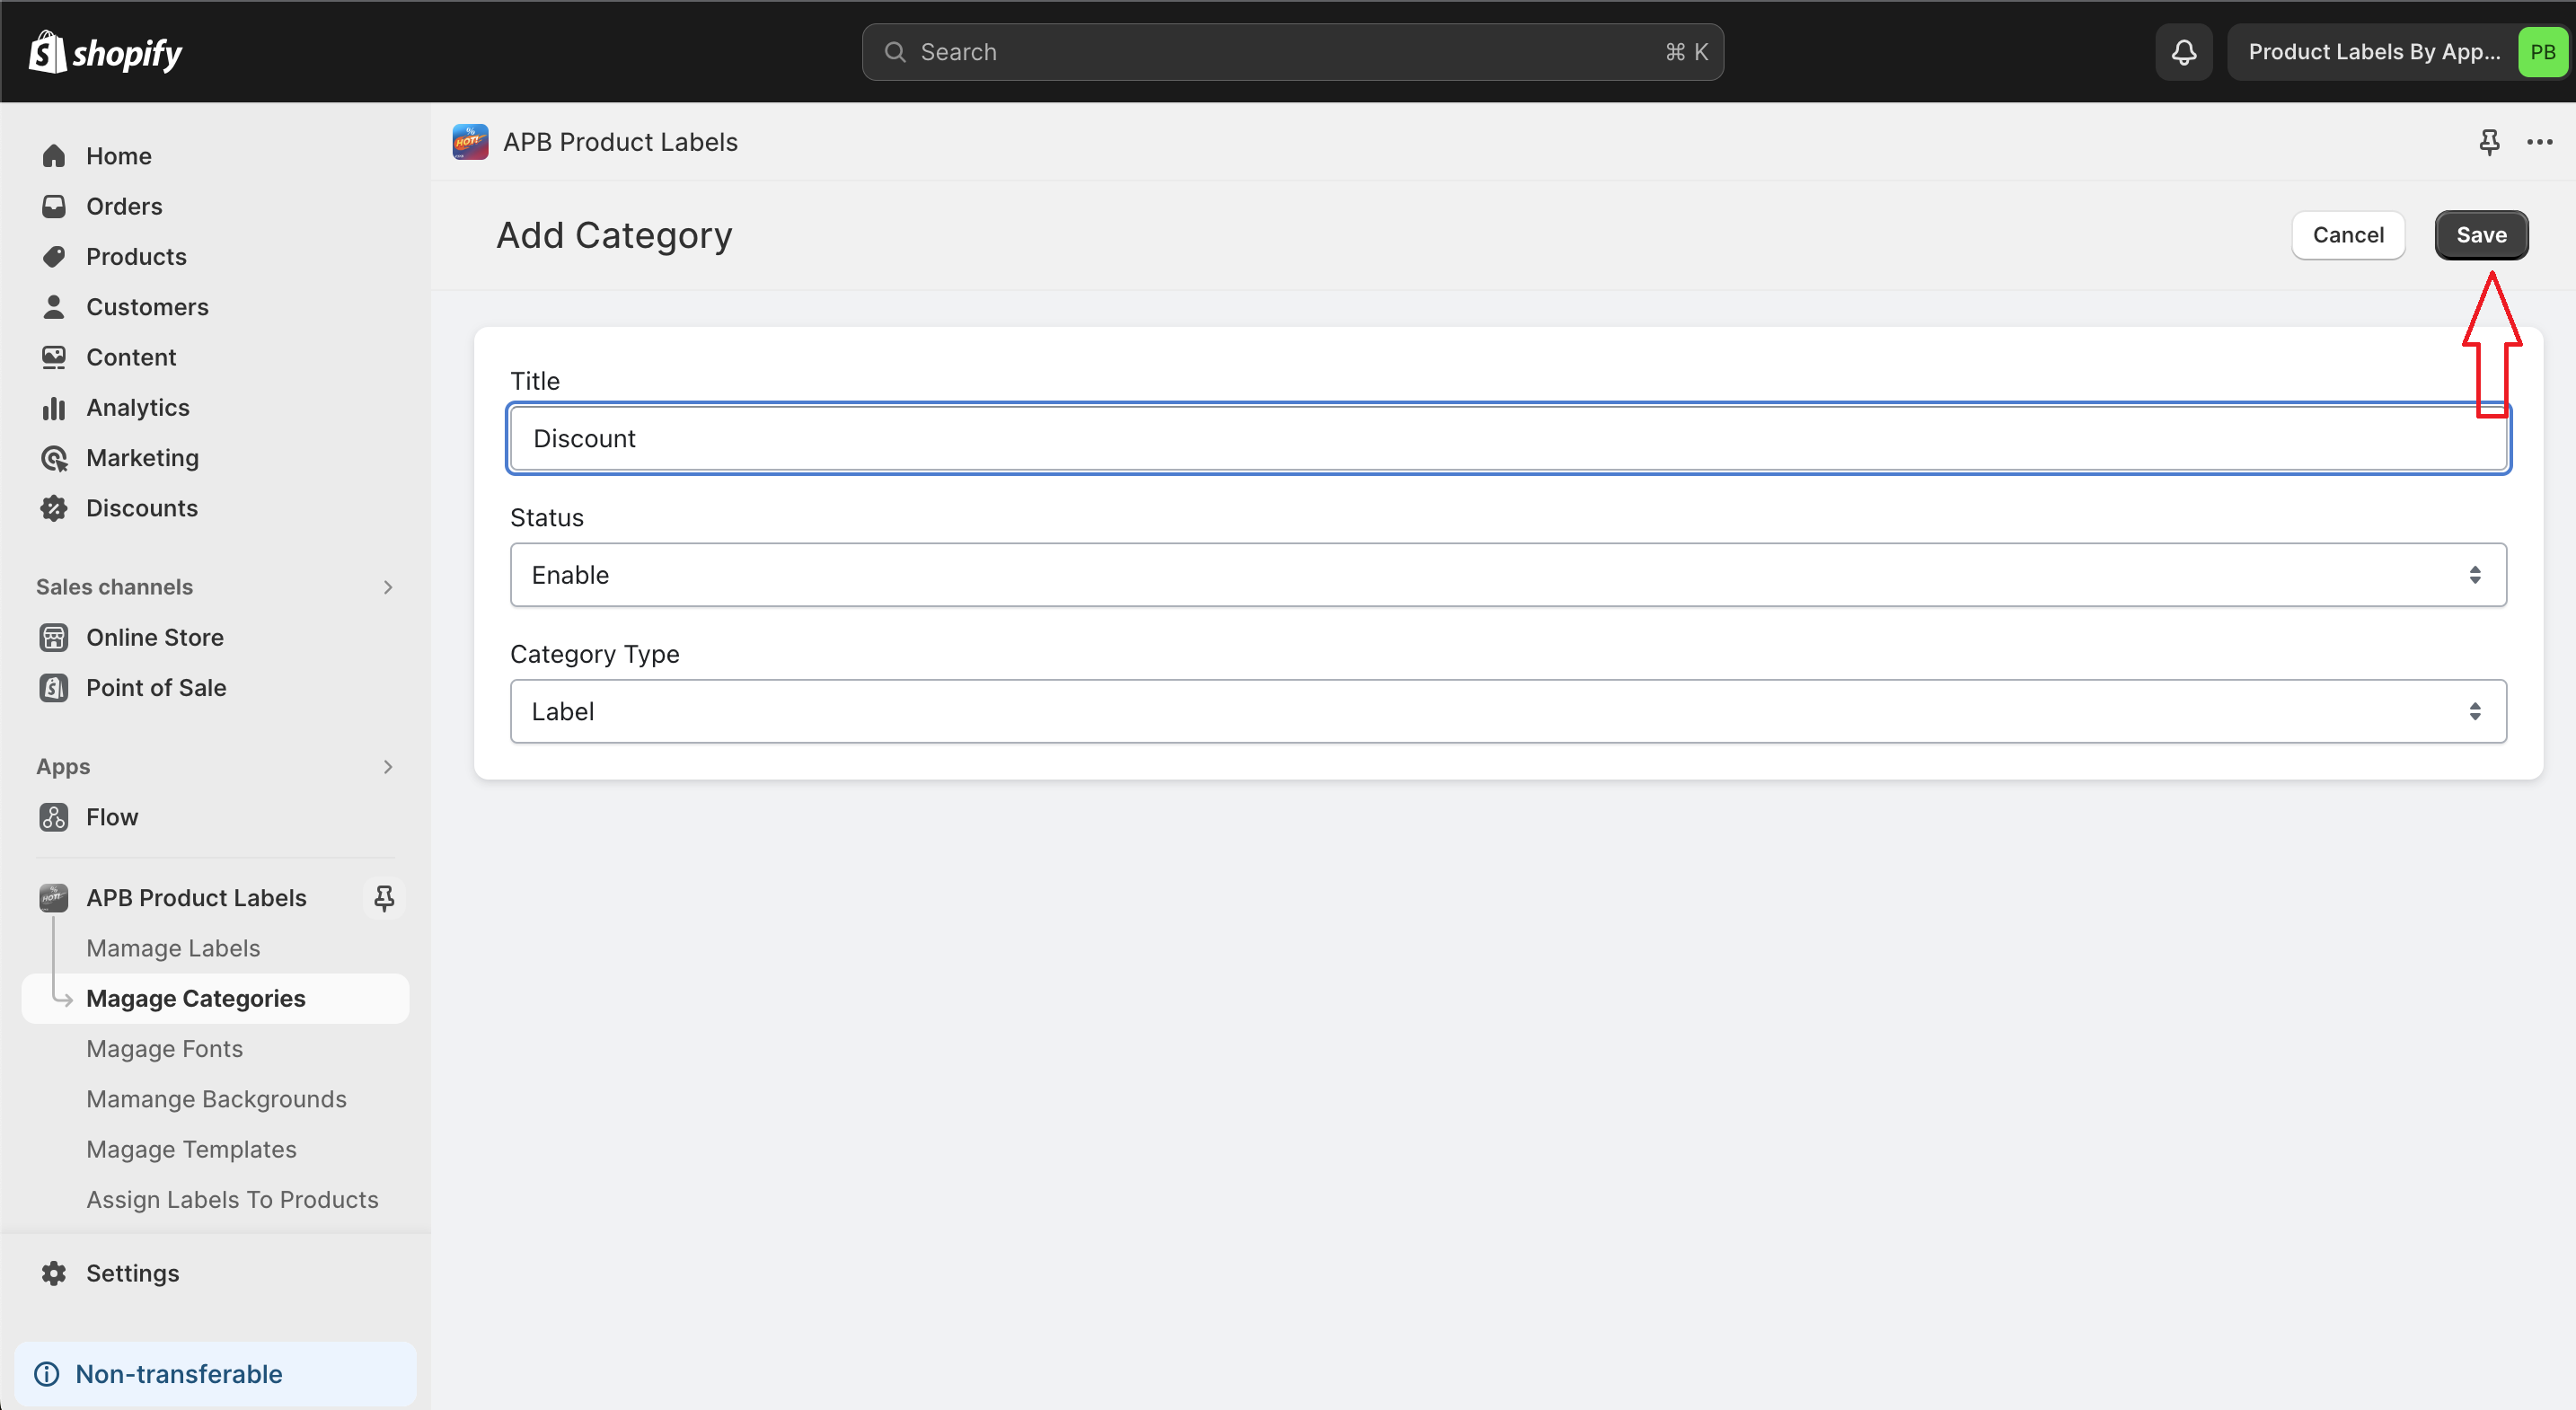
Enter information To the form and click Next Button
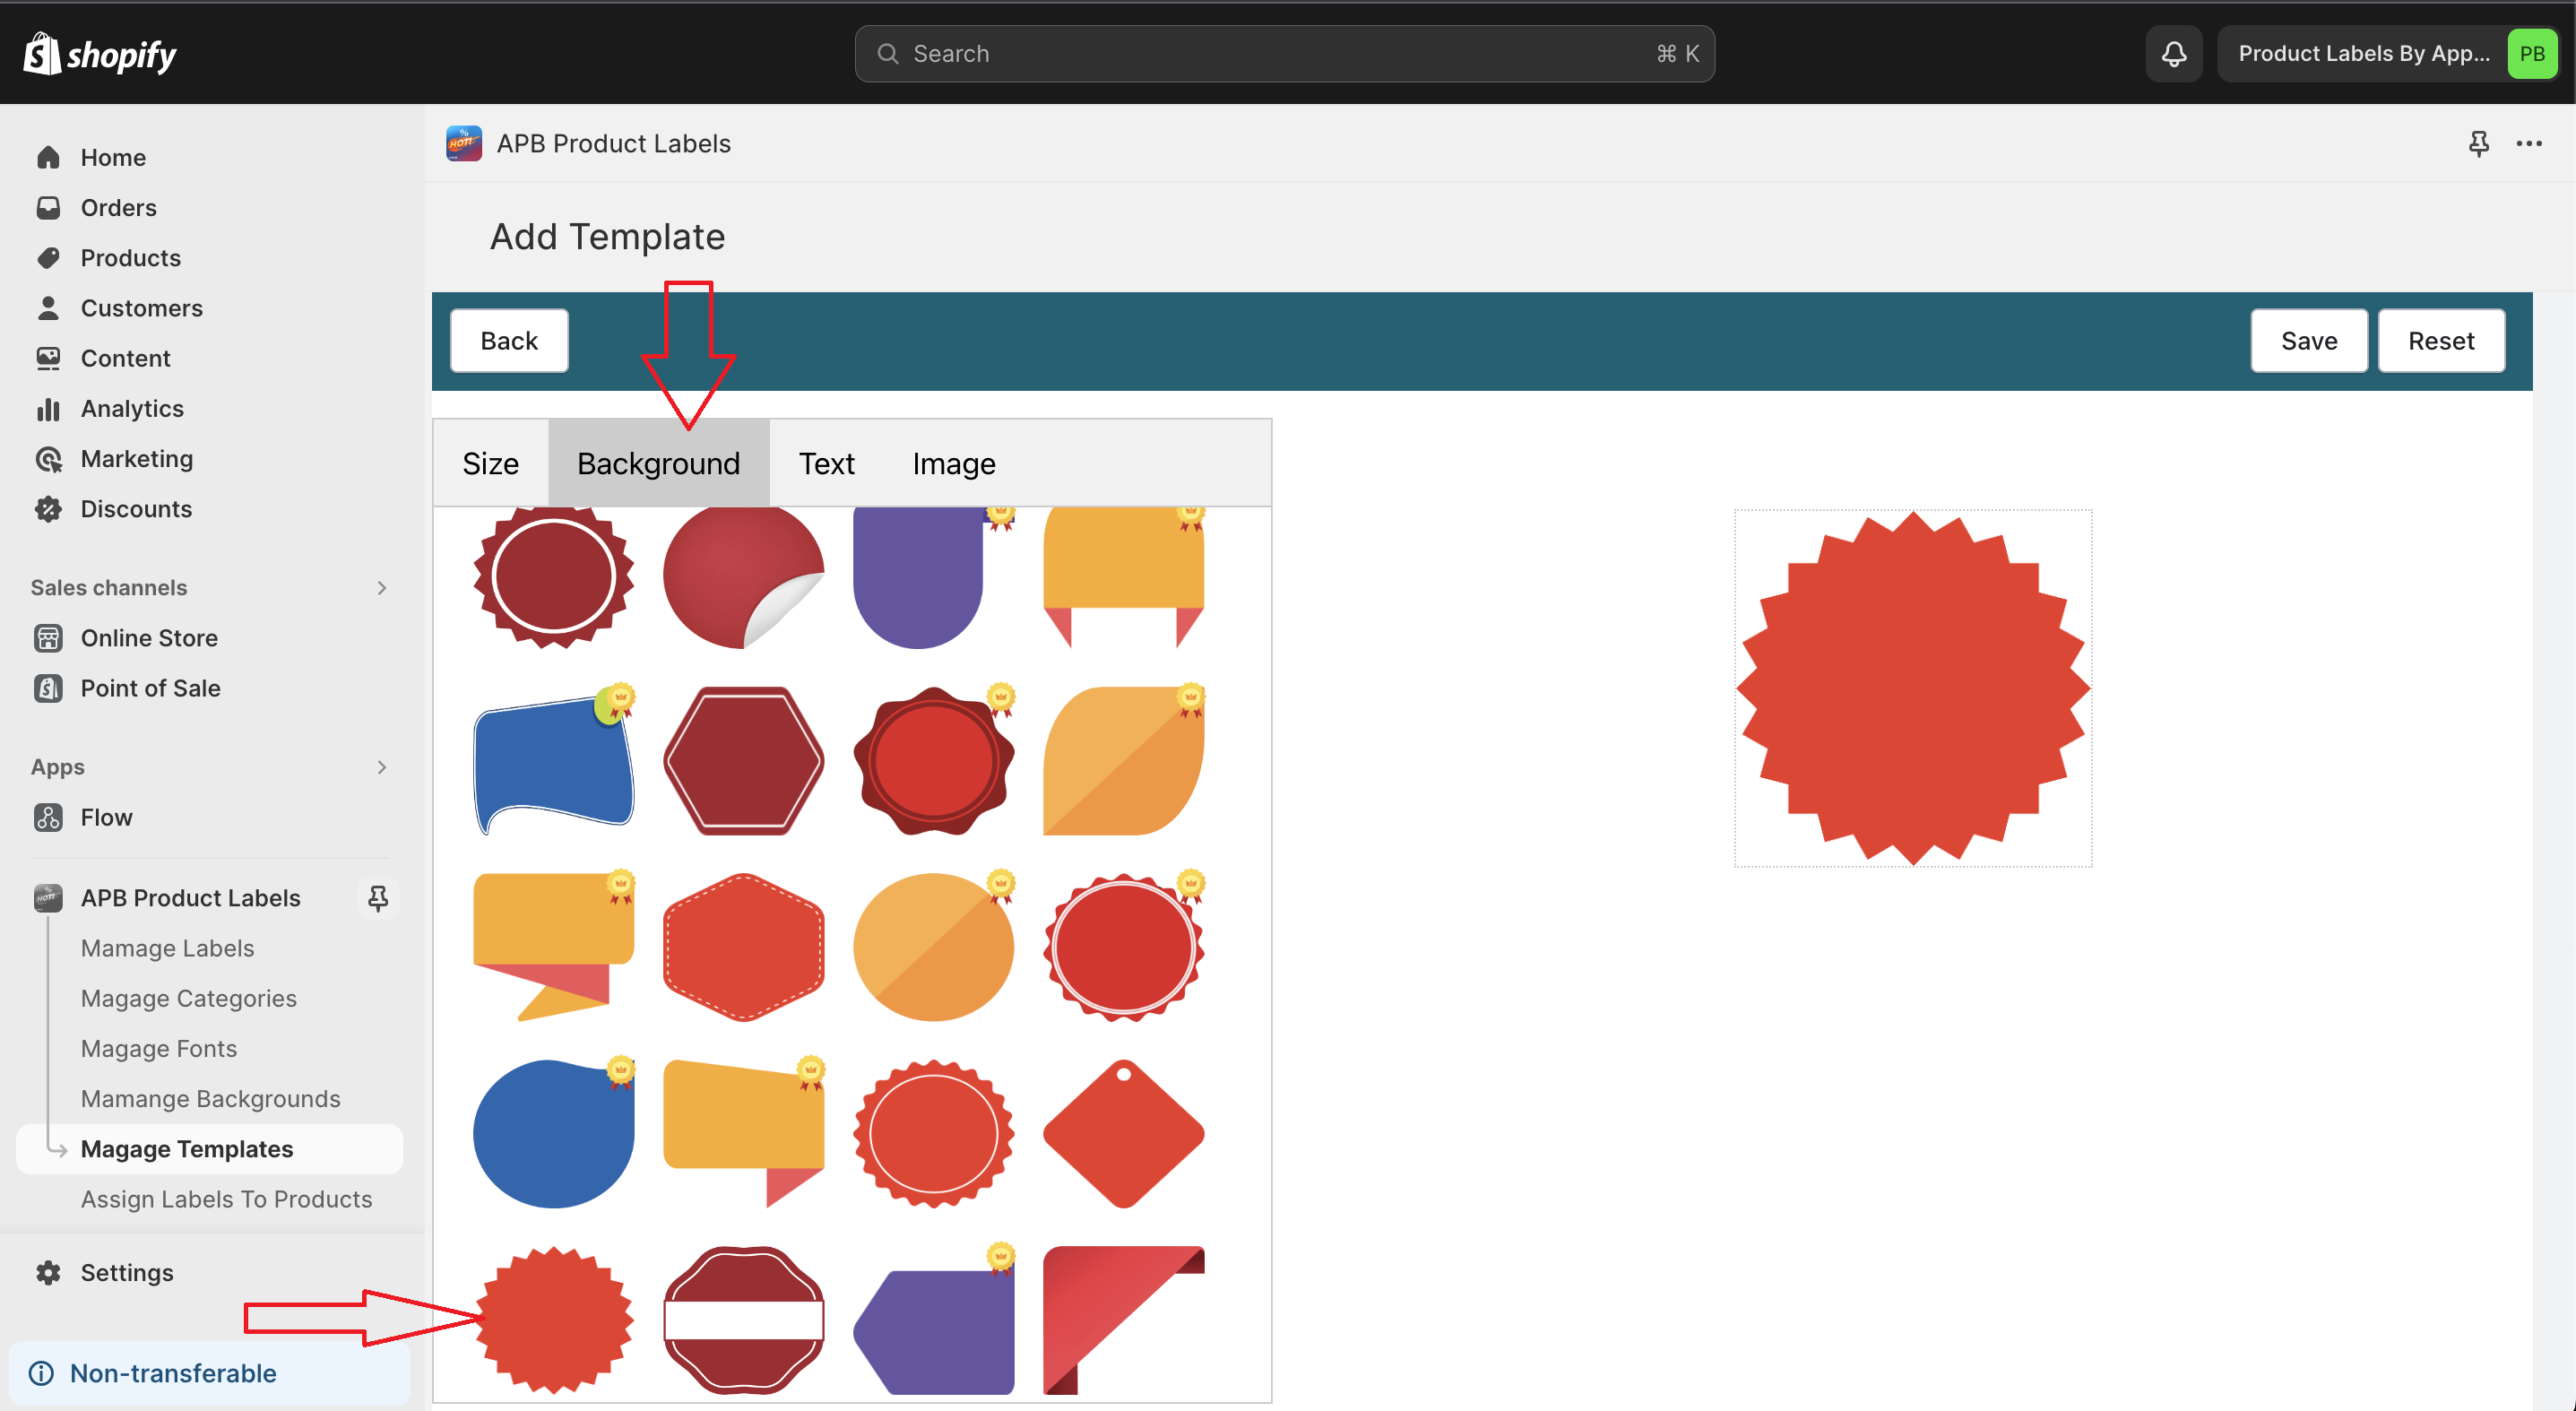
In the Template Design area, You can select Background, Add text or Upload Custom image for Template
Select Background:
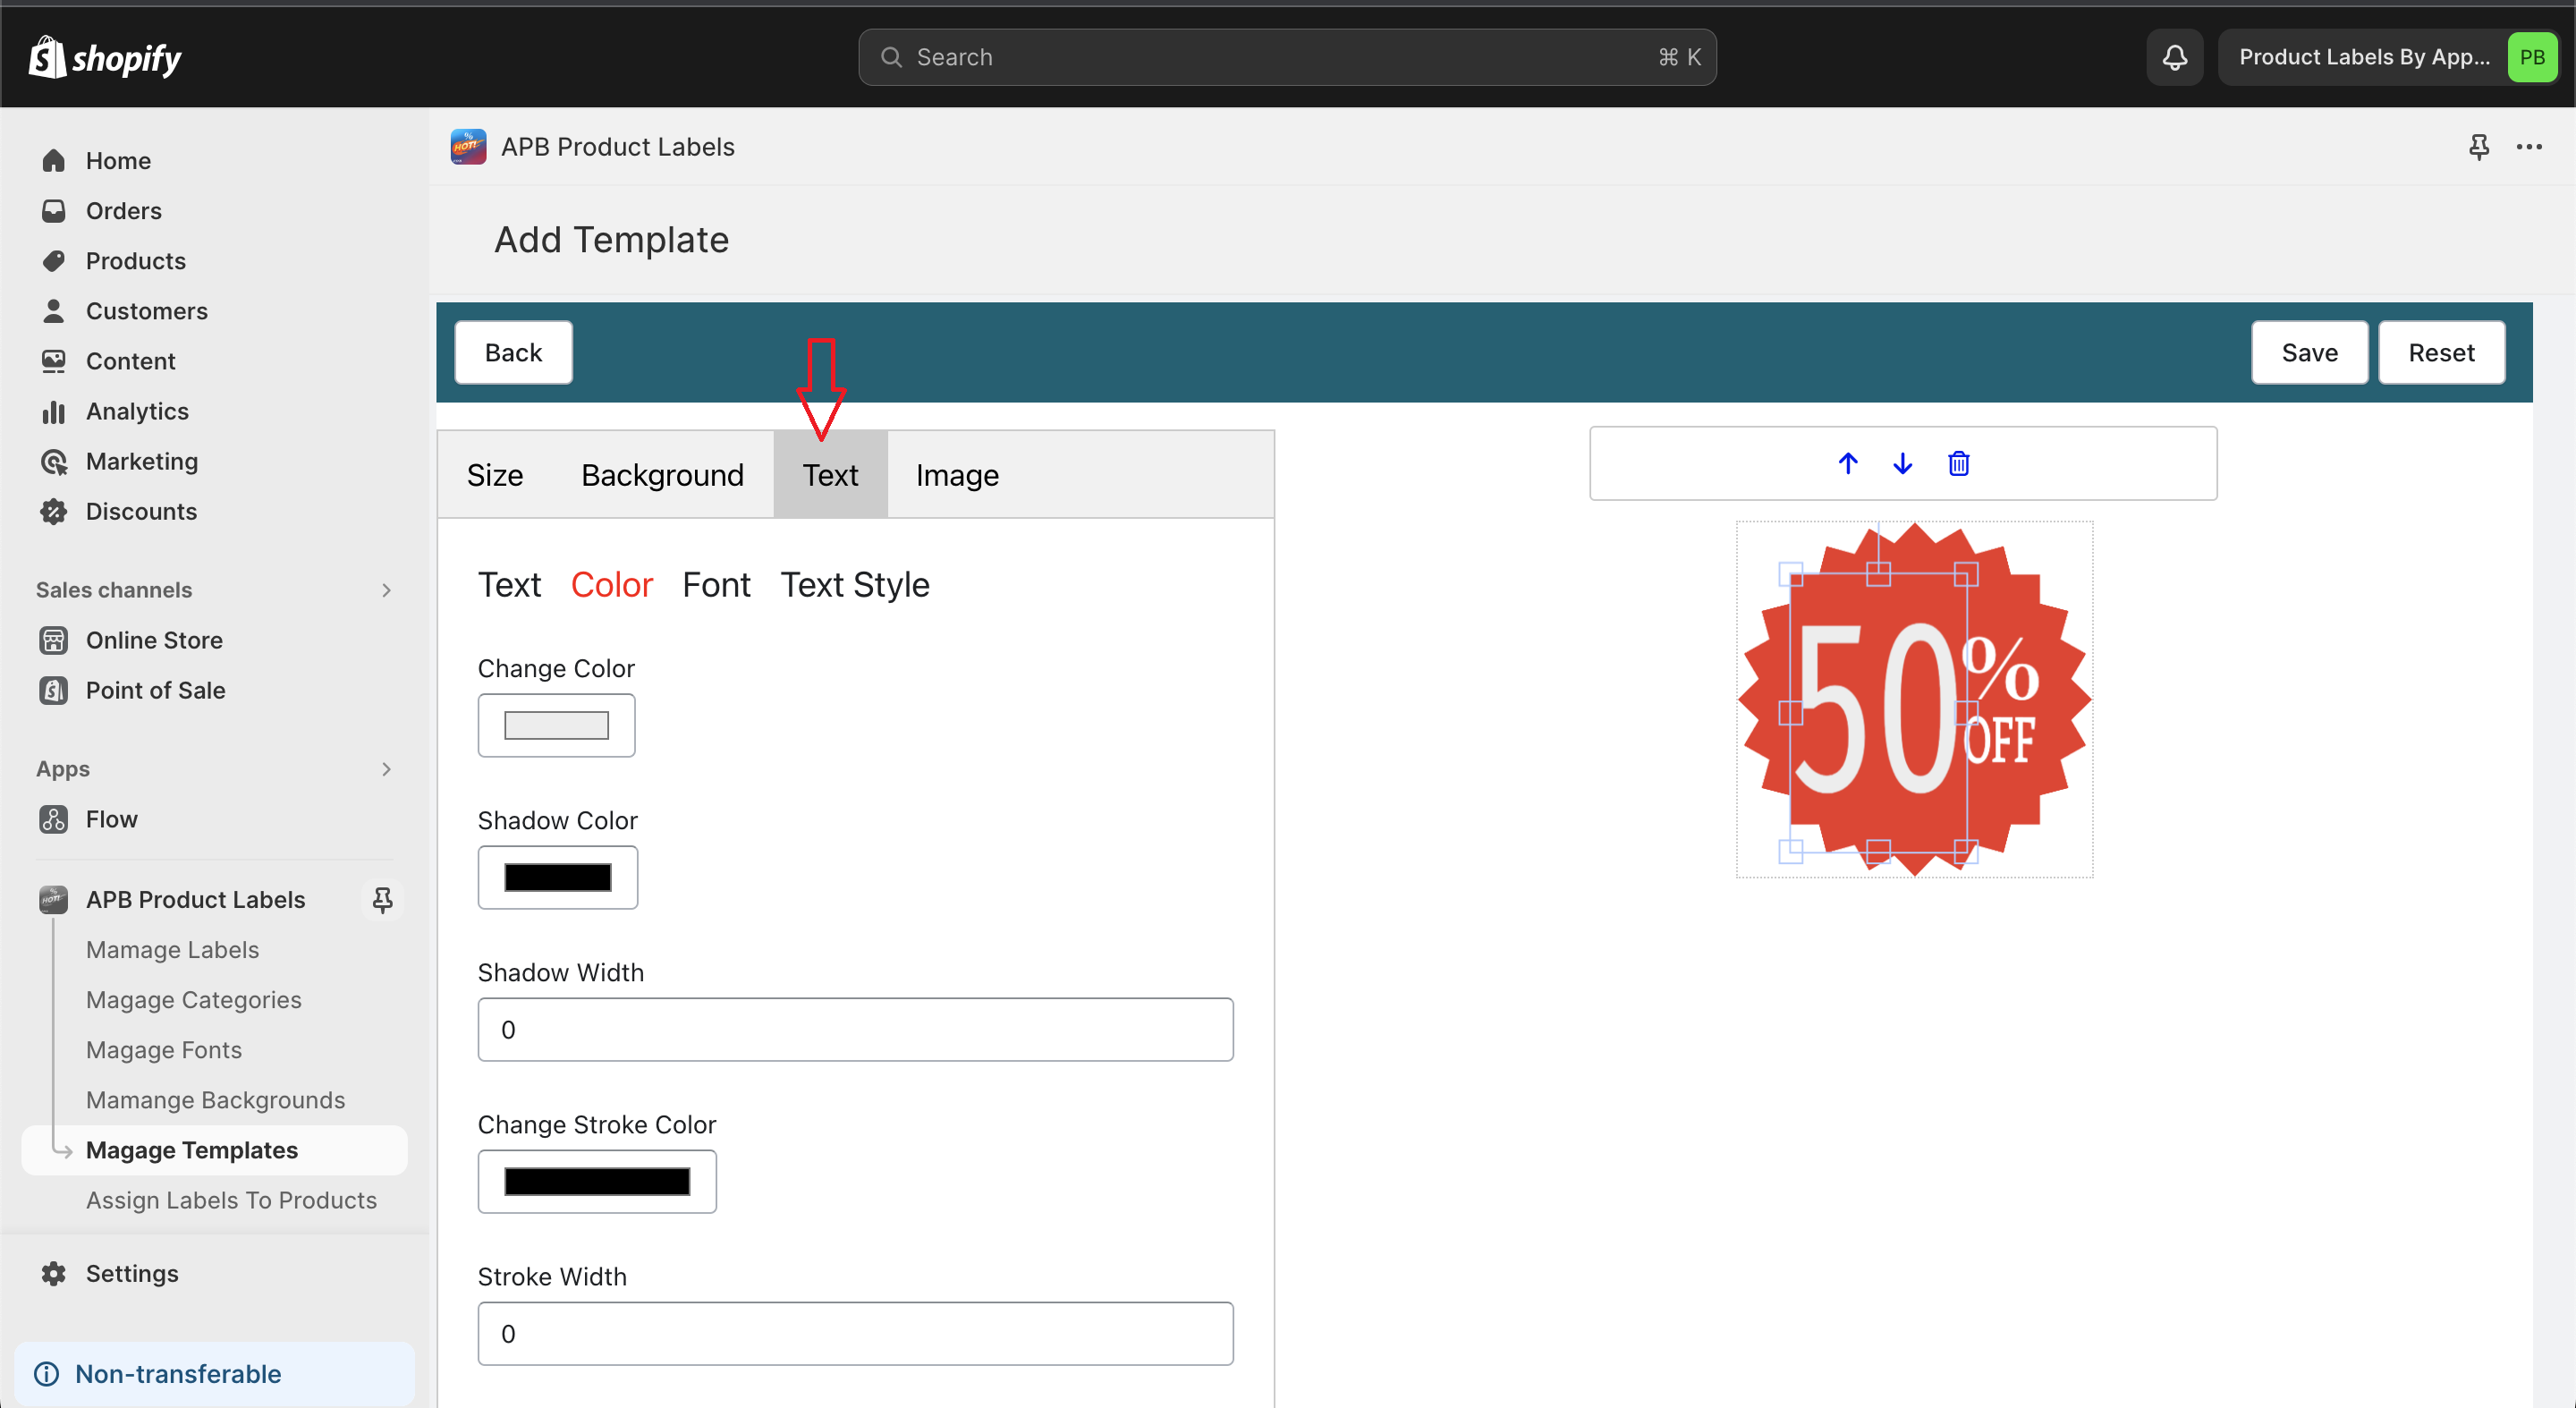
Add Text and Custom Font, Size, Color, and text style. Click To "Save" Button After complete Design Template
You can assign label to products, collection, tags( in Premium Plan), You can use your label, your tempates, sample label or sample templates
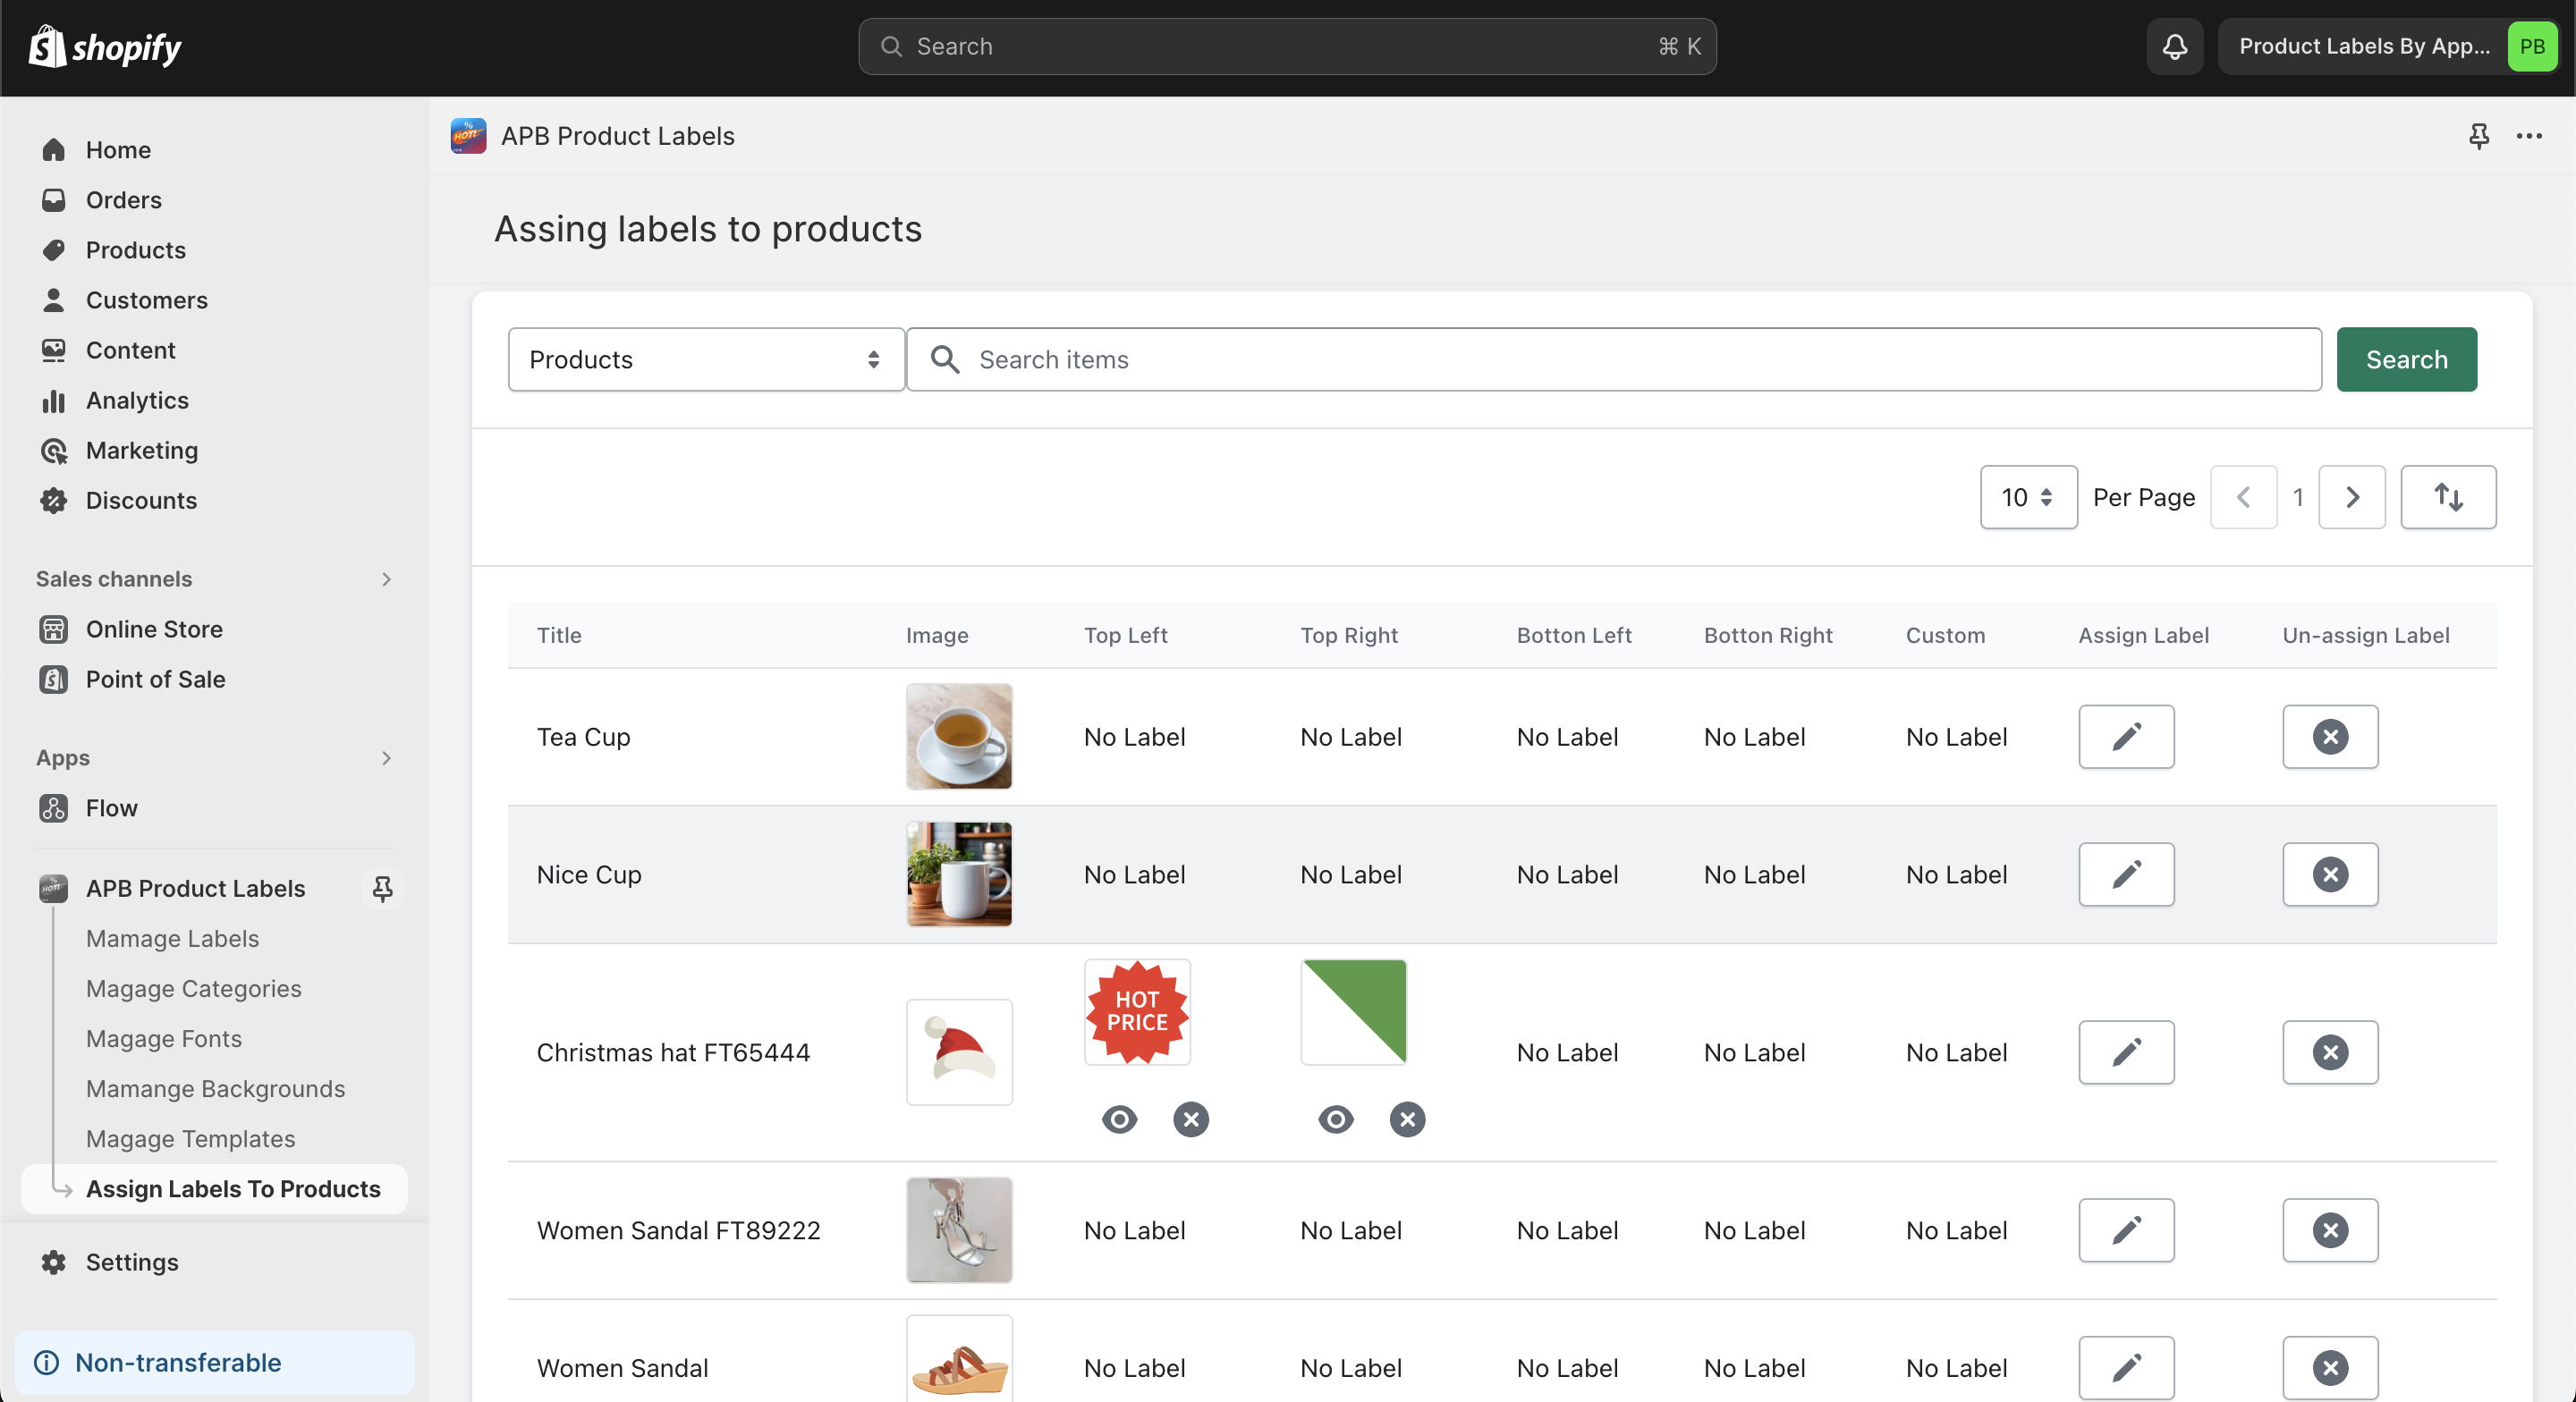
Click to APB Product Labels => Assign Labels To Products
Select Product, Collection Or Tag
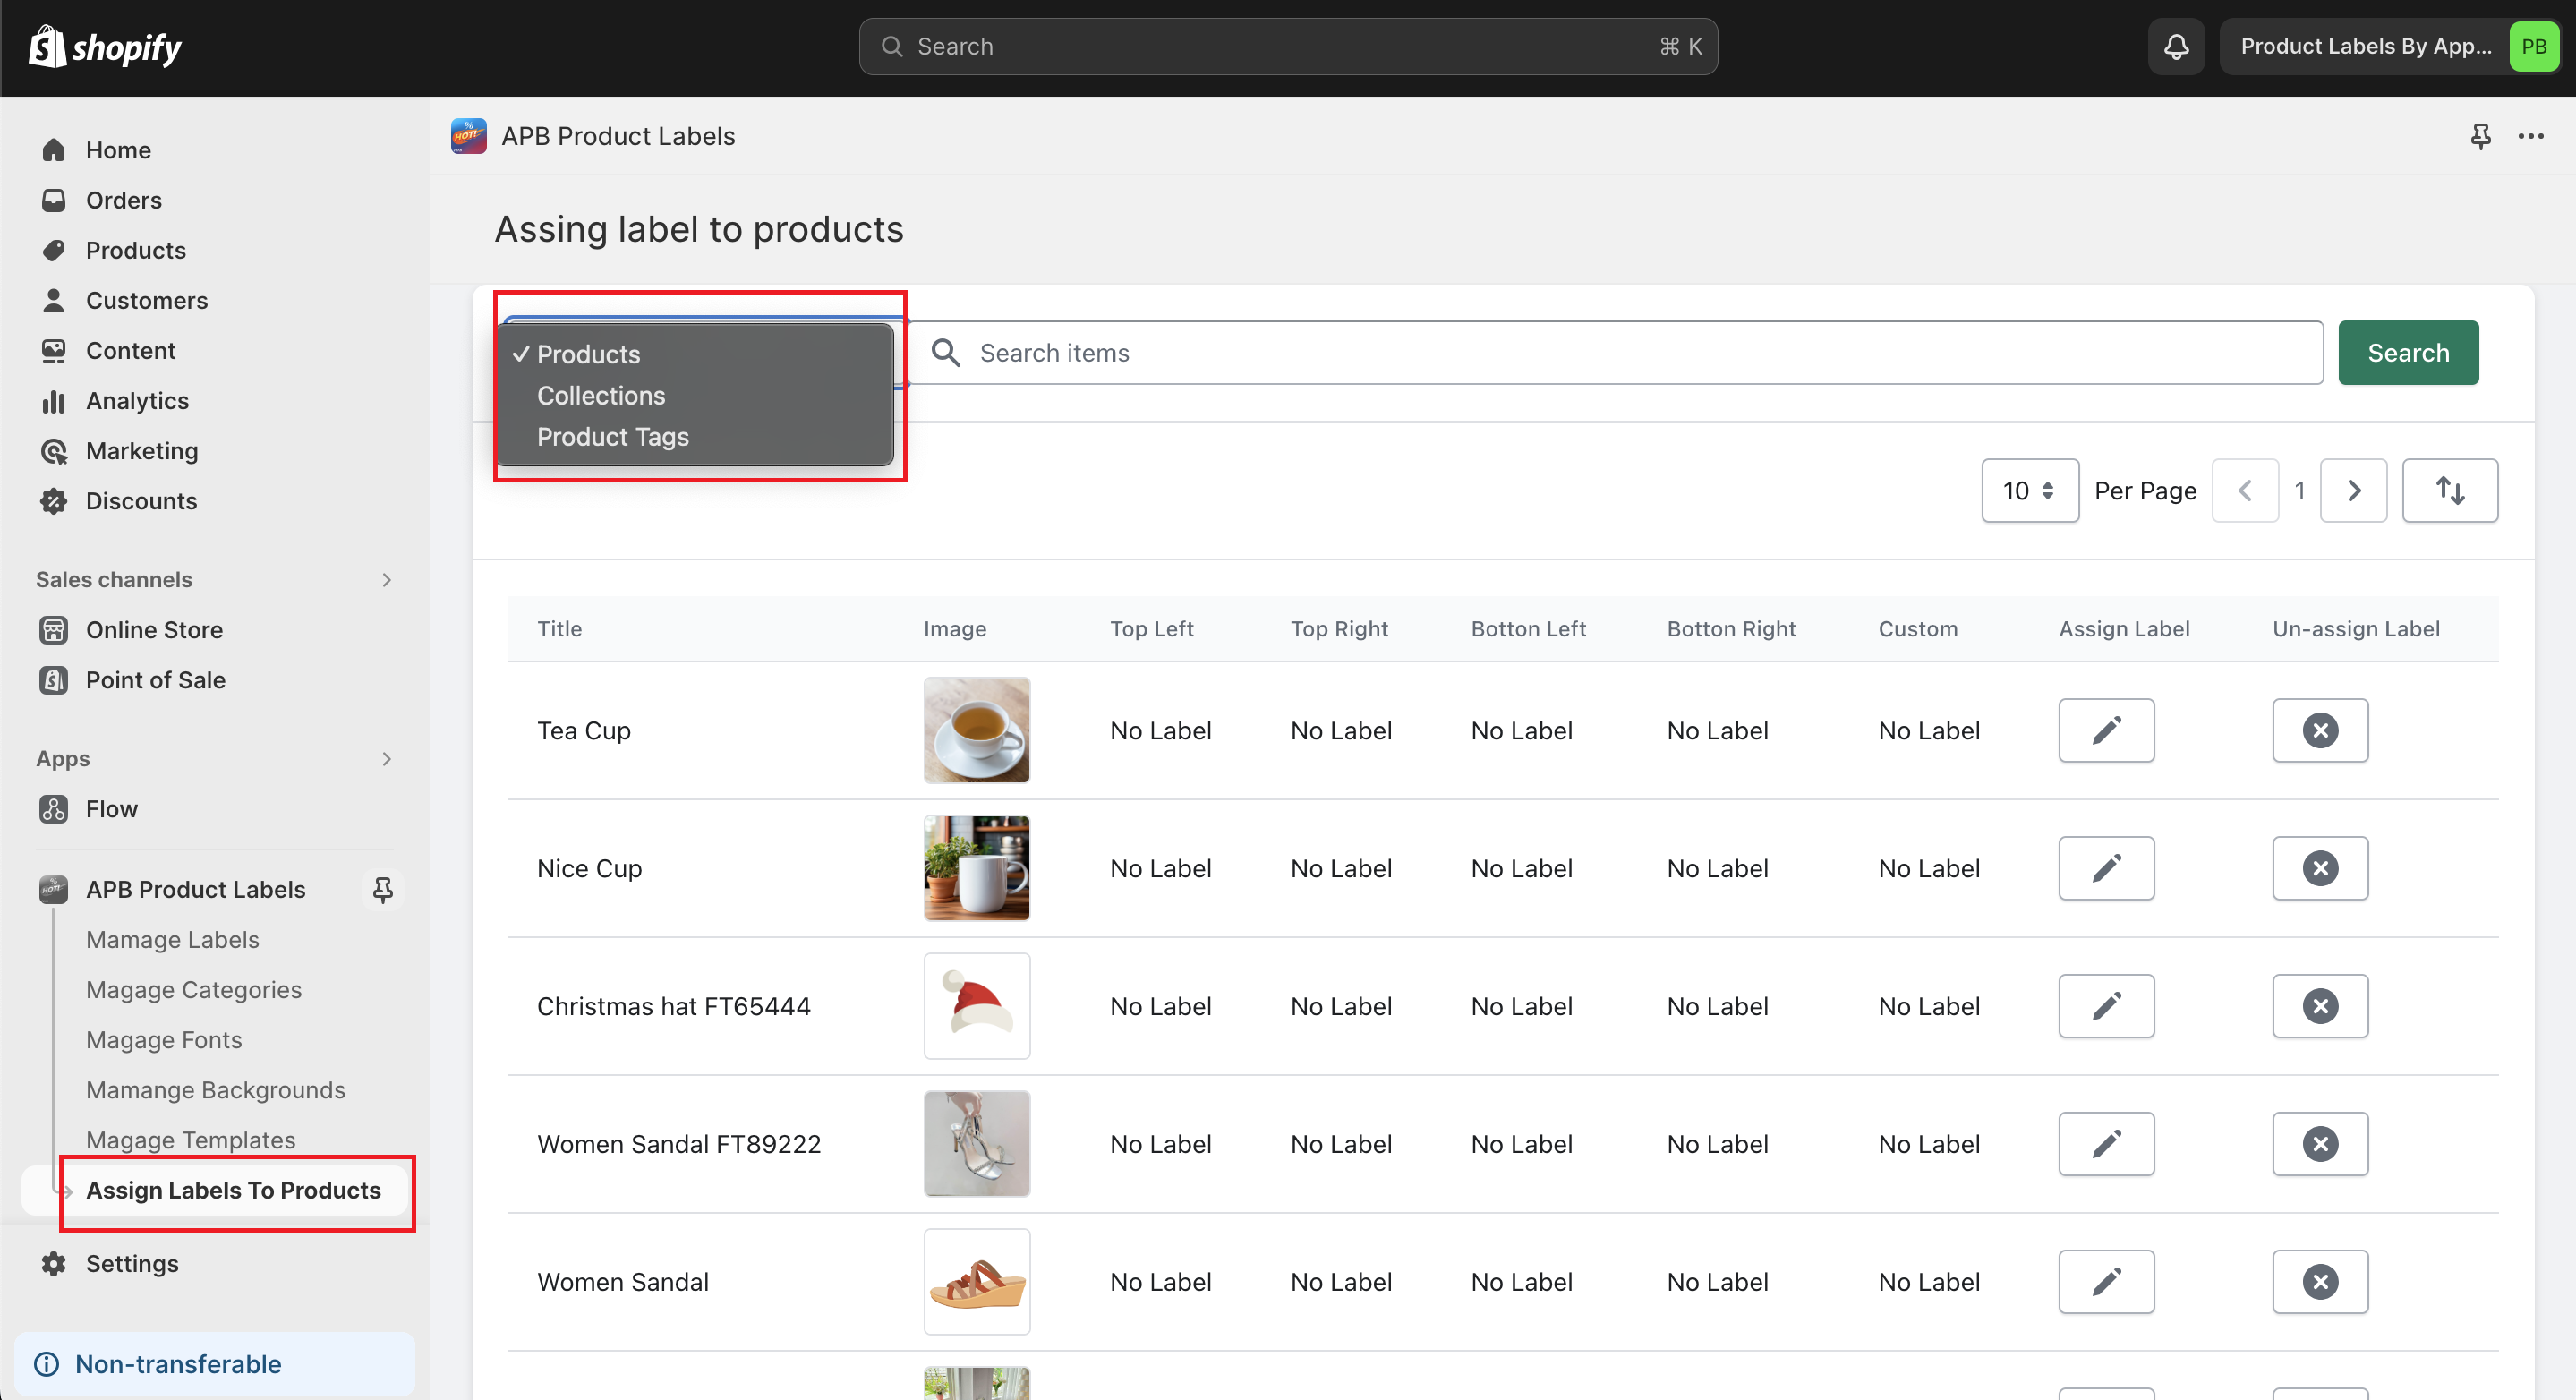
Click To Icon Edit
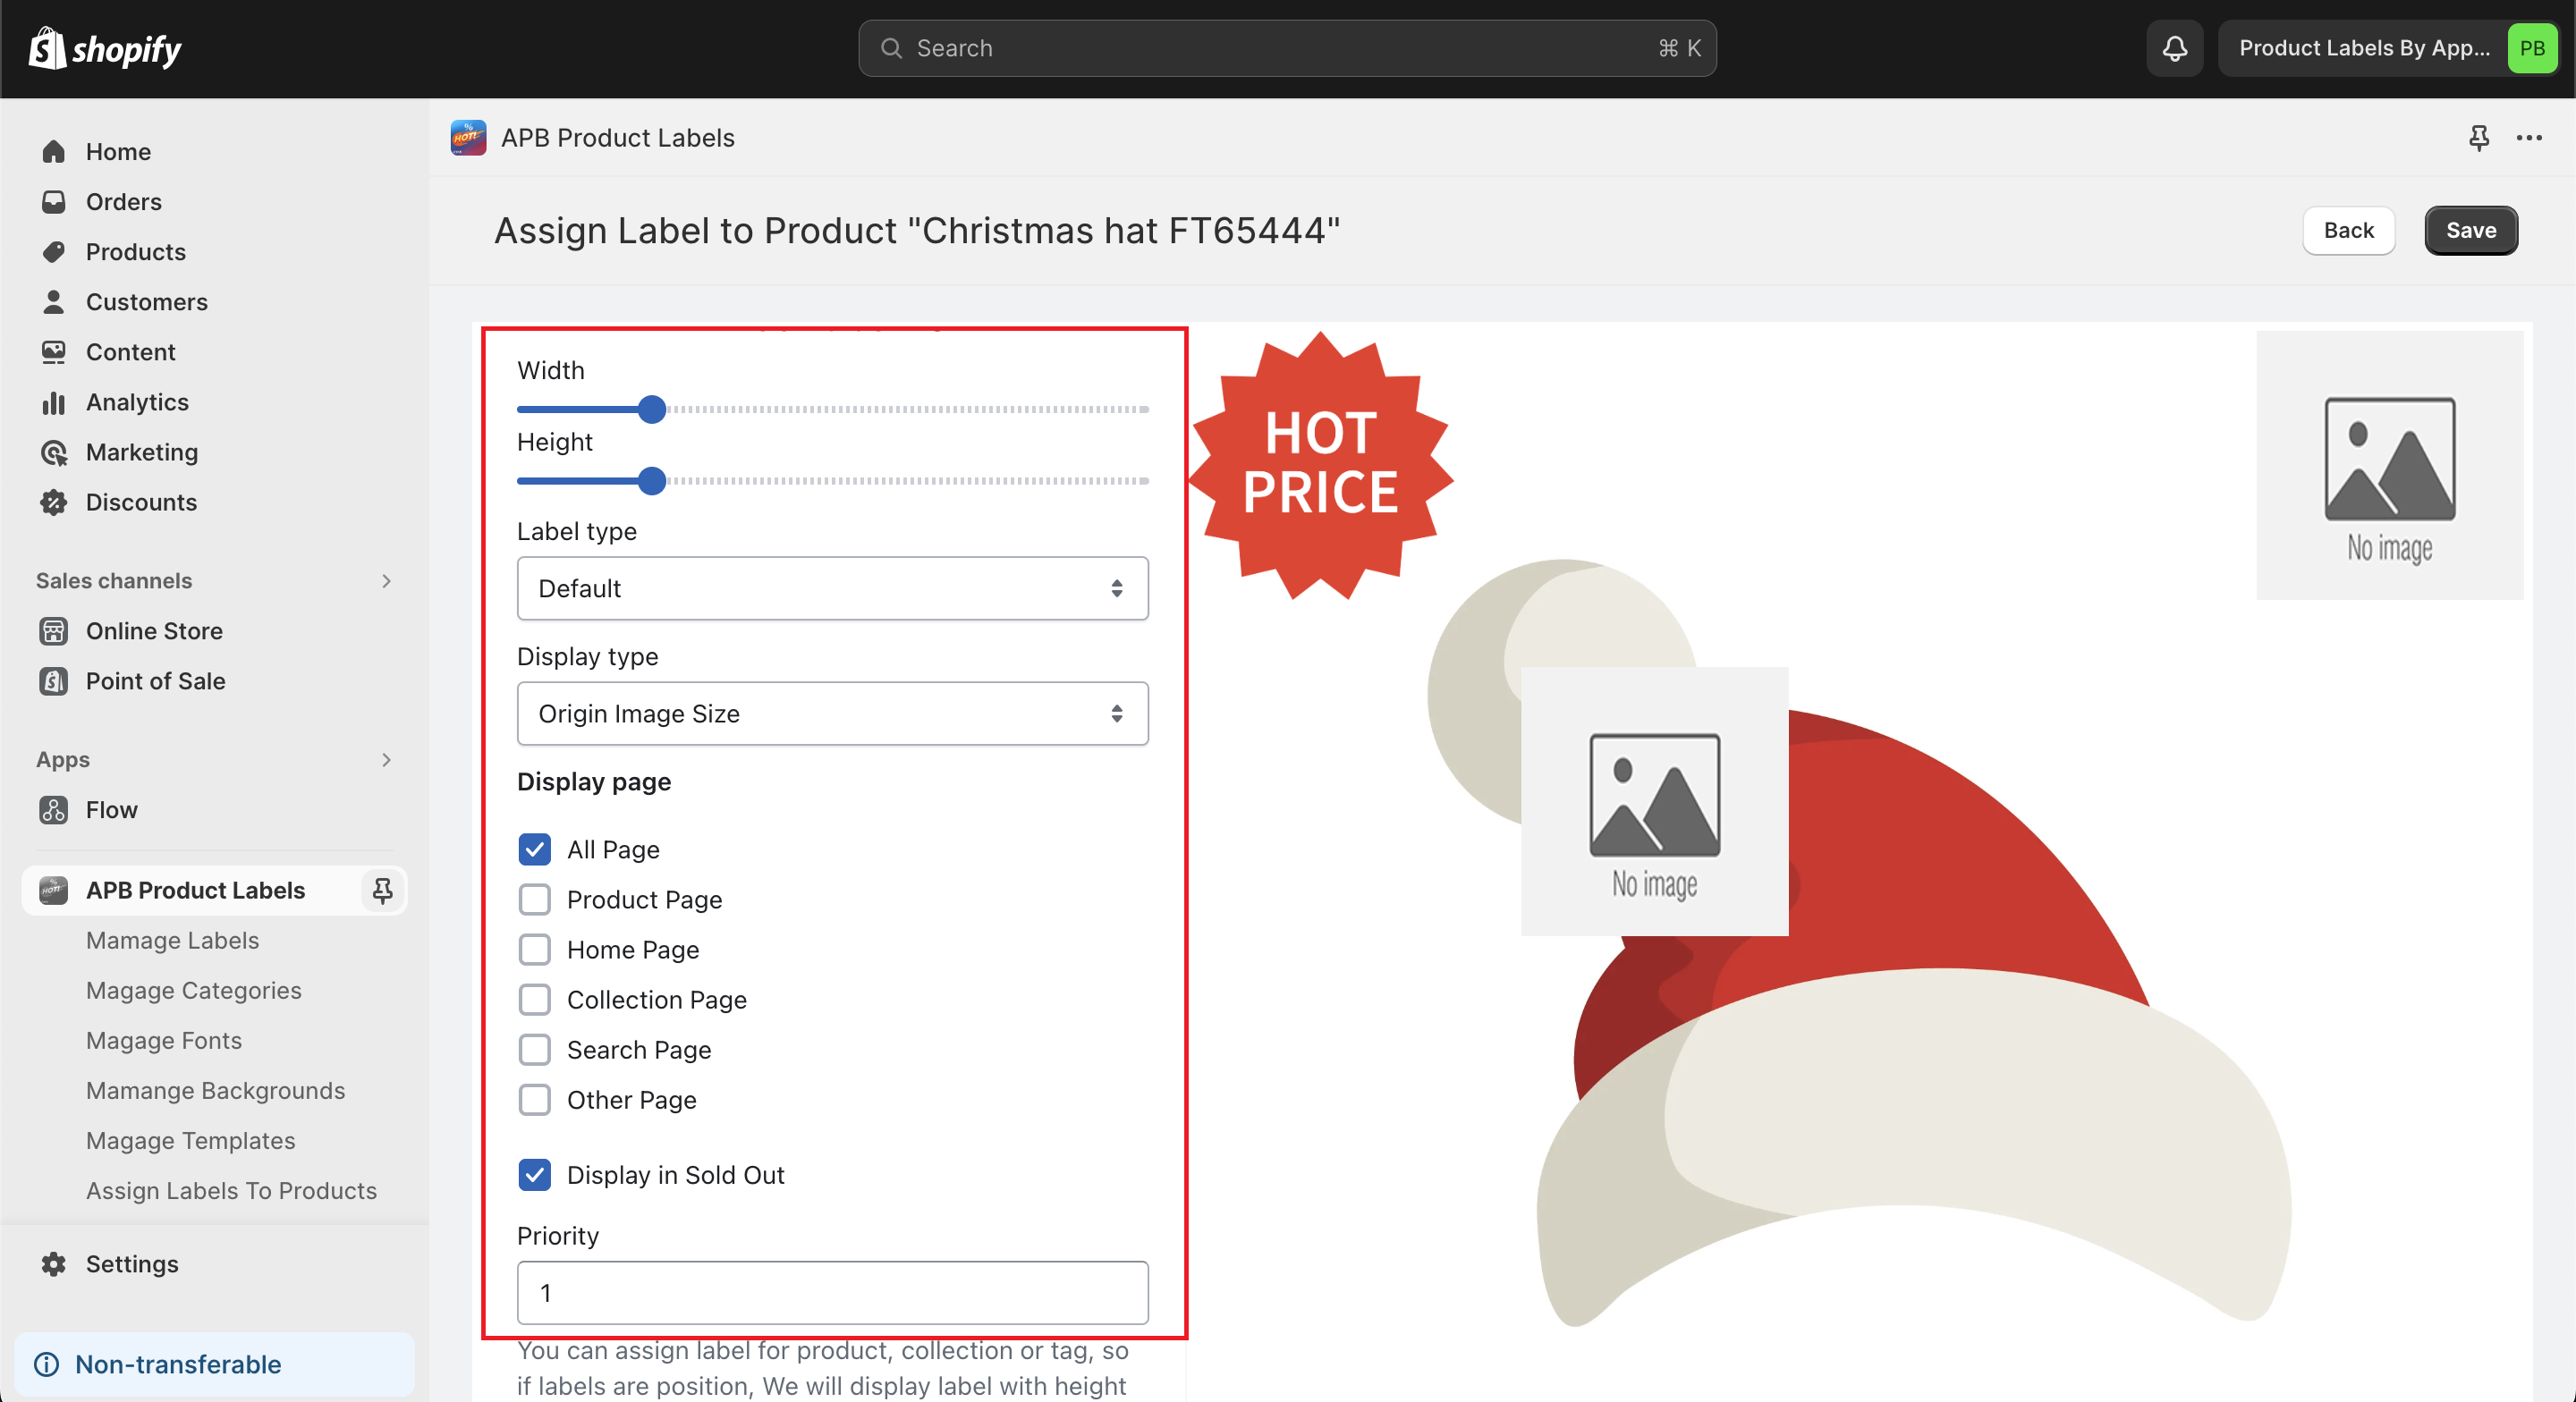
Select Position for label (Top left, Top Right, Botton Left, Button Right, Custom)
Select Label, You Can select Label from:
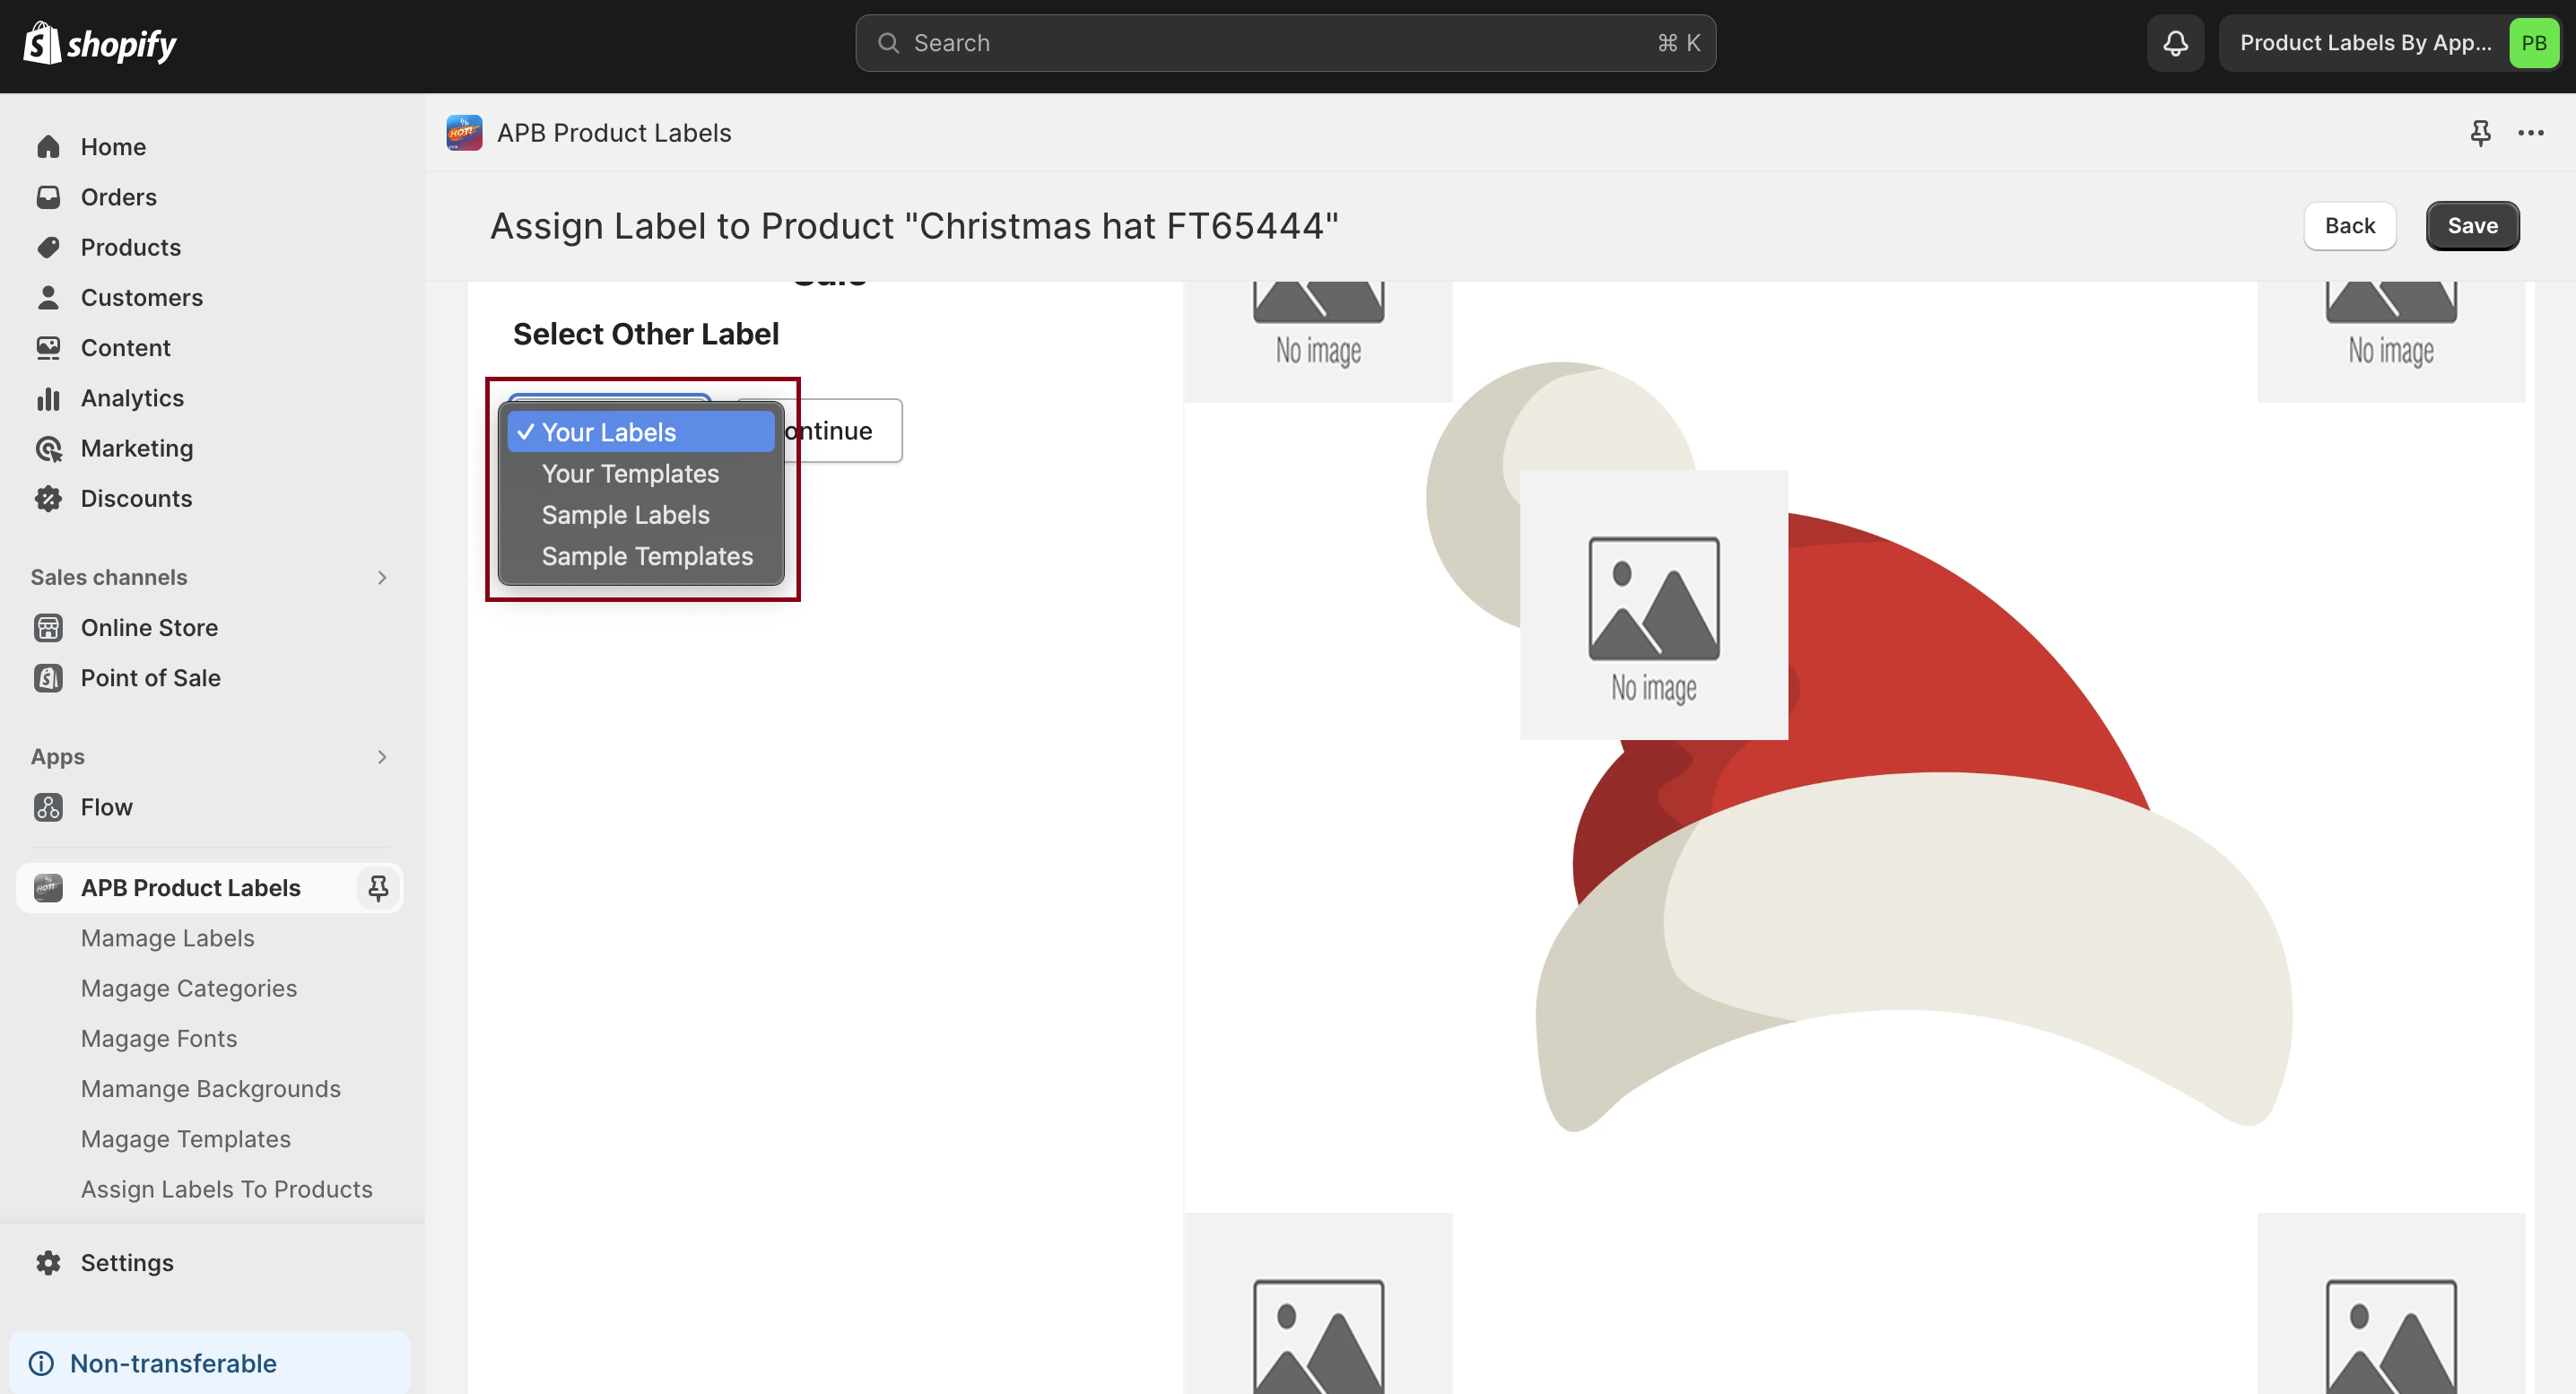

Each Label You can Will include options: (You can see preview label on Main Right Image)
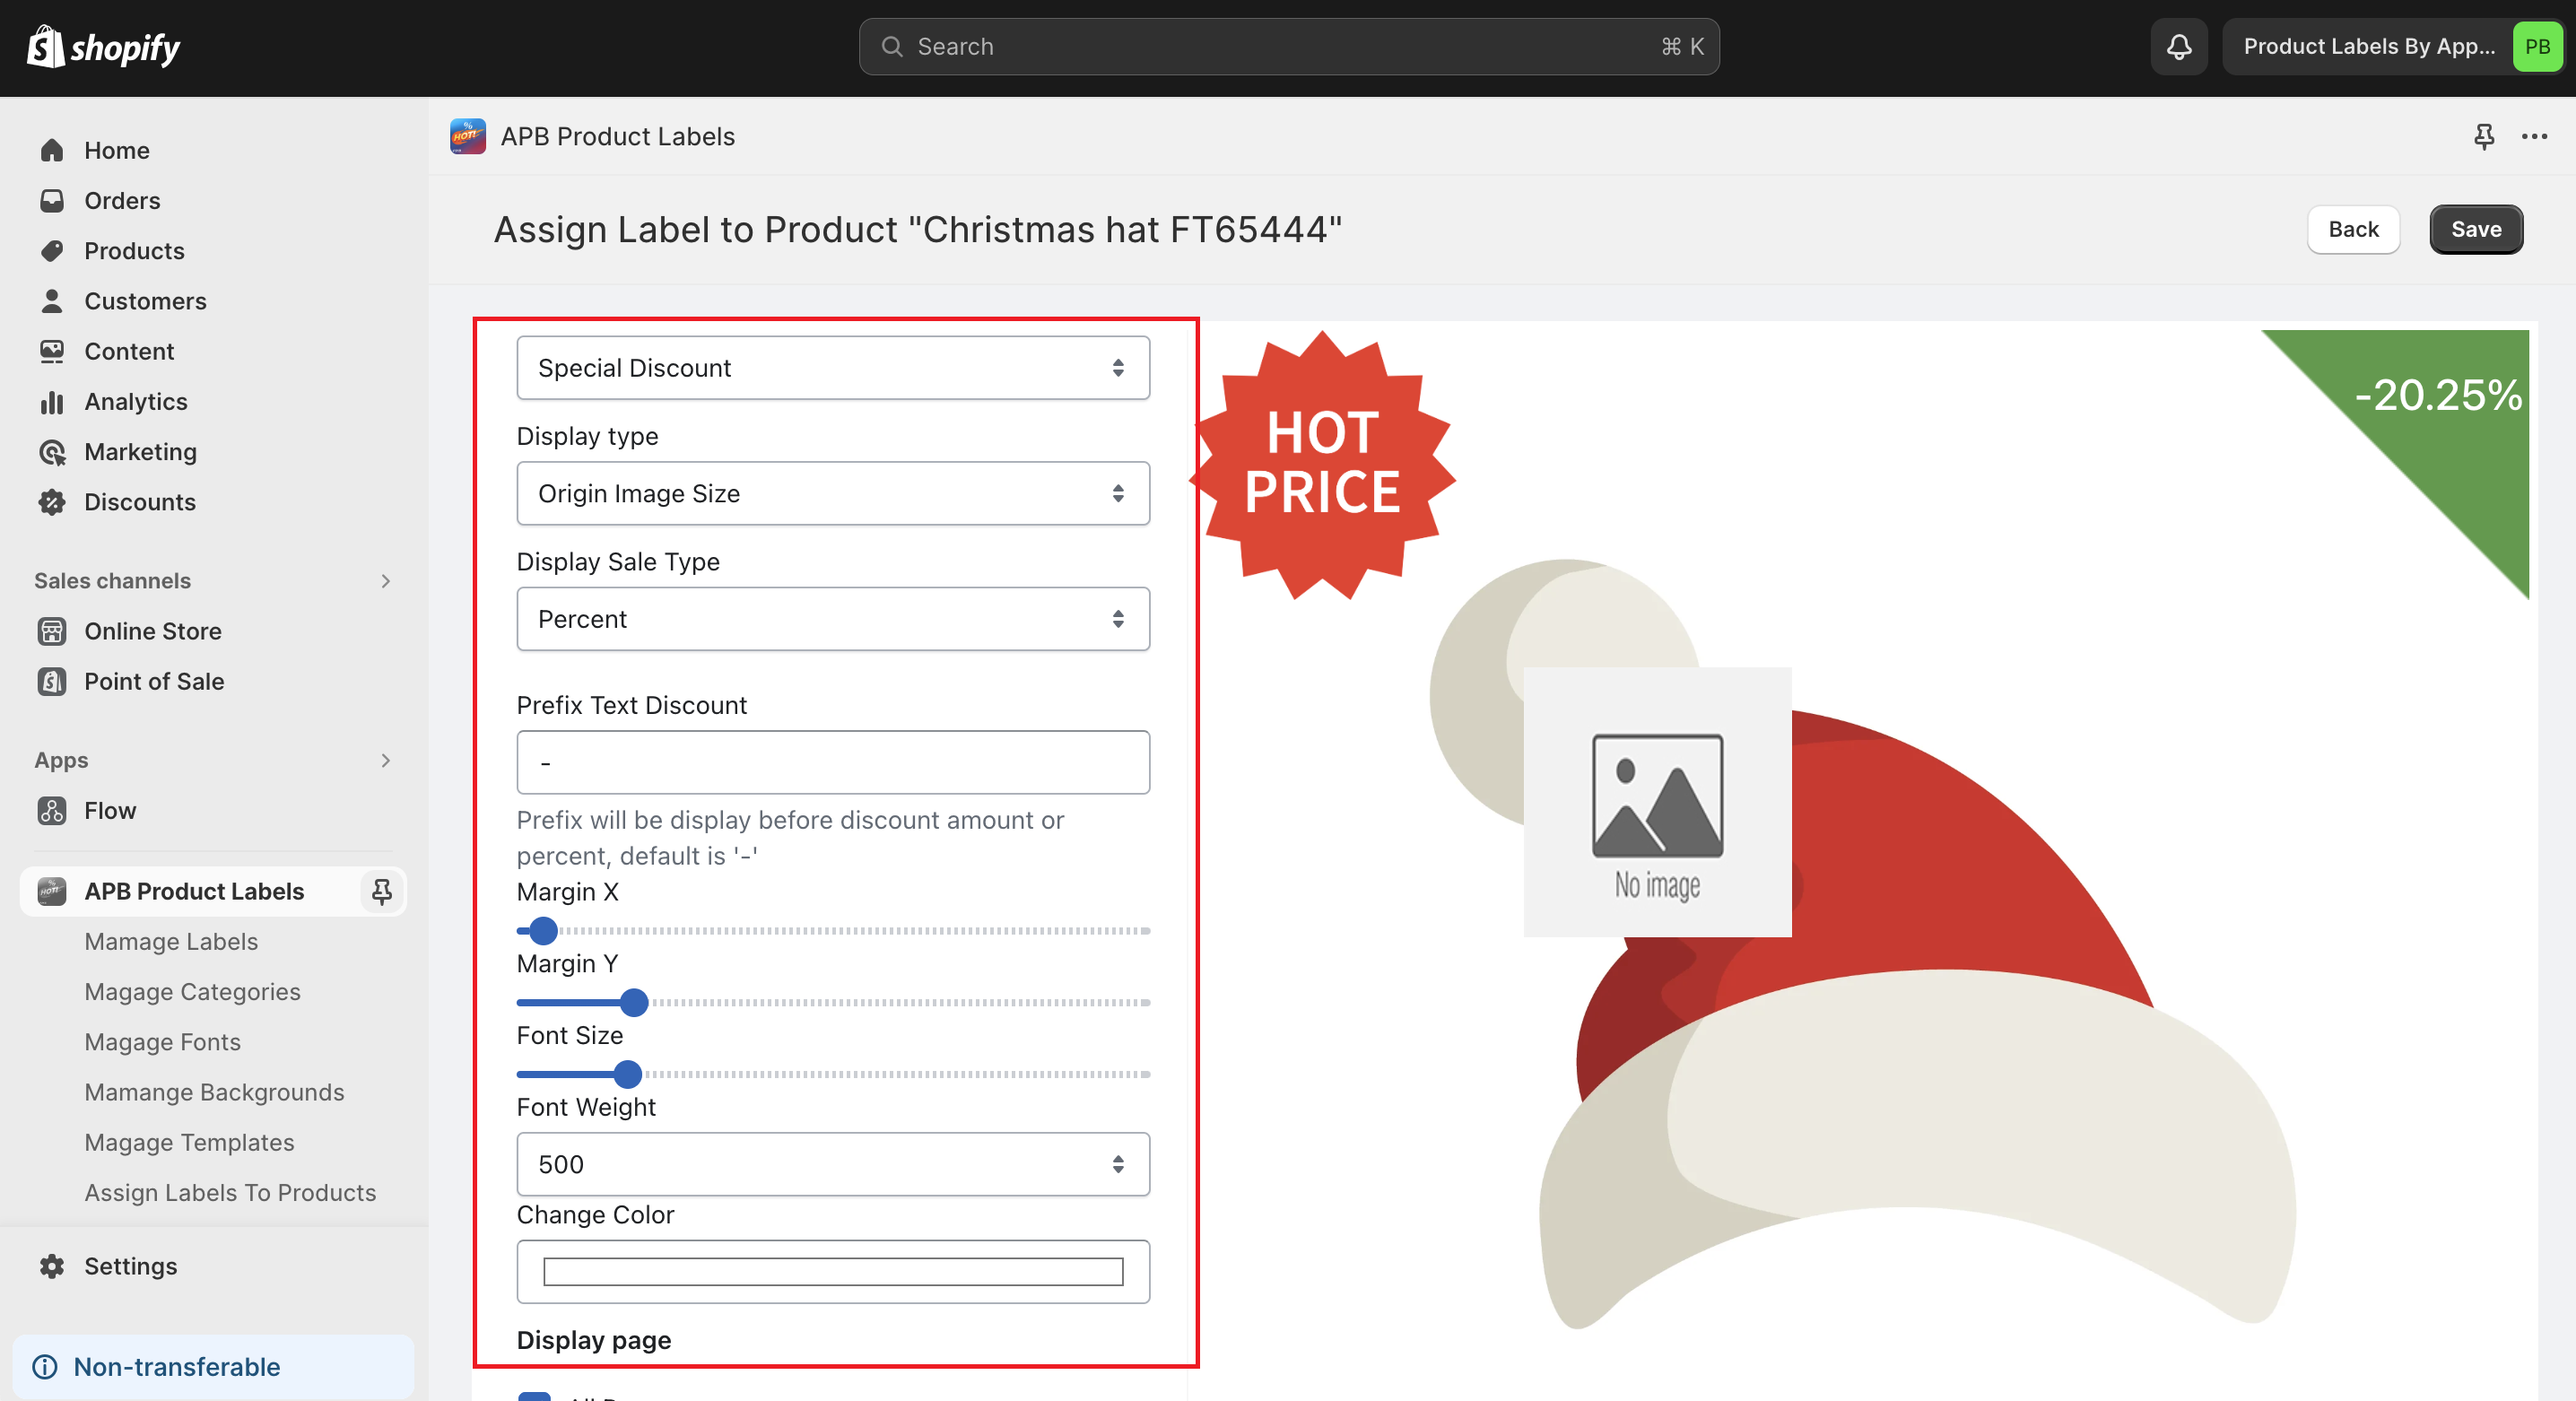
Option For Special Label: (Only available on Premium Plan)
After Assigning label for product, You can click save
In the App Dashboard, Click to the button Enable App embeds To online Store
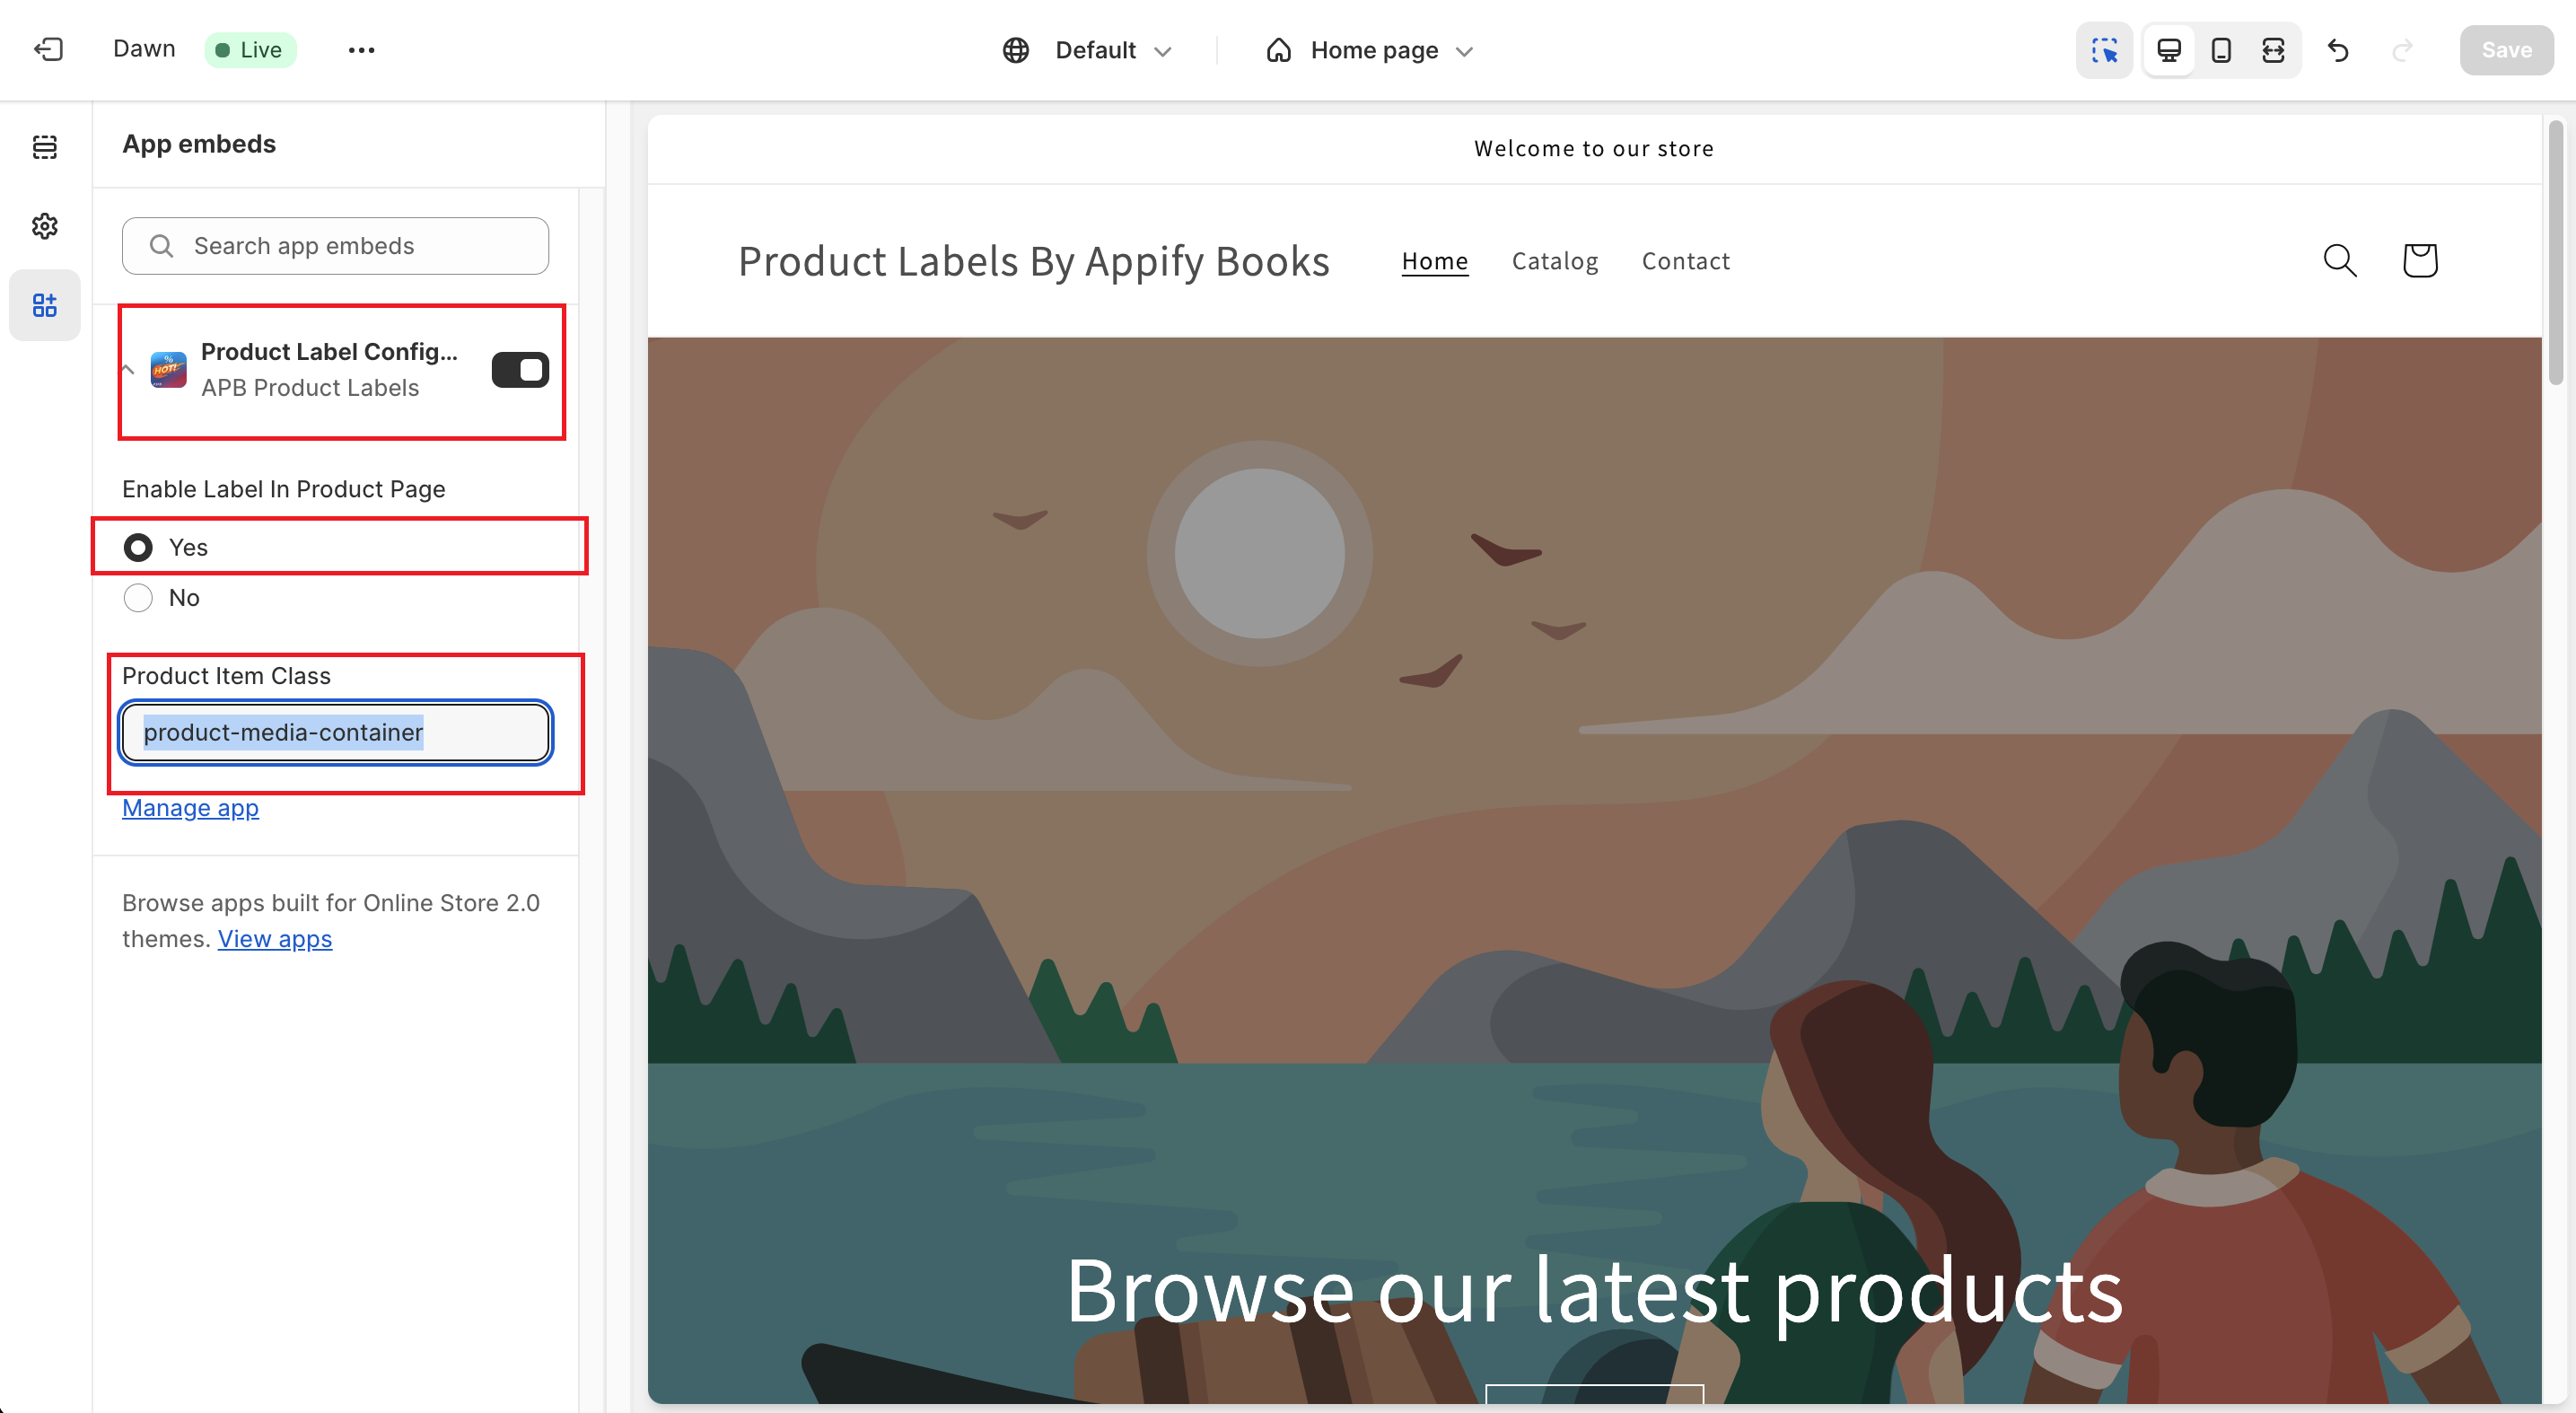
Click Save button in the top right corner
If you are using customize theme, Class in the embeds block maybe different, You can contact to email [email protected] or whatsapp number (+84)913718933. We will support you.